


AUSTRALIA'S WAR AT SEA: 1914-1918
On the eve of the Great War 1914-1918, the permanent strength of Australia’s new navy stood at 3,800 personnel and 16 commissioned ships. By 1918 the force had grown to 37 ships and more than 5,000 men, far less than the numbers serving in the Australian Imperial Force (AIF), but still imbued with a sense of their own unique national and naval identity. When news of the growing crisis in Europe first arrived in Australia the majority of the fleet was at sea in Queensland waters. The ships returned to Sydney to take on coal and stores and by 5 August, when the British Empire declared war on Germany, they were already proceeding to take up their war stations.
The Navy’s immediate tasks were to occupy Germany’s regional possessions and remove the threat posed by the German East Asiatic Cruiser Squadron under the command of Vice-Admiral Maximilian Graf von Spee. Centred on two armoured cruisers, the German squadron had left China and remained unlocated as the European crisis worsened. Notwithstanding its readiness for action, the RAN found it had no need to play a direct combat role in Von Spee’s defeat. As the German commander had earlier remarked in a letter to his wife, "[HMAS] Australia, by itself, is an adversary so much stronger than our squadron that one would be bound to avoid it". In consequence, the German Squadron did not attempt to interfere with allied operations and instead retreated to the South Atlantic where it was eventually destroyed by a British force off the Falkland Islands. Meanwhile all of Germany’s Pacific colonies had been rapidly annexed by Allied expeditionary forces. On each occasion, the Australian fleet commander pointed out to the German Administrator the overwhelming force at his disposal, and in almost all cases the operation proceeded successfully without loss of life.
The RAN did not escape entirely unscathed. The initial naval landings at New Britain on 11 September led to the loss of the first Australians to fall in the Great War. Further tragedy came three days later, when the submarine AE1 failed to return from a patrol outside Rabaul. A succession of searches revealed no trace either of the submarine or her 35-man crew. The RAN had nevertheless proved to be an effective instrument of national power and had begun the war on a triumphant note.
The Australian government had already announced that it would despatch an expeditionary force of 20,000 men to any destination desired by Britain. It fell to the navy to organise the transport of these troops, and it was while protecting the first Australian and New Zealand convoy to the European theatre that the light cruiser Sydney won the RAN’s first single-ship battle honour. Sydney’s opponent was the German light cruiser Emden, which Von Spee had detached for independent raiding in the Indian Ocean. In just two months of operations, Emden’s captain, Karl von Müller, had established a reputation for skill and daring, sinking or capturing 25 twenty-five Allied steamers. Von Müller had no knowledge of the Australasian troop convoy, but was well aware that the search for him was gathering strength. He therefore sought to disrupt Allied communications by choosing as his next target the cable and wireless station in the remote Cocos Islands. Emden’s attack began on the morning of 9 November, but the station managed to send off a wireless warning before the Germans jammed the transmission. Some 50 miles north, Sydney’s Captain John Glossop received orders to leave his convoy and investigate.
The battle between the two ships began just after 0930. Emden’s gunners made the first hits, killing four of Sydney’s men and wounding more than a dozen, but these were the only RAN casualties. Thereafter, Glossop kept his distance, eking maximum advantage from his heavier weapons. Emden scored only a dozen hits in total, and her fire soon slackened as Sydney’s gunnery began to tell. By 1100, only one German gun remained in action and the Australian crew watched fascinated as a large fire took hold of Emden aft and their enemy crumbled. First the foremost funnel toppled, then the foremast, the second funnel, and then finally the third. Incapable of firing back and hoping to save lives, von Müller made for North Keeling Island, where the beaten Emden grounded at 1120.
Emden’s earlier exploits had ensured that von Müller was singled out for praise in the Allied press, and the quality of Sydney’s victory against a brilliant and cunning foe was therefore all the greater. But, however much the victory was portrayed as confirmation of the Australian sailor’s fighting spirit, there were far more important strategic consequences. In a matter of months, and at the cost of a handful of lives, sea power had removed the only immediate threats to Australian security. In direct consequence, troop convoys were able to cross the Indian Ocean without escort for more than two years, and no soldier was ever lost to enemy action in transit. In any accounting, this was an extraordinary achievement.
Placed under British Admiralty control for the duration of the war, RAN ships and men could thereafter be found serving in essential roles all around the globe. Among the most dramatic of these activities took place in Turkish waters in April 1915 for, while the ANZAC troops were establishing their reputation during the landings at Gallipoli, an Australian submarine was simultaneously making its own mark on history.
With Lieutenant Commander HG Stoker in command, HMA Submarine AE2 had sailed from Australia and joined the British 2nd Submarine Flotilla in the Aegean Sea in February 1915. In late April Stoker received orders to attempt a passage of the Dardanelles and enter the Sea of Marmara. Here he was to attack Turkish shipping and generally create confusion while the amphibious assault proceeded on the Gallipoli peninsula. AE2 began its epic passage through the Dardanelles on the early morning of 25 April. Avoiding shoals, mines, shore artillery and the many enemy craft that were soon searching for him, her commander slowly made his way up the Strait. By the time Stoker felt it was safe to surface, the submarine had spent more than sixteen hours submerged, and the air inside had become so foul that matches once struck refused to burn.
Stoker spent the next five days operating as widely as possible to give the impression that more than one submarine was active. The end came on 30 April when, without warning, AE2 began to rise uncontrollably, and surfaced only a mile from a Turkish torpedo-boat. Stoker ordered a dive but could not hold AE2’s trim. First the boat went too deep, going well past her safety limit and then, in a frantic attempt to recover, she broke surface stern first. Within seconds, enemy shells had pierced the pressure hull leaving Stoker with no choice but to abandon AE2. All of the crew were saved.
AE2’s achievement was to show that the feat was possible, and she was followed by other submarines that within a month had completely disrupted Turkish sea communications. Thereafter, the maintenance of their army on the peninsula became an acutely anxious problem. Nevertheless, the loss of AE2 did not mark the end of the RAN’s role at Gallipoli. In response to a growing need for engineer units in the mud of the Western Front, in February 1915 the Naval Board approved the formation of the 1st Royal Australian Navy Bridging Train (RANBT) from surplus reserve manpower. After leaving Australia the unit was diverted to Gallipoli, where it was attached to the British IX Army Corps and landed at Suvla Bay on 7 August 1915. The landing marked the last great attempt to take the peninsula and, under heavy enemy fire, the Australians unloaded their gear and set to work building a pontoon pier for the evacuation of the wounded. This and other piers were later replaced by more permanent structures, while the RANBT undertook the additional tasks of maintaining water supplies to the landing force, disembarking troops and stores, and providing salvage services.
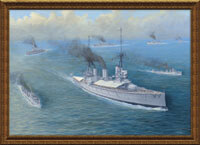
Elsewhere, RAN cruisers and destroyers variously assisted with the blockade of German East Africa, patrolled North American and Far Eastern waters and performed anti-submarine duties in the Mediterranean. From 1915 Australia operated with the British Grand Fleet in the North Sea. As flagship of the newly established 2nd Battlecruiser Squadron Australia accompanied the Battlecruiser Fleet on a succession of sweeps, patrols, and convoy escort tasks across the length and breadth of the North Sea. The cruisers Sydney and Melbourne also joined the Grand Fleet, arriving in England in late 1916. Both warships then began two years of ceaseless vigil, proud to be a part of the ‘greatest fleet the world has ever seen’. Normally kept at less than four hours’ notice for sea, the cruisers’ duties included a succession of anti-submarine sweeps across to Norway and then down the coast of Denmark, ‘dark night patrols’ in search of enemy minelayers, and convoy support.
On 11 November 1918, the signing of the Armistice brought the fighting in Europe to an end. After years of inaction, the German High Sea Fleet steamed across the North Sea to be interned at Scapa Flow, and, on 21 November, the Grand Fleet came out in two divisions to meet it. Australia had the honour of leading the port line at the head of her squadron. Melbourne and Sydney were also there, taking their place among the light cruisers. The decisive battle longed for by many naval officers had not occurred, but the ceremony provided a suitably auspicious end to the RAN’s participation in the war. On 15 April 1919, on the eve of Australia’s departure for home, King George V relayed his feelings of gratitude and pleasure that Australian ships had shared in British naval triumphs. The Admiralty was similarly effusive: ‘Their Lordships state that Australia may well feel pride in the record of its navy newly created in the years prior to 1914, but shown by the test of war to be in all respects ready to render invaluable service to the Empire in the hour of need’.