

Then. Now. Always. RAAF Centenary
Discover the people, events and research behind each commissioned work.
View the original commissioned artwork and, where available, enquire about acquisition.
Discover and purchase rare #1–#10 Archive Editions and historically significant retained pieces.
Explore related Limited Edition lapel pins, medallions and art.
Centenary of the Royal Australian Air Force
The Royal Australian Air Force marked 100 years of service on 31 March 2021, but the story behind the Centenary began before the RAAF itself existed. At Point Cook, Victoria, Australia established its first military flying school in 1914. From there, Australian airmen went on to serve with the Australian Flying Corps during the First World War. After the war, the temporary Australian Air Corps bridged the transition to a permanent independent air service.
By its Centenary, the RAAF had evolved from timber-and-fabric aircraft into a highly networked modern force operating advanced combat, transport, surveillance, maritime patrol, refuelling and training aircraft. Yet across every era, the continuing story was its people, the generations who flew, maintained, supported and commanded the aircraft and served Australia in war and peace.
Read more
The origins of Australian military aviation are closely tied to Point Cook. The Central Flying School opened there in February 1914 and flying training began that August. During the First World War, Australian Flying Corps squadrons served in the Middle East and on the Western Front. After the Australian Flying Corps was disbanded, the Australian Air Corps provided a temporary bridge until the Australian Air Force was created in 1921.
The Second World War transformed the service. By late 1944 the RAAF had grown to more than 182,000 personnel and around 6,200 aircraft in 61 squadrons. Australians served across Europe, North Africa, the Mediterranean, Asia and the Pacific. The post-war Air Force then entered the jet age and continued operational service through Korea, Malaya, Confrontation and Vietnam, with aircraft such as the Meteor, Canberra, Sabre, Mirage, Iroquois, Caribou and F-111 marking successive generations of capability.
The decades approaching 2021 brought another transformation: strategic airlift, airborne early warning, air-to-air refuelling, maritime surveillance, electronic attack, remotely piloted systems and the F-35A. The Centenary theme, Then. Now. Always. therefore looked in both directions: honouring the service and sacrifice of past and present members while recognising that Air Force would continue to adapt beyond its first hundred years.
The RAAF Centenary
The Royal Australian Air Force marked its centenary on 31 March 2021 under the official theme, Then. Now. Always. The centenary program commemorated the service and achievements of past and present members, increased public awareness of the Air Force’s history and contribution to Australia, and sought to inspire future generations to continue its legacy of service.
The centenary was commemorated across Australia and at deployed and diplomatic locations overseas. It was both a historical anniversary and an opportunity for Air Force to explain how a service born in the age of timber-and-fabric aircraft had become a highly networked force operating sophisticated combat, transport, surveillance and support systems.
Then. Now. Always. Centenary of The Royal Australian Air Force
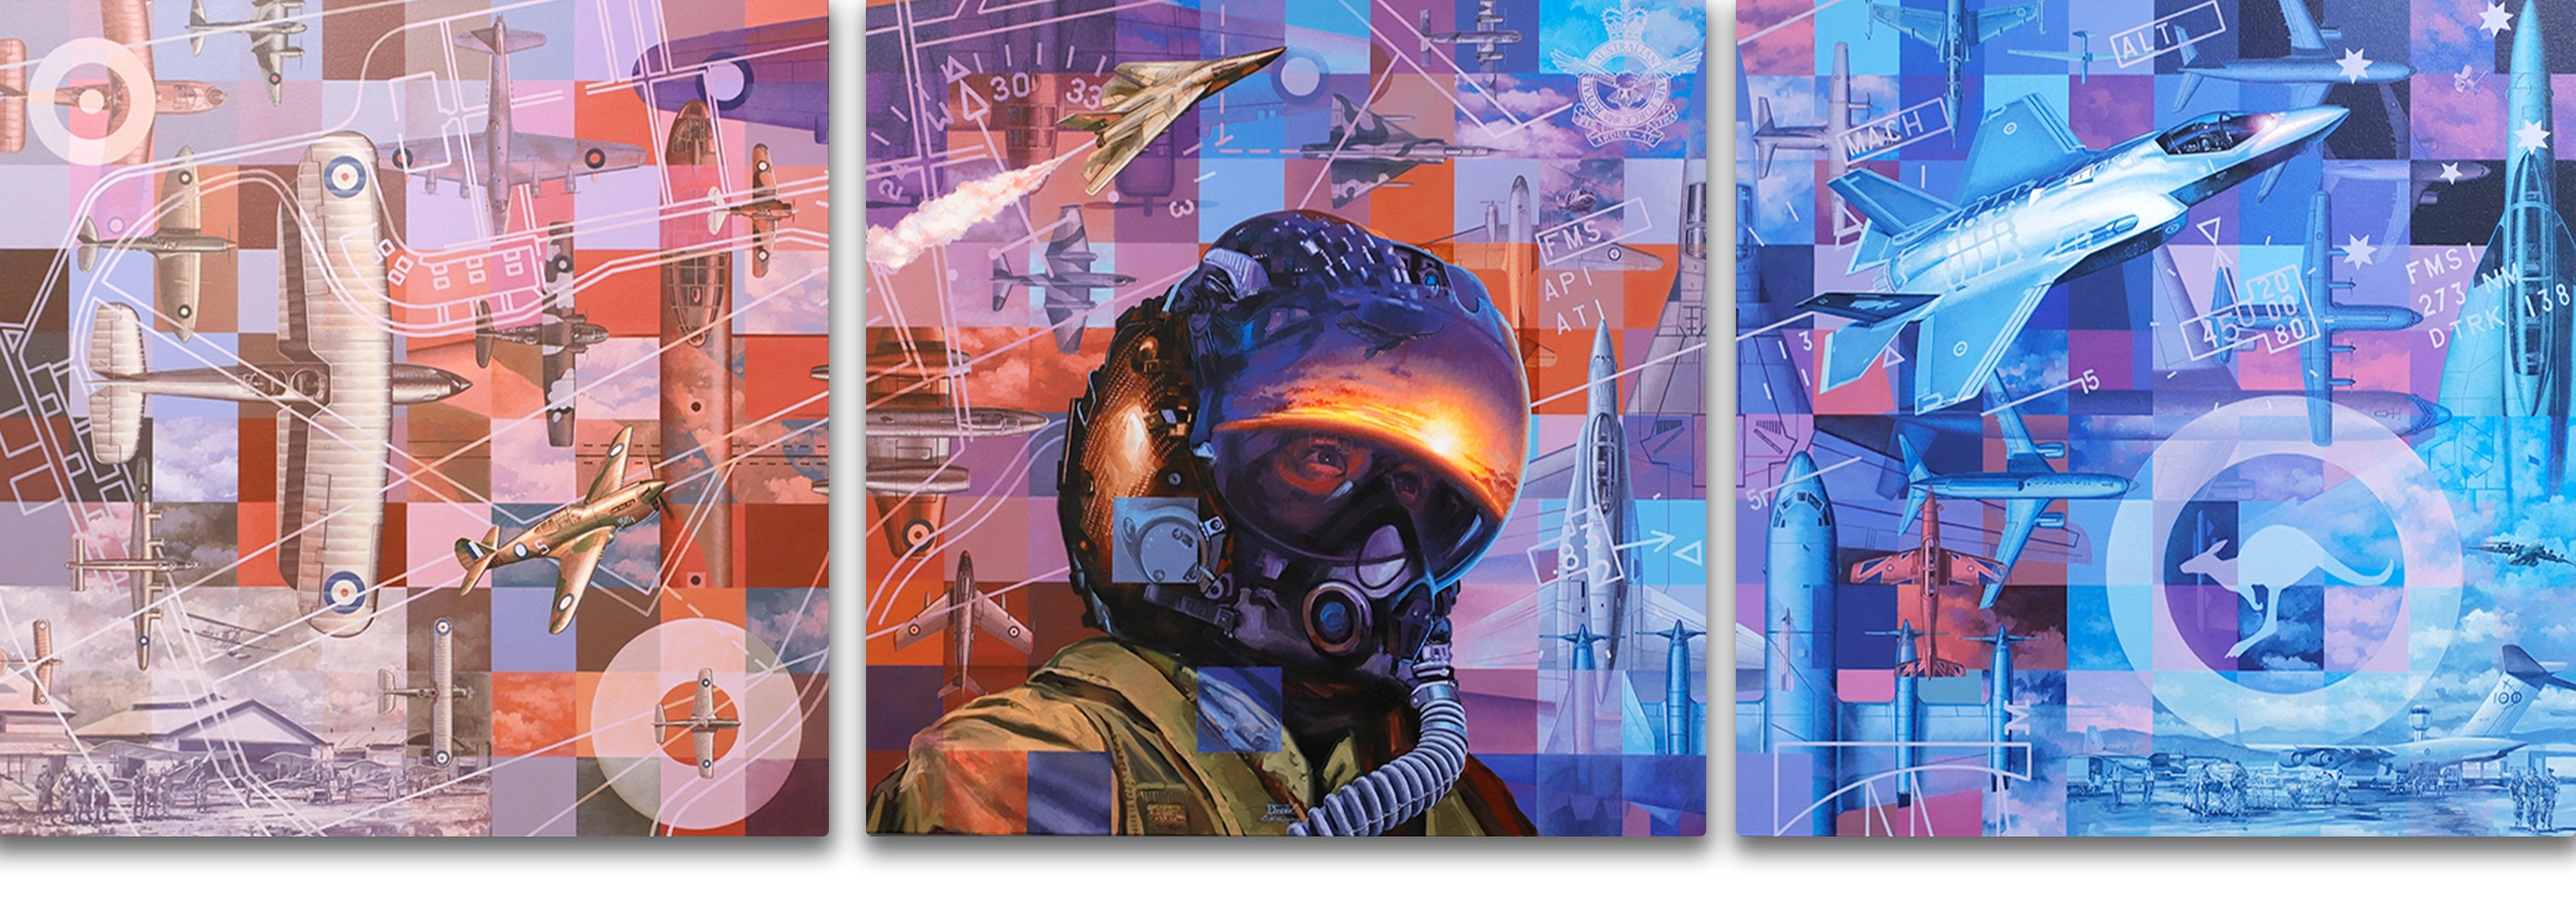
To commemorate the Air Force Centenary, BrandNet commissioned Australian aviation artist Drew Harrison to create an artwork capable of carrying an unusually large story: 100 years of aircraft, people, service, technological change and national history.
Read more
Harrison initially explored more traditional aviation concepts, including a pilot surrounded by historical vignettes and aircraft flying in formation. He concluded that a conventional aviation painting could not comfortably contain the breadth of the centenary. The solution was a contemporary triptych, three interconnected one-metre-square panels that could operate as one work while giving the story room to move from past to present and future.
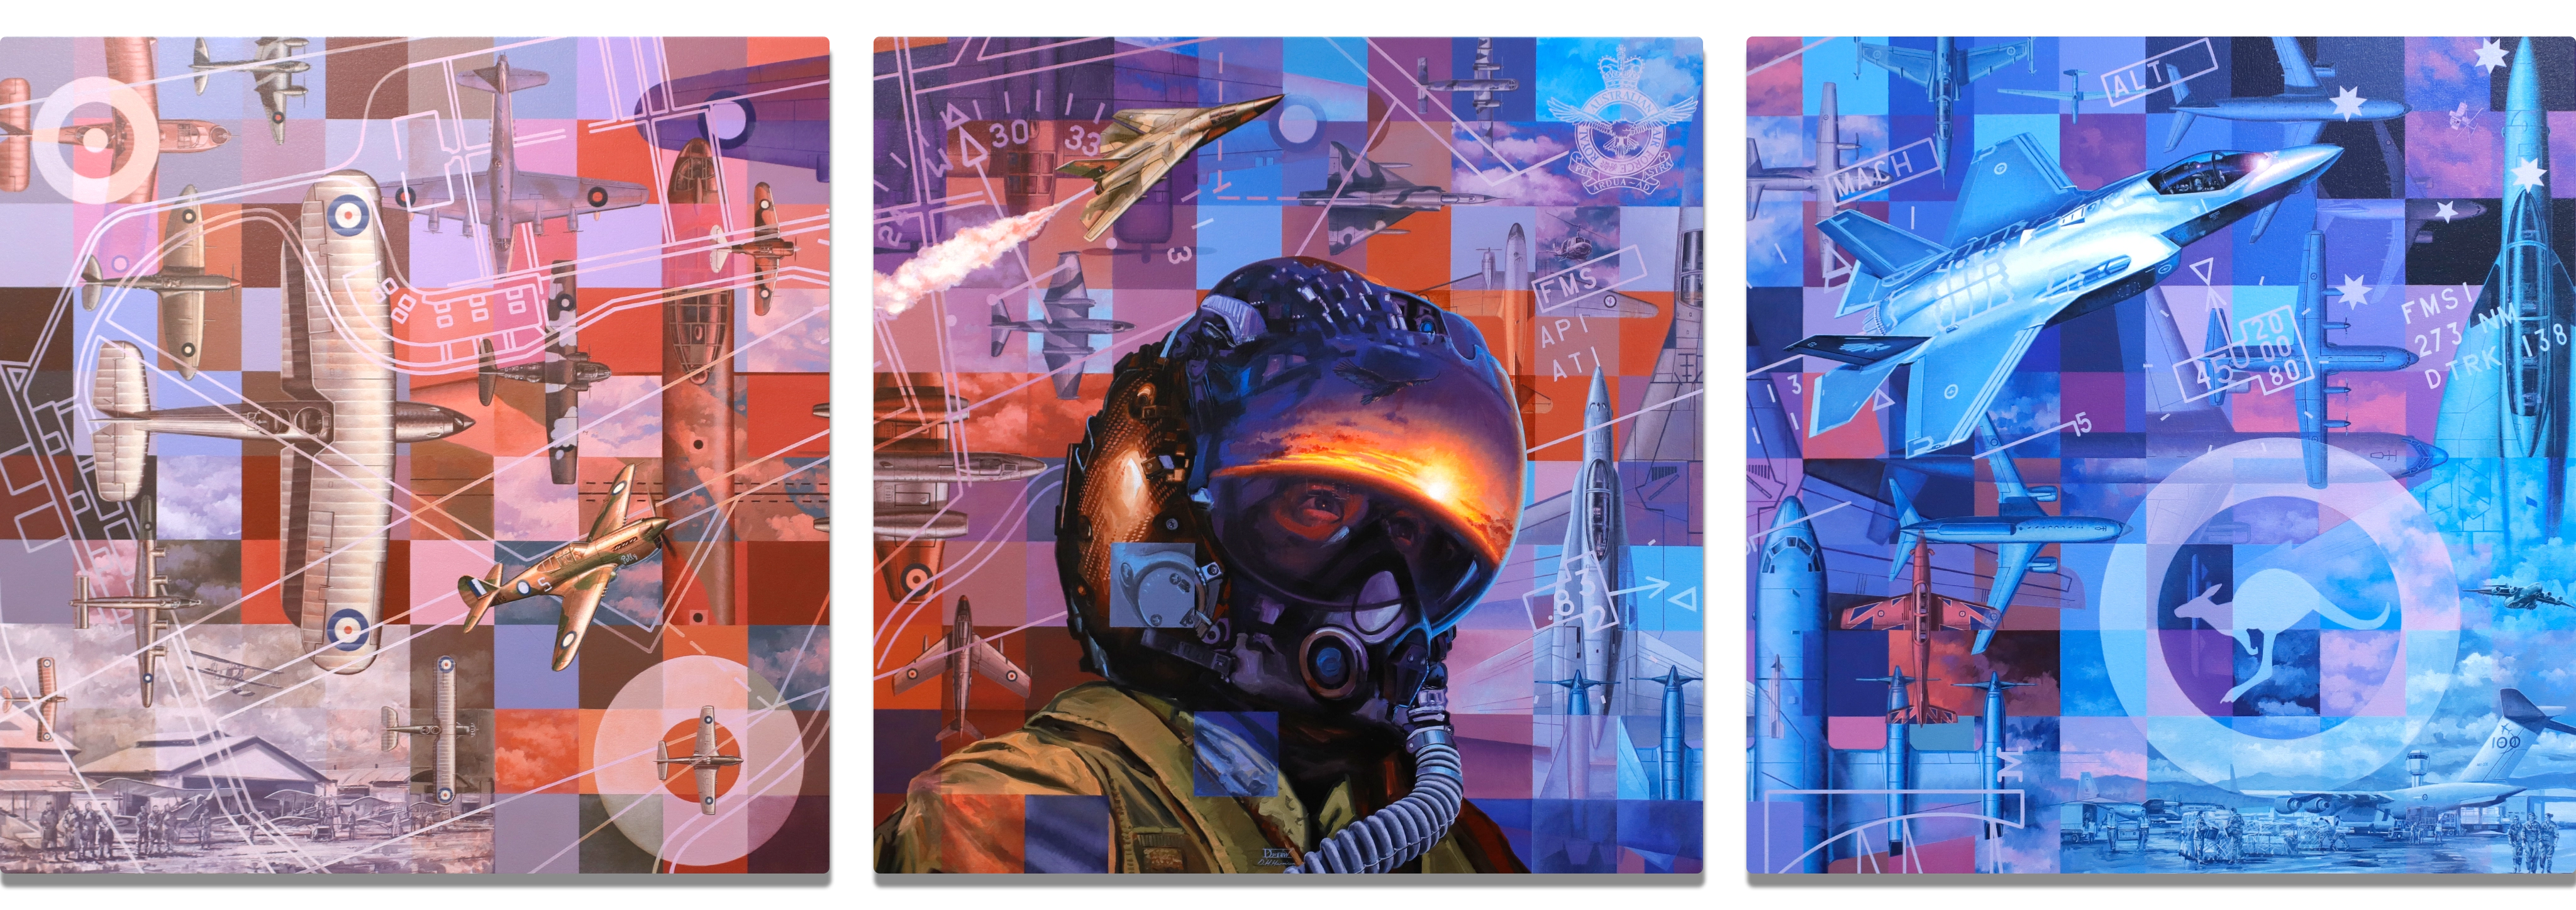


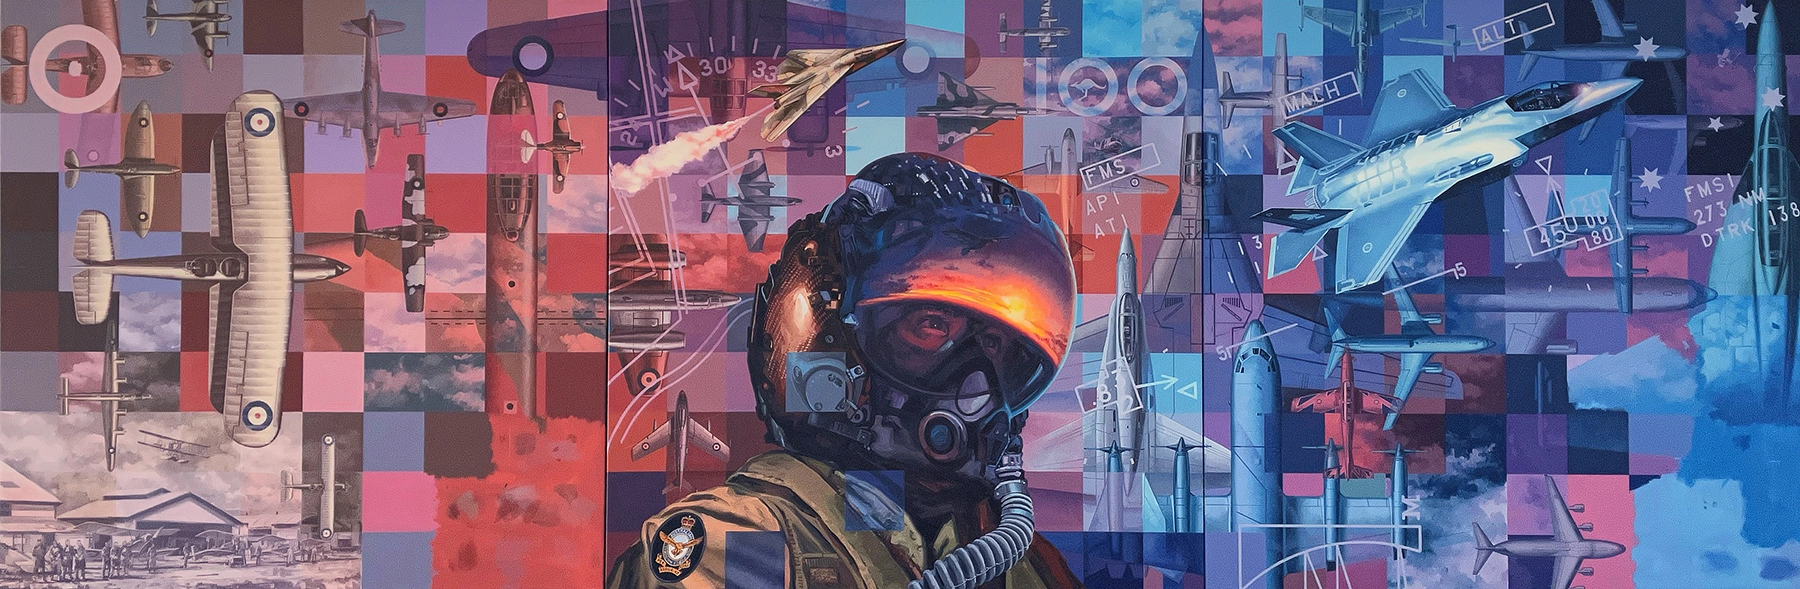
The composition takes cues from the RAAF100 identity and the words Then. Now. Always. A single pilot anchors the centre. Around that figure, aircraft, roundels, crest imagery, Head-Up Display graphics, a map of Point Cook and the centenary grid overlap in layers. The result is neither a chronological chart nor a traditional air-combat scene. It is a visual tapestry of Air Force history.
Historical Accuracy
Then. Now. Always. is a visual history of a century, not a single moment in time. Aircraft separated by decades appear within the same composition because the work is designed to connect eras rather than reconstruct an actual formation.
Read more
The historical detail lies in the aircraft, insignia, symbols and places represented. Harrison included 40 aircraft spanning the century, from early types associated with the beginnings of Australian military aviation through Second World War aircraft, Cold War and Vietnam-era types, and the modern F-35A, Wedgetail, Poseidon, Growler and other contemporary platforms.
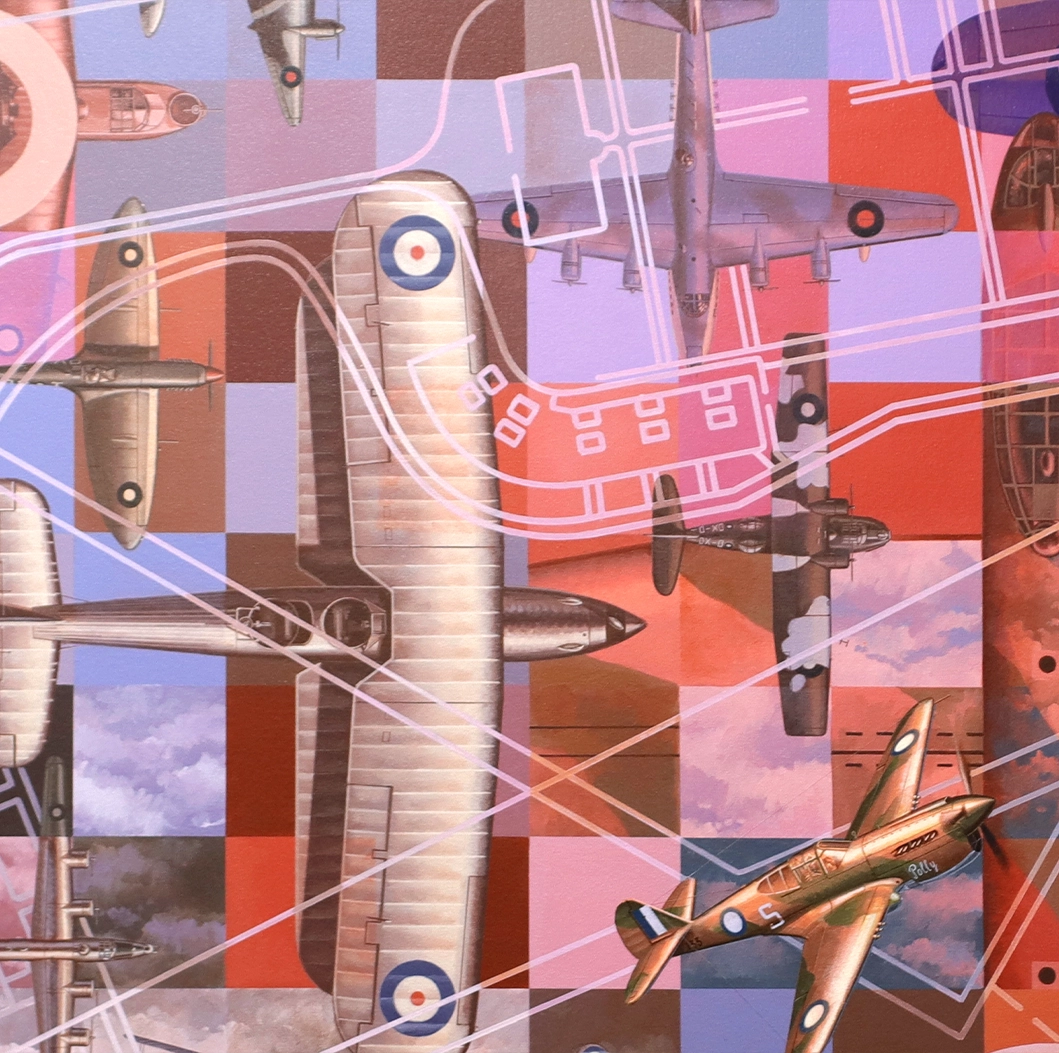
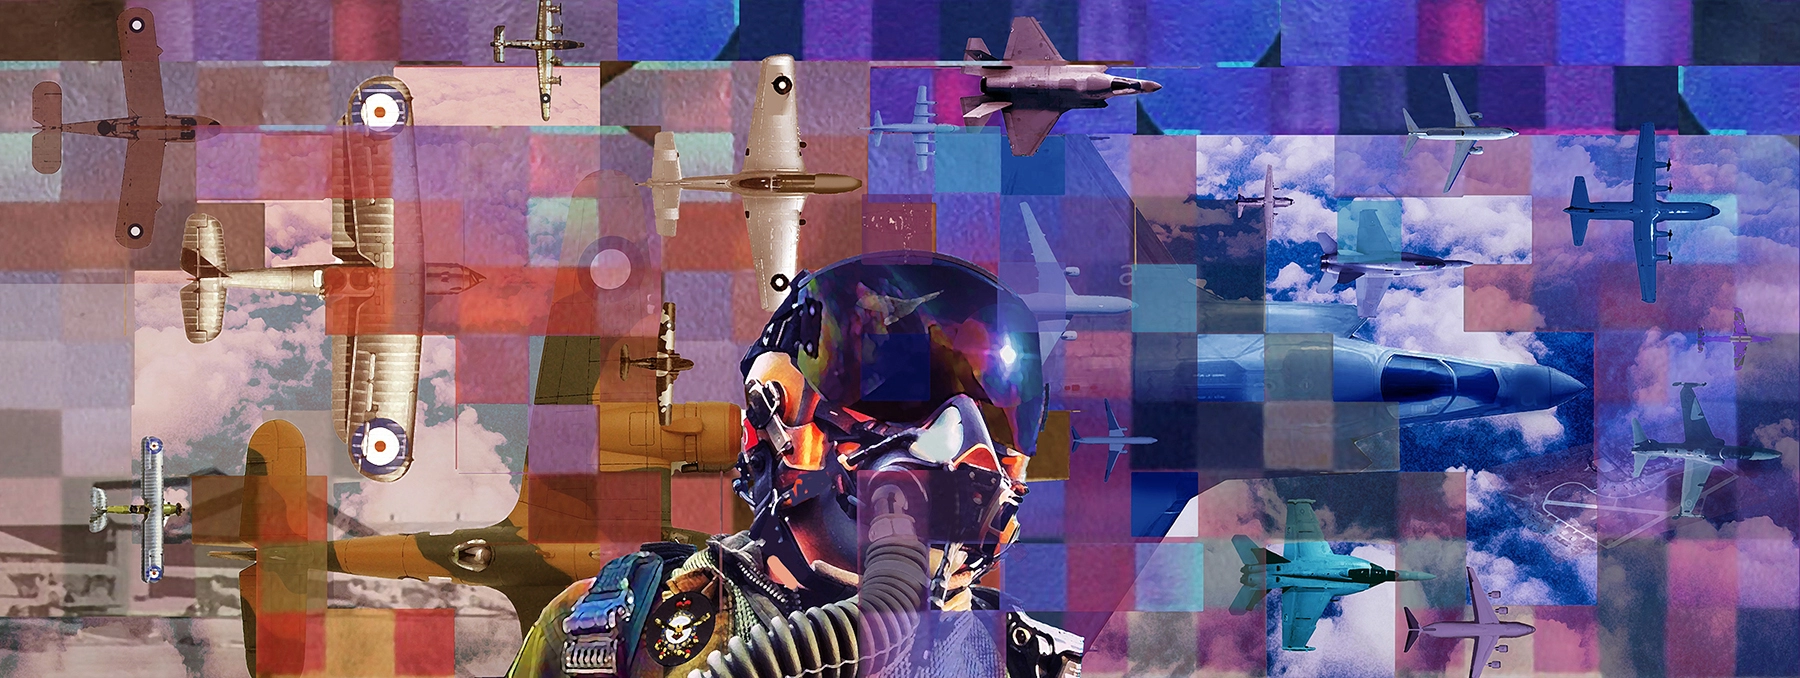
The structure itself carries historical meaning. The narrative begins at Point Cook and moves from the lower left toward the upper right. Sepia tones evoke the early years before the work transitions into the familiar deep blues associated with Air Force. Each of the three canvases contains a 10 × 10 grid (100 squares) while the central pilot provides a human link between generations. The work therefore uses deliberate artistic compression while retaining historically recognisable aircraft and symbolism.
100 years built into the design
Each panel contains a 10 × 10 grid, creating 100 squares within each canvas. The device gives the work structure while quietly repeating the centenary number. Harrison described the squares as both building blocks and a kind of tapestry, a way of connecting ideas, people, aircraft and technological advance. Combined with the shift from sepia to deep blue, the grid helps the viewer read the artwork as a passage through time.
The people behind the aircraft
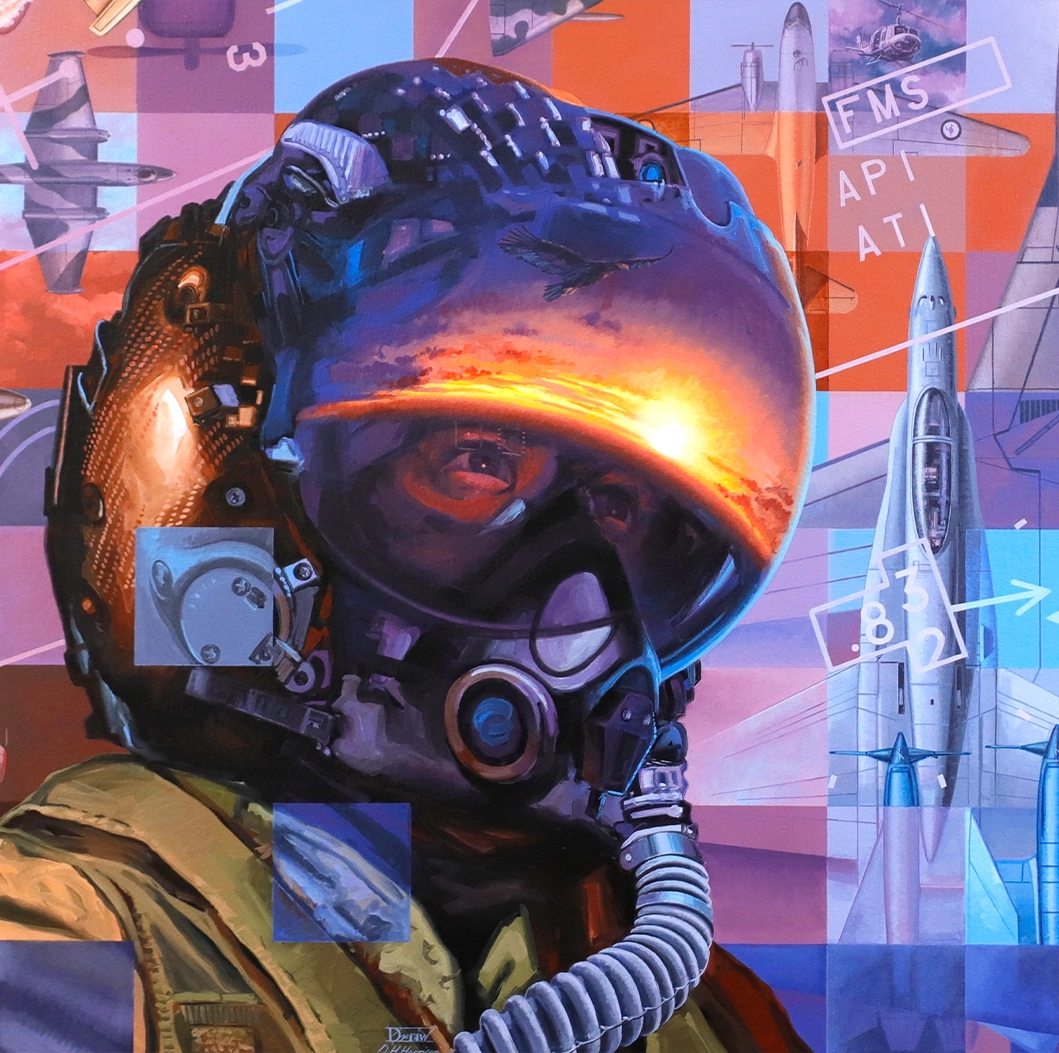
At the centre is a single pilot figure. The figure is not intended as a portrait of one individual; it represents the generations of people who have contributed to Air Force service. The choice is important. Aircraft dominate aviation history visually, but Harrison makes the person the unifying element. Technology changes from canvas-covered biplanes to stealth fighters and remotely piloted systems; the continuing thread is the people who operate, maintain and support them.
A century of changing capability
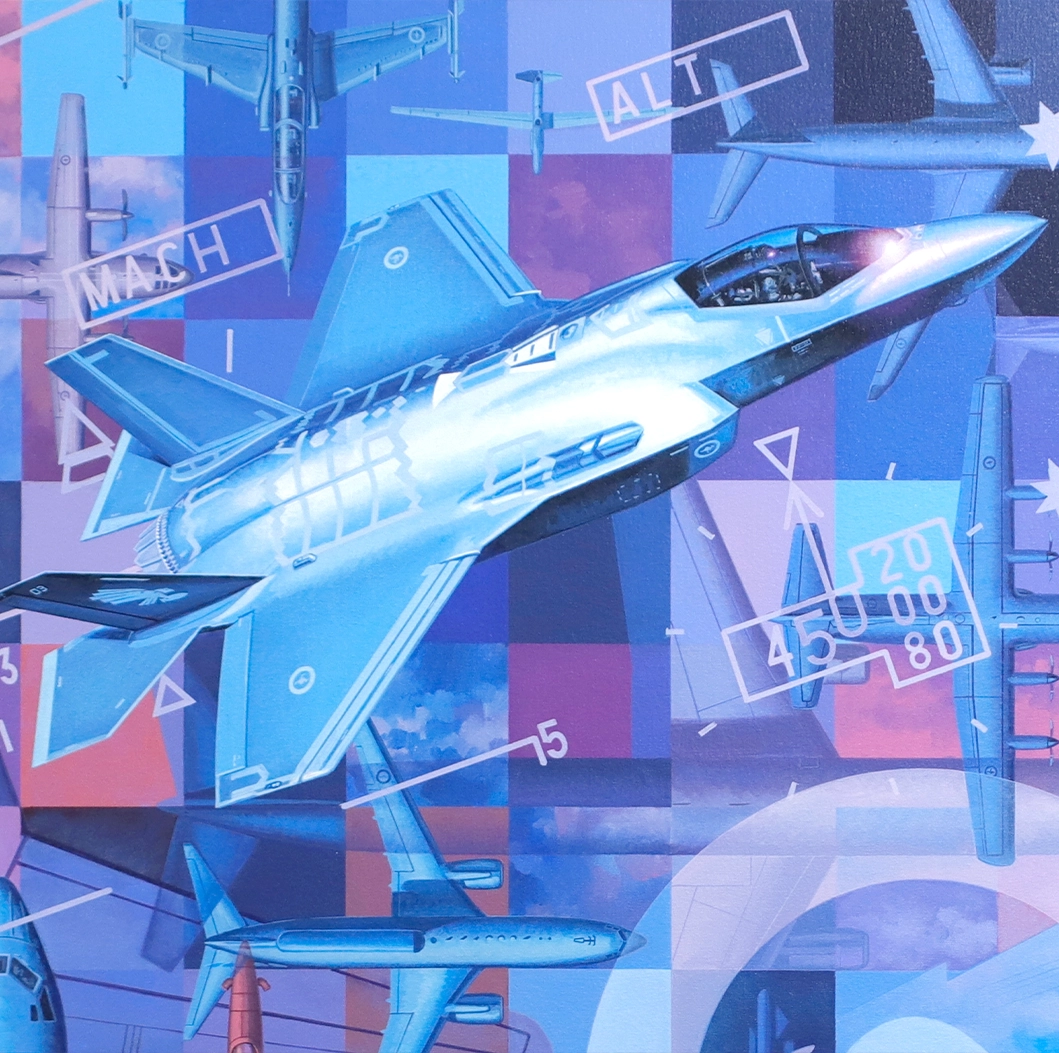
Forty aircraft are woven through the three panels. Three (the P-40, F-111 and F-35) receive particular three-dimensional prominence, while the remaining aircraft appear within the layered grid. The selection is deliberately representative rather than exhaustive. It includes aircraft associated with training, fighter defence, strike, maritime patrol, reconnaissance, transport, helicopters and modern surveillance. Together they show how Air Force capability expanded from basic flying and reconnaissance into a sophisticated, multi-role force.
Drew Harrison
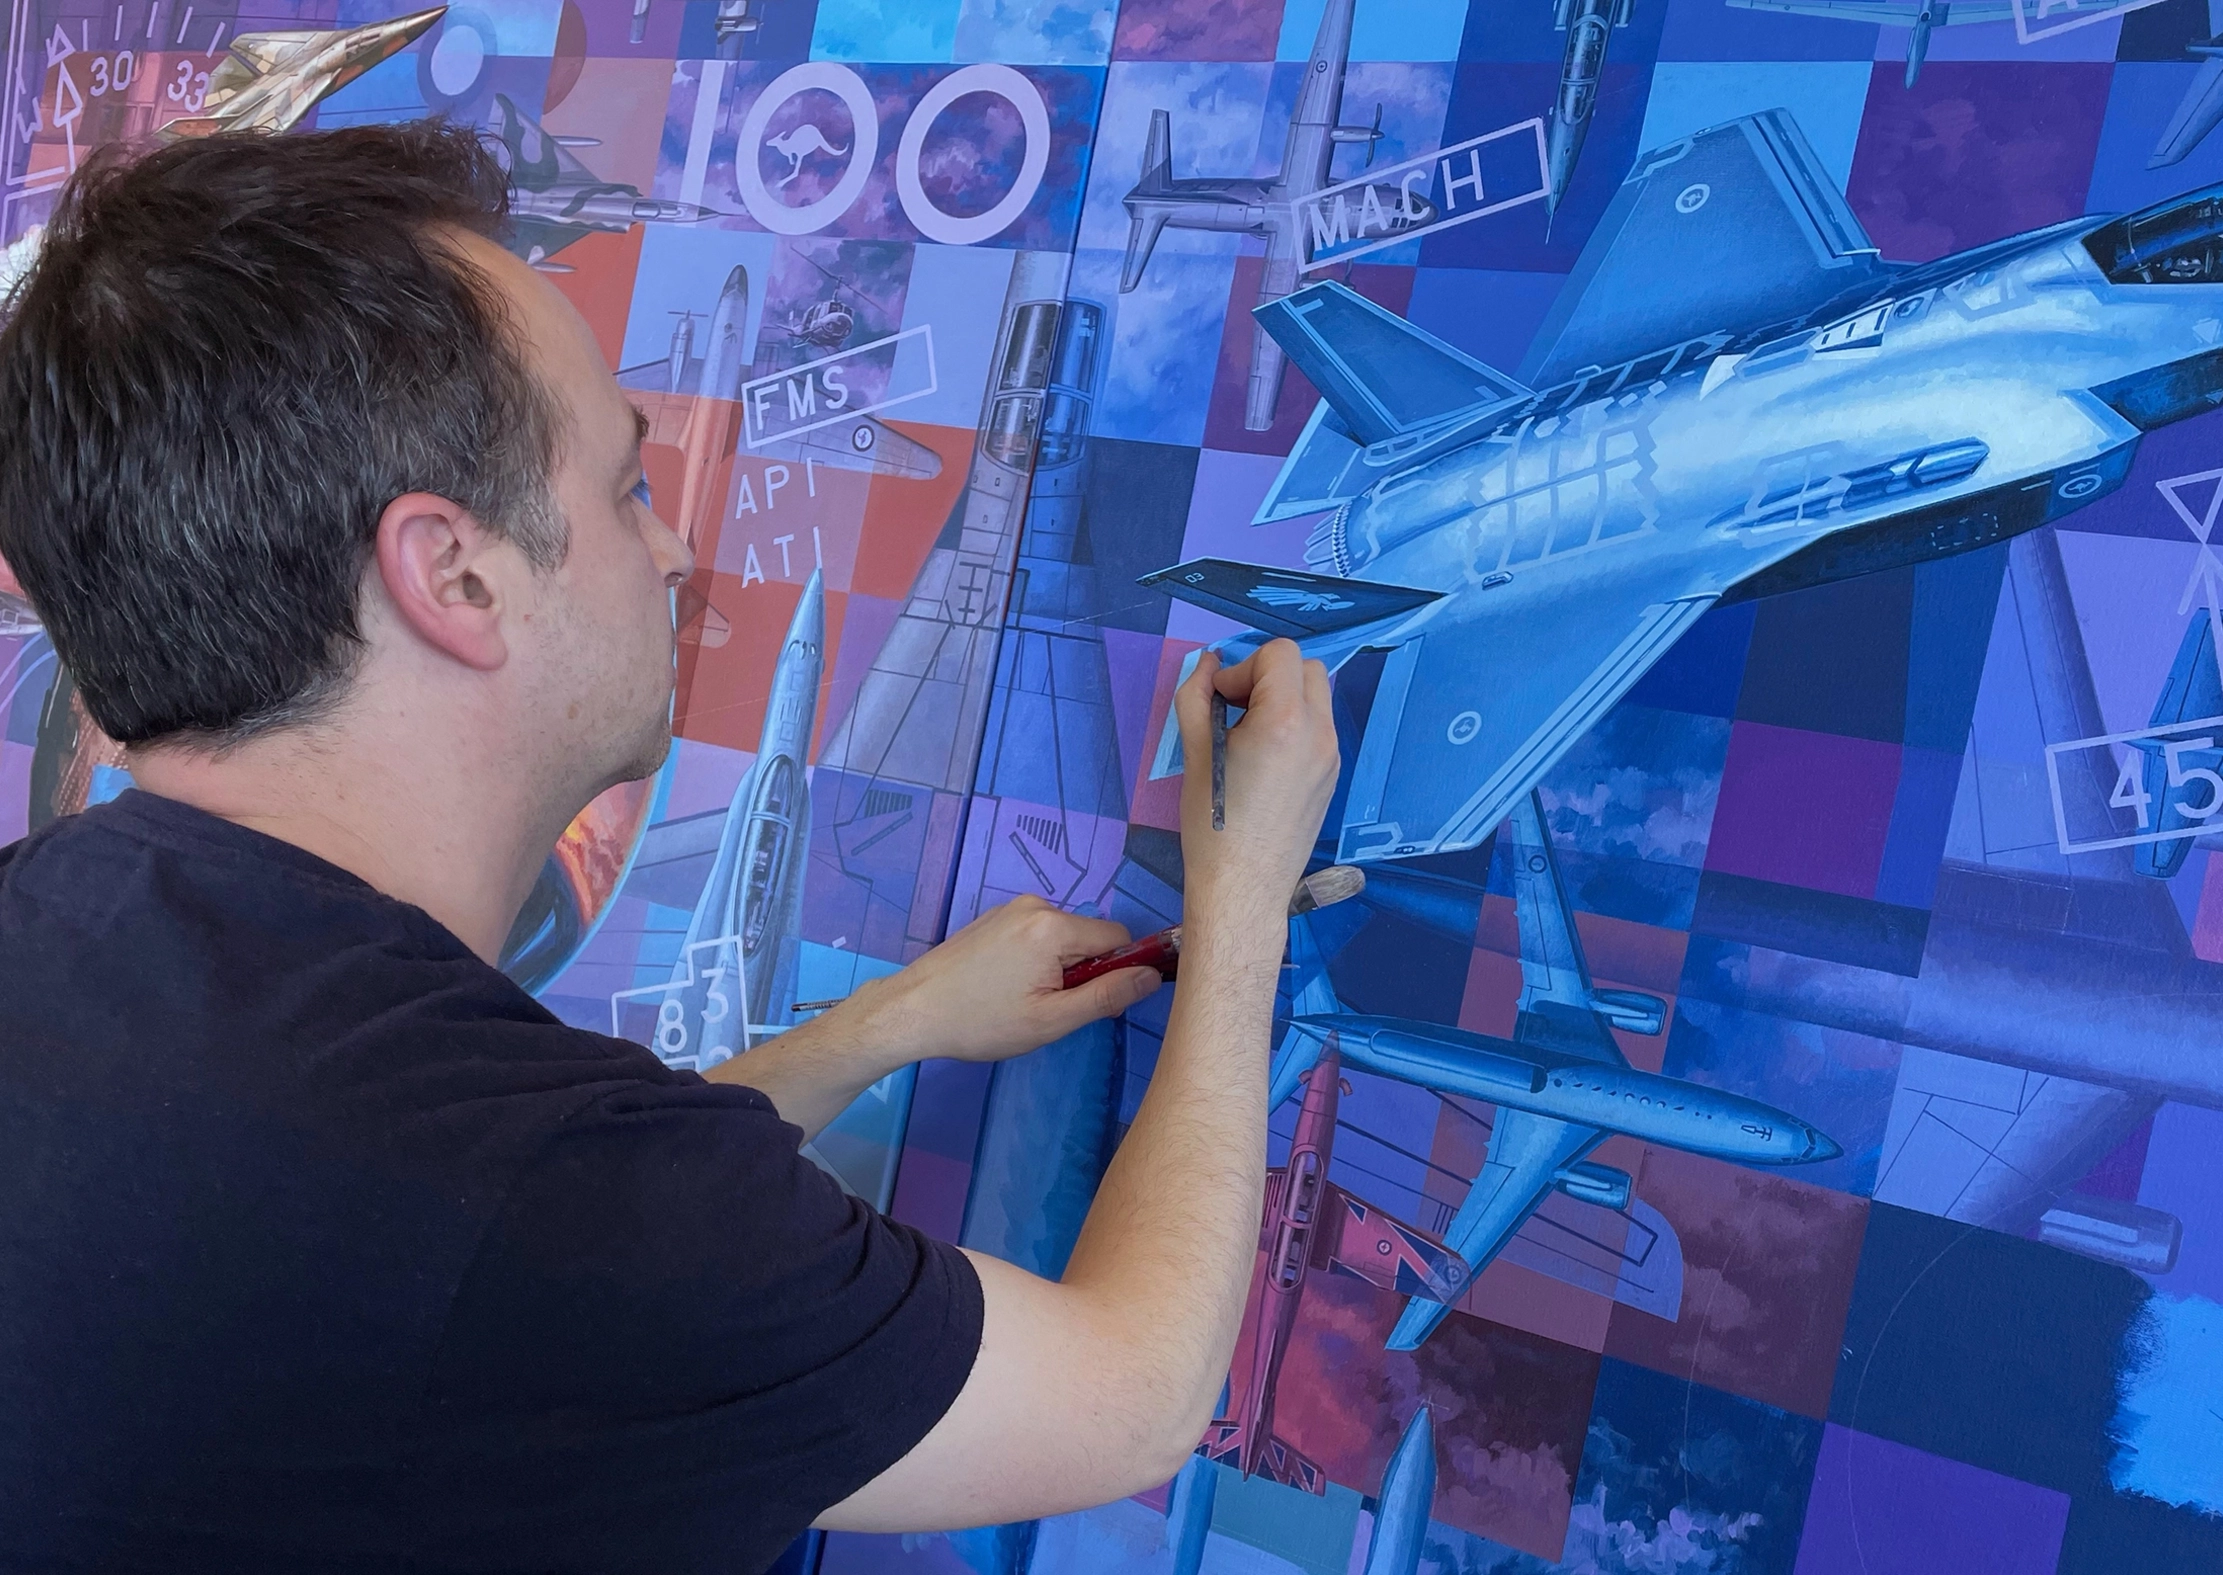
Drew Harrison is an Australian artist whose military and aviation work combines detailed research with a contemporary visual language. His experience in traditional aviation painting gave him the technical grounding to render aircraft accurately, while commissions such as Then. Now. Always. allowed him to move beyond a single aircraft scene into broader visual storytelling.
For the Centenary commission, Harrison deliberately resisted the temptation to turn 100 years of Air Force history into a crowded chronological montage. His solution was to use symbolism, colour, repeated geometry and carefully selected aircraft to create a work that could be understood at several levels: first as a strong contemporary image, then as an aviation artwork, and finally as a detailed visual history.
Artist’s Notes
Harrison’s central idea was movement from Point Cook in 1921 toward the modern Air Force and beyond. The pilot became the human centre of the composition; the grid represented both technological building blocks and the interconnected fabric of the service; and the palette moved from historical sepia into deep Air Force blue.
The artwork also incorporates RAAF crest imagery, roundels, Head-Up Display graphics and a map of Point Cook. In the pilot’s visor is the reflection of an eagle, linking the modern figure back to the enduring idea of flight and to Air Force identity. The three most prominent aircraft (P-40, F-111 and F-35) span different generations, while more than thirty additional aircraft appear in plan view across the composition.
Read Harrison's full artist's notes: Part 5 - 8
Read Harrison's full artist's notes: Part 9 - 12
Read Harrison's full artist's notes: Final Notes
Detailed Artwork Description
The first panel begins in sepia. Early aircraft and Point Cook establish the origins of the story, while Second World War types build the historical density of the image. Across the central panel the palette and technology change. The pilot occupies the visual centre, surrounded by aircraft and layered Air Force symbolism. In the final panel, deep blues, modern aircraft and the upward movement of the design carry the eye toward contemporary capability and the future.
Look closely and the work rewards repeated viewing. Aircraft are not arranged simply by size or fame. They are layered into the grid so that the eye moves between generations. Roundels, the RAAF crest, map elements and digital graphics connect institutional heritage with modern technology. The three canvases remain distinct, yet the diagonal movement across them makes the triptych read as one continuous century.
The original Then. Now. Always.
The original commissioned artwork by Drew Harrison is preserved within the BrandNet Archives. Painted as three individual panels, each measuring 1000 × 1000 mm, it is the unique source work from which the Centenary limited editions and wider collection were created. For a collector, organisation or institution, the original offers something no reproduction can: the artist’s hand, surface and scale, together with direct provenance to the RAAF Centenary commission.
Read More
The triptych was conceived from the outset as a single centenary work. Viewed at full scale, its three-metre visual span allows the progression from Point Cook to the future to unfold as Harrison intended. The original also preserves details and texture that inevitably change when the image is reduced for canvas, aluminium and other collectable formats.
Own a part of the story
The original triptych became the foundation for a family of limited-edition art and Centenary collectables. Each format carries Harrison’s visual history of Air Force into a different scale and setting.
 Click to enlarge
RAAF Centenary 3 Frame Limited Edition Canvas Artwork
Three individually framed canvases preserve the triptych format of Harrison’s original work, allowing the Then, Now and Always panels to retain their intended separation while reading as one continuous composition. Special provenance: the first 100 large-format reproductions were promoted with a metal disc cut from A21-1, the first F/A-18A built and flown in Australia.
View the Artwork → Click to enlarge
RAAF Centenary Large Limited Edition Canvas Artwork
The three panels are combined into a single 1800 × 600 mm canvas, presented in a black shadow frame with a centrally positioned engraved message plate.
View the Artwork → Click to enlarge
RAAF Centenary Medium Limited Edition Canvas Artwork
A more compact 1200 × 400 mm single-canvas edition, presented in a black shadow frame while retaining the complete Then. Now. Always. Heritage inclusion: a small piece of metal from a No. 452 Squadron Spitfire Mk VIII, donated by the Darwin Aviation Museum. The medium edition was designed for smaller display spaces without cropping the artwork. All three panels are combined into one continuous canvas, preserving the movement from the early Air Force to the modern service.
View the Artwork → Click to enlarge
Then. Now. Always. AF100 Aluminium Artwork
A contemporary aluminium presentation of Harrison’s complete Centenary artwork, combining the vivid colour and sharp detail of the original composition with a clean modern display format. The aluminium format is particularly suited to the contemporary character of the commission. Its smooth surface and crisp reproduction complement the grid, aircraft silhouettes and deep blues of the later panels while keeping the full centenary story together in one piece.
View the Artwork → Click to enlarge
Then. Now. Always. AF100 Set of 4 Limited Edition Coffee Mugs
A four-mug set carrying imagery from the Then. Now. Always. Centenary collection, designed to bring elements of Harrison’s artwork into an everyday commemorative format. The mug set is part of the wider collection rather than a fine-art edition. It demonstrates how individual aircraft and visual elements from the commission were adapted beyond the original triptych while retaining the Air Force 100 identity.
View the Set →History, artwork and collecting
Explore the history behind the Then. Now. Always. Artwork, the choices and decisions made by the artist, and the Archive and Limited Edition pieces created from the commission.
The Artwork
Why was Point Cook important to the birth of Australian military aviation?
Point Cook became the home of Australia’s first military flying school and is closely associated with the origins of the RAAF. The Central Flying School opened at Point Cook in February 1914 and flying training began that August. Australian military aviators trained there before the Australian Flying Corps served overseas during the First World War.
After the war, Point Cook remained central to the Australian Air Corps and then to the new Australian Air Force formed in 1921. That is why Harrison begins the centenary narrative there.
When was the Royal Australian Air Force formed?
The Australian Air Force was formed as an independent service on 31 March 1921 and received authority to use the title “Royal” later that year. The new Air Force replaced the temporary Australian Air Corps and became the third arm of Australia’s military forces.
The 31 March date became the basis of the 2021 Centenary. The change was more than a new name: it established a permanent independent air service whose roles and technology would expand dramatically over the next century.
How large did the RAAF become during the Second World War?
By late 1944 the RAAF had more than 182,000 personnel and around 6,200 aircraft in 61 squadrons. More than 215,000 men and women served in the RAAF during the Second World War, and 9,870 lost their lives.
Australians served across Europe, North Africa, the Mediterranean, Asia and the Pacific. The scale of that wartime expansion explains why so many Second World War aircraft occupy the historical side of Then. Now. Always.
What did the RAAF do after 1945?
The RAAF remained operational through the Cold War and served in Korea, Malaya, the Indonesian Confrontation, Vietnam and later peacekeeping and Middle East operations. No. 77 Squadron entered the Korean War within days of the conflict beginning, initially flying Mustangs and later Meteors.
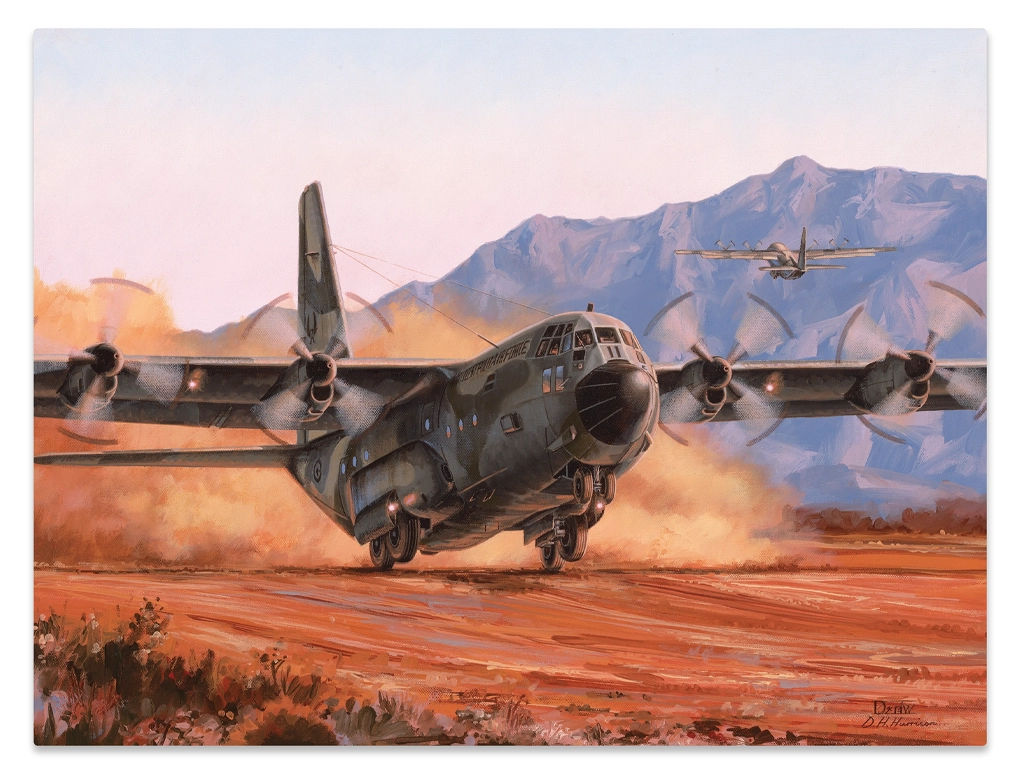
Later decades brought Sabres, Canberras, Mirages, Iroquois helicopters, Caribous and F-111s, alongside transport, maritime and support aircraft. Air Force also became increasingly involved in peacekeeping, humanitarian assistance and regional operations.
Why was the 2021 Centenary called Then. Now. Always.?
The phrase connected Air Force heritage, present-day service and the generations still to come. Air Force used the Centenary to honour past and present members, strengthen public understanding of its contribution to Australia and inspire future generations.
The theme was therefore deliberately forward-looking. Harrison adopted the same idea structurally: the artwork starts with the past, moves through the present and continues visually toward future and space-related capability.
The Commission
Why is the artwork a triptych?
Three panels gave Harrison enough visual space to tell a century-long story without turning it into a conventional timeline. Early concepts based on a pilot surrounded by historical scenes or aircraft in formation proved too restrictive.
The triptych allowed Harrison to create three connected chapters and to move the eye continuously from Point Cook in 1921 toward the future.
Who is the pilot in the centre?
The pilot is a symbolic figure representing generations of Air Force personnel, not one named individual.
Harrison wanted people to remain at the centre of a story that could easily have become dominated by aircraft. The pilot connects every era: aircraft, uniforms and technology change, but service is ultimately carried by people.
Why are aircraft from different eras shown together?
Because the painting is a visual history, not a literal formation. Forty aircraft from across the century are layered through the three panels.
Their placement is designed to create historical progression and visual balance rather than reproduce an event that actually occurred. The approach lets a viewer compare generations of capability within one continuous composition.
What is the meaning of the 10 × 10 grid?
Each panel contains 100 squares, reinforcing the Centenary while providing a structure for the layered imagery.
Harrison saw the grid as both technological “building blocks” and a tapestry linking people, ideas and aircraft. It also gives the work a contemporary visual language very different from a traditional aviation painting.
Why does the colour change across the artwork?
The palette moves from sepia into deep Air Force blues to signal the passage from history toward the present and future. The colour transition is one of the work’s strongest storytelling devices.
The historical side feels archival, while the later panels become increasingly contemporary. The pilot looks toward that blue, future-facing side of the composition.
The Collection
How was the three-panel original adapted for collectors?
It was reproduced both as a three-frame treatment and as combined single-canvas editions, with aluminium and other collectables extending the collection further. The three-frame edition preserves the structure of the original triptych.
The 1800 × 600 mm and 1200 × 400 mm versions combine all three panels into one continuous canvas. The aluminium artwork provides a more contemporary display option, while medallions, mugs and other pieces carried the Centenary story into smaller collectable formats.
What makes the large and medium canvas editions special?
Both were limited to 250 and carried an engraved Chief of Air Force message, edition number and a heritage-metal inclusion.
Military Shop’s Centenary page records that the 1800 × 600 mm and 1200 × 400 mm canvas editions each incorporated a small disc of metal from a No. 452 Squadron Spitfire Mk VIII, donated by the Darwin Aviation Museum. This physically links the modern Centenary reproduction with an aircraft from the RAAF’s wartime heritage.
What was special about the first 100 large-format reproductions?
They were promoted with a metal disc cut from A21-1, the first F/A-18A built and flown in Australia. That inclusion connected the Centenary artwork with a significant physical piece of Australian aviation heritage.
Where an archive example contains the A21-1 disc, its certificate and message plate should be retained with the artwork as part of its provenance.
Archive Editions
What is an Archive Edition?
An Archive Edition is a retained piece from BrandNet’s original release, preserved with its documented edition number and provenance. For Then. Now. Always. the archive can include early-numbered artwork editions and other retained Centenary pieces.
The significance is not simply age: it is the documented connection between the piece, the original BrandNet release and the Centenary commission.
Why are low edition numbers sought after?
Collectors often value early numbers because they sit at the beginning of a finite numbered release. The image quality is not inherently different, but a low number can add collecting interest, particularly where the piece remains complete with its original certificate, message plate, heritage-metal inclusion and BrandNet provenance.
What should remain with a limited-edition artwork?
Keep the artwork, certificate, numbered message plate and any original heritage-metal inclusion or presentation material together. Those elements help establish exactly what the collector owns.
With special Centenary editions, the metal inclusion and engraved plate are part of the story of the object, not simply packaging.
Then. Now. Always. A century preserved
Then. Now. Always. occupies a special place in the BrandNet Archives. Commissioned for a once-in-a-century anniversary, the original triptych records how Air Force chose to look at its own history in 2021: proud of its beginnings, conscious of the service and sacrifice of generations, and already looking toward what came next.
The BrandNet Archives preserve the original artwork alongside selected editions and collectables developed from it. Together they record more than the finished products. They preserve the path from historical research and artistic commission to the limited releases created for the Centenary, a small material record of how 100 years of Royal Australian Air Force history were commemorated.
Explore the BrandNet Archives →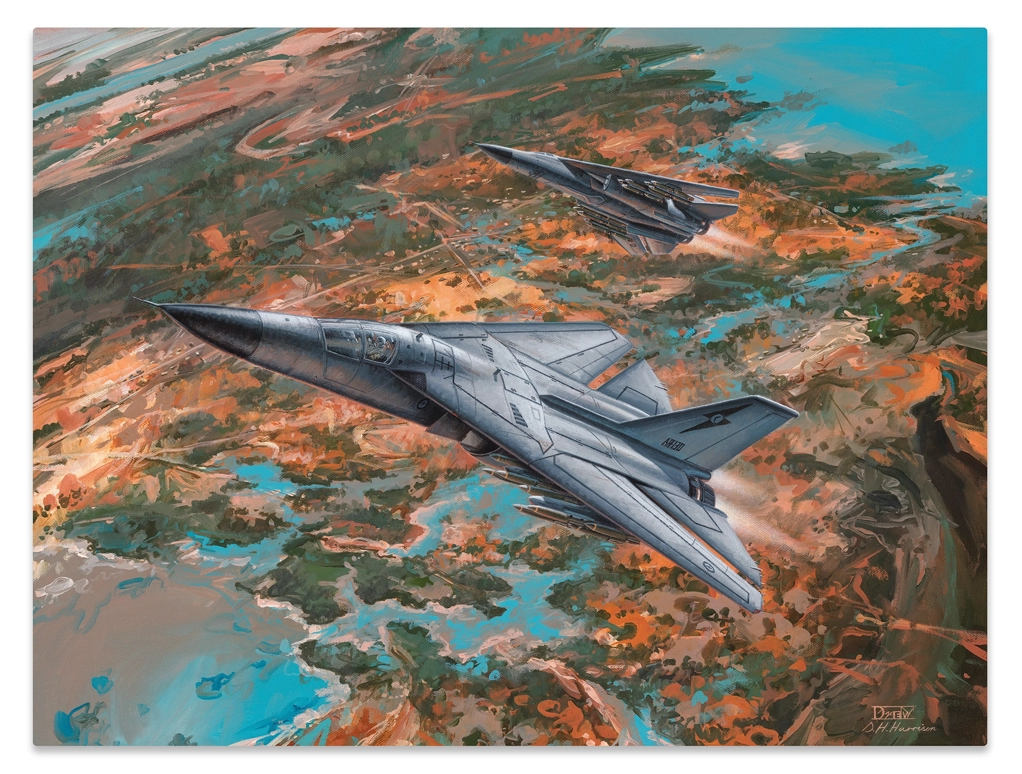
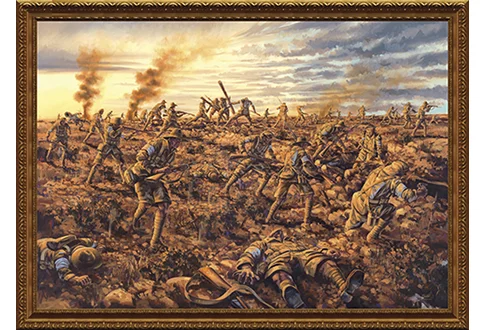
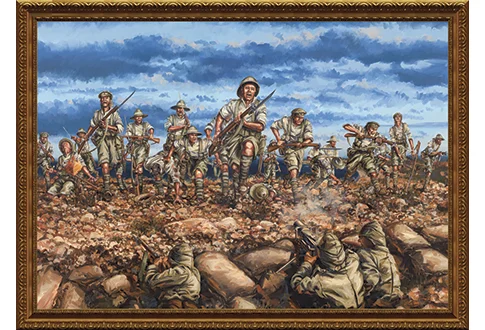
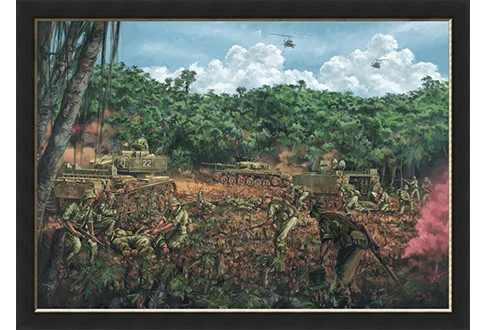
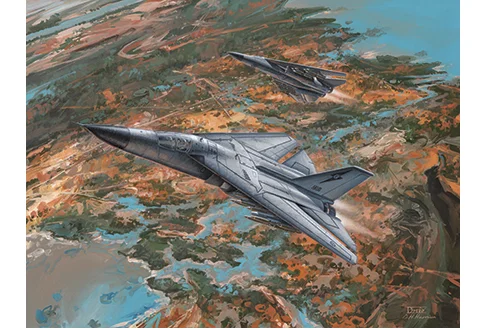
Explore more Australian military stories, art and collectables
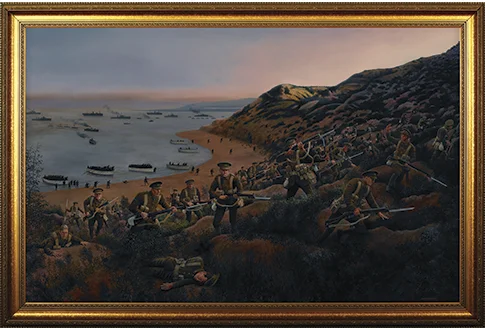
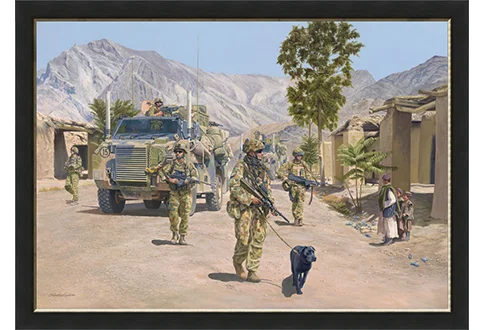
The Battle of The Nek is one story within a much larger archive of commissioned military artworks, historically significant pieces, low-number Archive Editions and Limited Edition collections.
Explore The BrandNet ArchivesThen. Now. Always. Artwork
Part 1
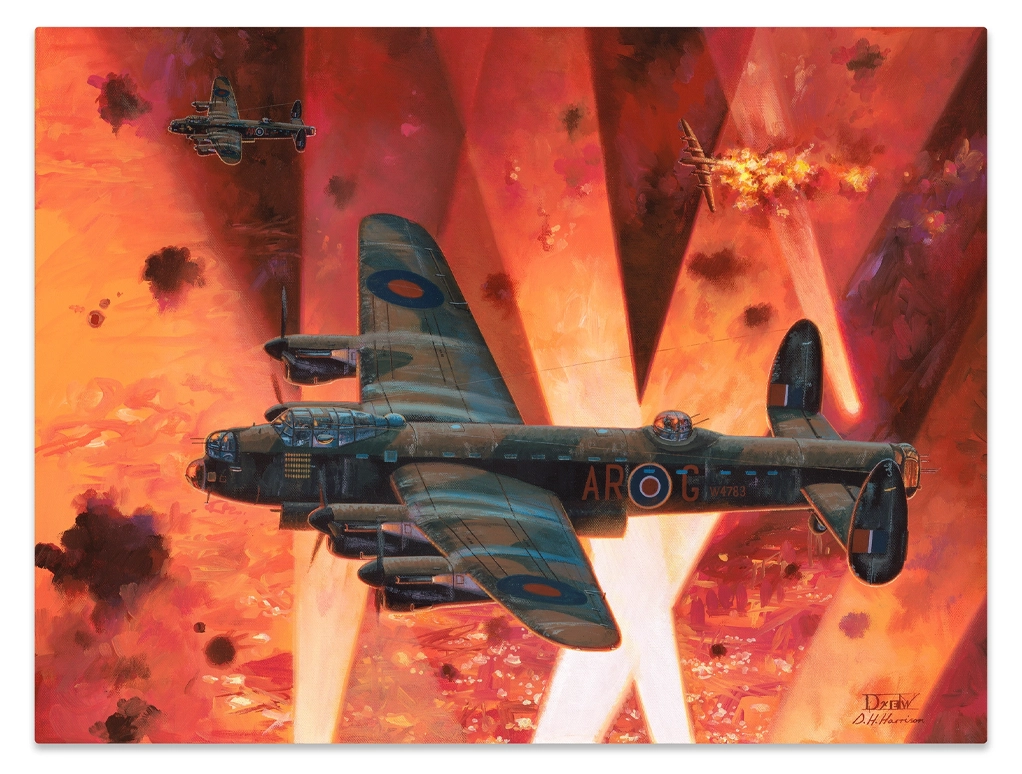
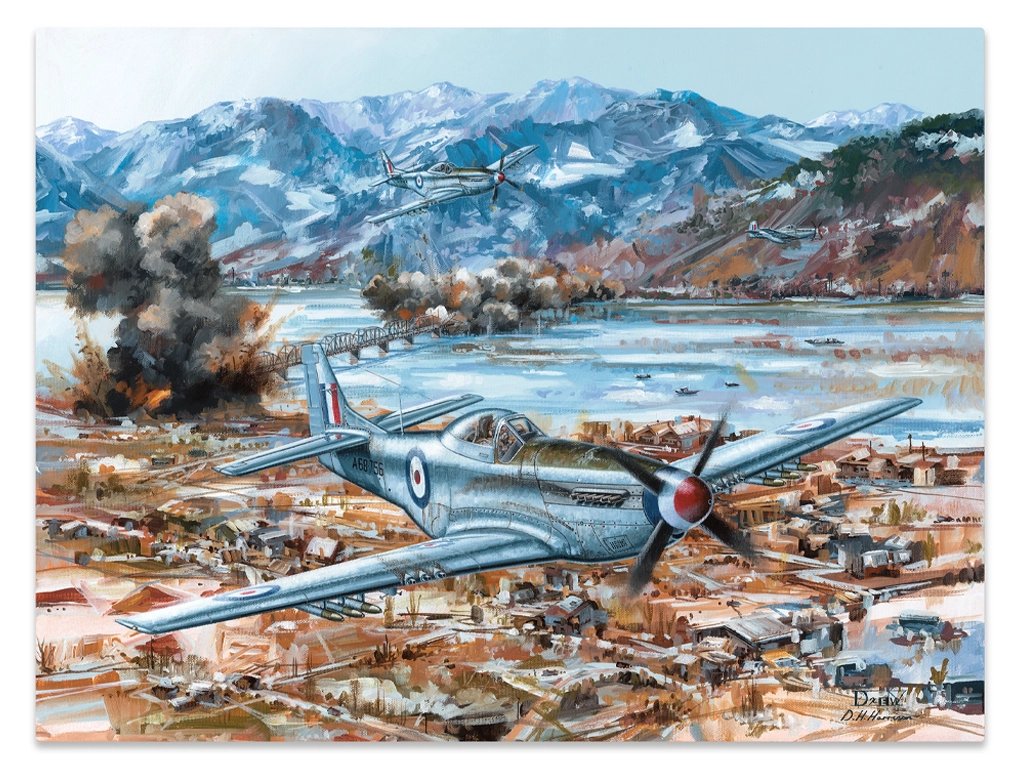
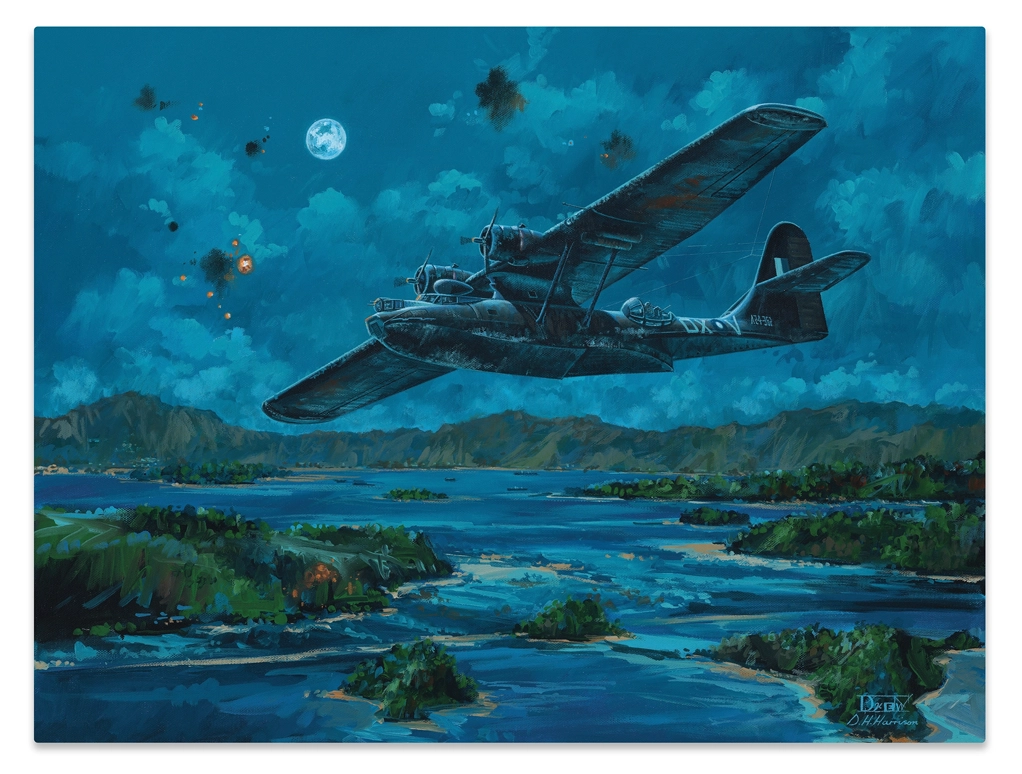
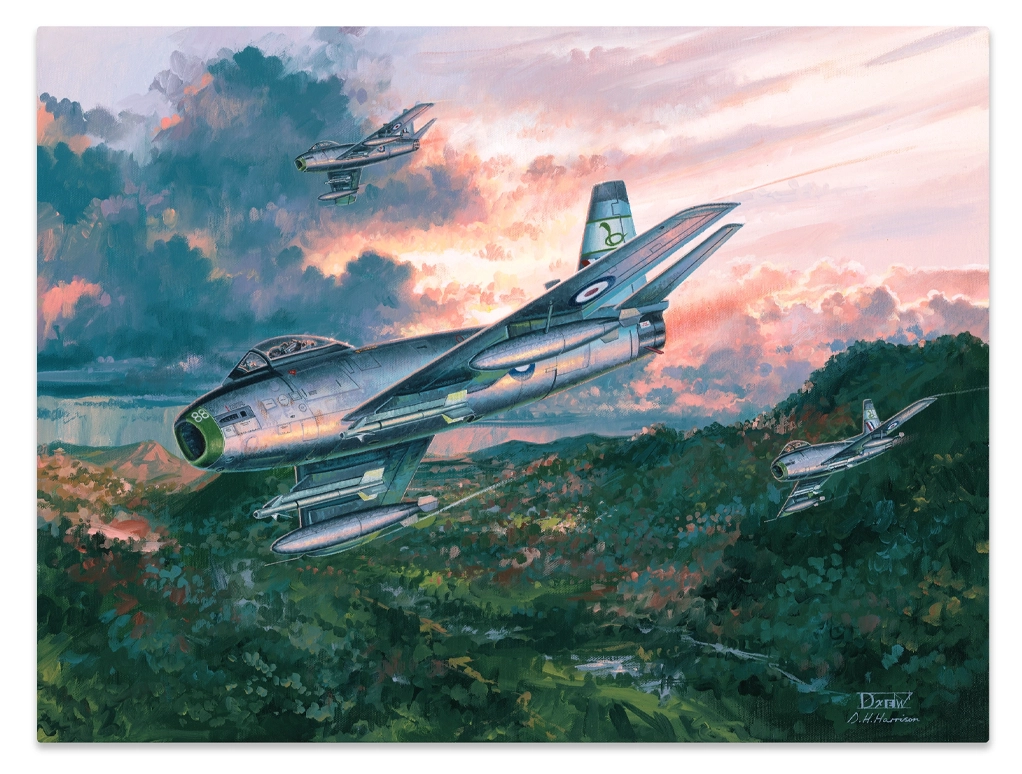
It has been an honour to be engaged by BrandNet for projects during the Royal Australian Air Force centenary year. Our previous collaborations have included artworks commemorating iconic military engagements from The Battle of Lone Pine and The Nek to Combined Arms Contact (Vietnam War) as well as the epic Centenary of First World War Diary Collection. With a background in illustration my artistic journey has traversed the paths of fine and contemporary art. Even so, I have always had an interest in aviation and particularly the stories of Australian aviators during times of war and peace. This has led to several entries in the RAAF’s Heritage Awards including numerous prize placings and works in the permanent collection. It has been immensely pleasing to have five of these paintings reproduced in the Air Force 100 Commemorative Medallion Set and so exciting to have them accessible to the wider public.
However, the opportunity of contributing an artwork for the Centenary of Air Force was something I could not ignore! So where to begin? Quite often commemorative aviation artworks simply place multiple historic aircraft in a posed scene. While impressive it really only engages the true aviation enthusiasts (like me!). Quite early in the development all agreed it was better to create an artwork that could be engaging across the wider public as way of sharing the Air Force centenary with everyone. That simple directive in many ways shifted it away from being a ‘traditional’ aviation art painting. There was no specific design brief although an initial conversation centred around a pilot’s visor as a way of reflecting images of past events and/or aircraft. It was also an historical nod to wartime recruiting posters that often included an aviator looking towards the sky. I soon realised this could not possibly encompass the enormous scope of 100 years! Progressively the idea changed to centre the pilot within a cockpit while flanked by aircraft in the surrounding sky. This proved a really dynamic composition although there became a tipping point between having a balance of aircraft and too many.
It was at this stage three important elements were introduced that ended up driving the overall concept into a new direction. An idea of colour separation developed from the background sky. This was already partitioned into an area of clouds, open sky and then moving up into the upper atmosphere. I simplified that further into sepia tones representing the past and blues for the future. Another element was the introduction of squares or pixels. These were quite literally an interpretation of technology although purposely a way of unifying and adding dimension to a formal layout of aircraft. Thirdly was the overlay design of a hangar and Head-Up-Display graphics. Everything here was just broad strokes working out basic compositions and colours. Details such as helmet types, correct placement of fittings and aircraft were all elements to attend to when the design progressed further.
Part 2
Obviously, it was important to have input from the Royal Australian Air Force although by the same token I was given freedom in the design. Very early on BrandNet sought involvement from the Chief of Air Force, Air Marshal Mel Hupfield, AO, DSC and his staff who provided valuable assistance to guide some of the inclusions that are so important to the fabric of the Air Force. It was never going to be possible to include every single aspect of an organisation so rich in history. Even so the design at this stage was reaching the absolute limits set out by the original constraints. The list of inclusions were now appearing as tack-ons, everything from the RAAF crest, to Centenary logo, airfields, personnel and then the ever expansive list of aircraft. Ultimately this drove a dramatic change in the overall composition and steered the artwork further into a contemporary style of painting.
My initial cue for this change was taking the basic colour separation already in the cloudscape and simplifying into a grid by expanding on the squares and pixels. This takes on a Cubist approach. In this case the cloudscape has been fractured and separated into a form of abstraction. That helped form a really dynamic yet orderly composition with the added benefit of design flexibility. With the switch to a more contemporary composition, the perception of reality could be manipulated and realism was no longer of primary importance. With that in mind, I view these squares as a unifying tapestry representing the interconnection of ideas, people and aircraft. The integration of multiple elements became far easier from this point with a basic narrative flowing from the historical on the left and moving towards the future on the right.
Personnel are the heart and soul of Air Force and while it was important to include a human aspect, aircraft remain a powerful representation. Therefore, while the central pilot remained as a unifying feature I decided to start overlaying different plan views of aircraft. For those who worked with these types there is natural affinity. Each aircraft becomes a symbol of their personal stories as well as for the conflicts and times of peace in which they have flown.
The unique shapes of aircraft should not be underestimated as beautifully elegant forms or patterns. Getting the balance of shapes was really important for the composition although I had to counter this with aircraft either of greatest significance, combat role or popularity. That was probably one of the hardest aspects to get right! Once again it was balancing the expectations of realist objects while seeking out the perfect arrangement of shapes and forms. This is where the digital approach to drafting a concept is far more practical than sketching. It makes it much easier to make alterations, shift shapes and change colours across multiple layers. In these early and rough designs the balances were gradually coming together.
Part 3
The design was really starting to take shape as I managed to integrate many of the seemingly random list of inclusions along with a good number of aircraft into a more cohesive flow. In many ways the evolution of design started to define the scale and proportion of the artwork. While the artwork size was never specified the layout began to take on a cinematic ‘widescreen’ approach. From a practical point of view a singular large format work was not ideal for some of the proposed production outcomes and I decided to split it into three panels as a triptych.This is an approach I have experimented with before in my contemporary art as a way of splitting and reordering a narrative. Most notably I took this to an extreme in a multi-panel and transformative contemporary painting titled Project Icarus. This was a genesis for splitting the centenary artwork into three as it provided a solid progression reflecting the RAAF’s slogan of THEN, NOW, ALWAYS. There is also a sense of grandeur much like a wall mural. While the painting is a singular work the three sections can be isolated and appear as individual panels.
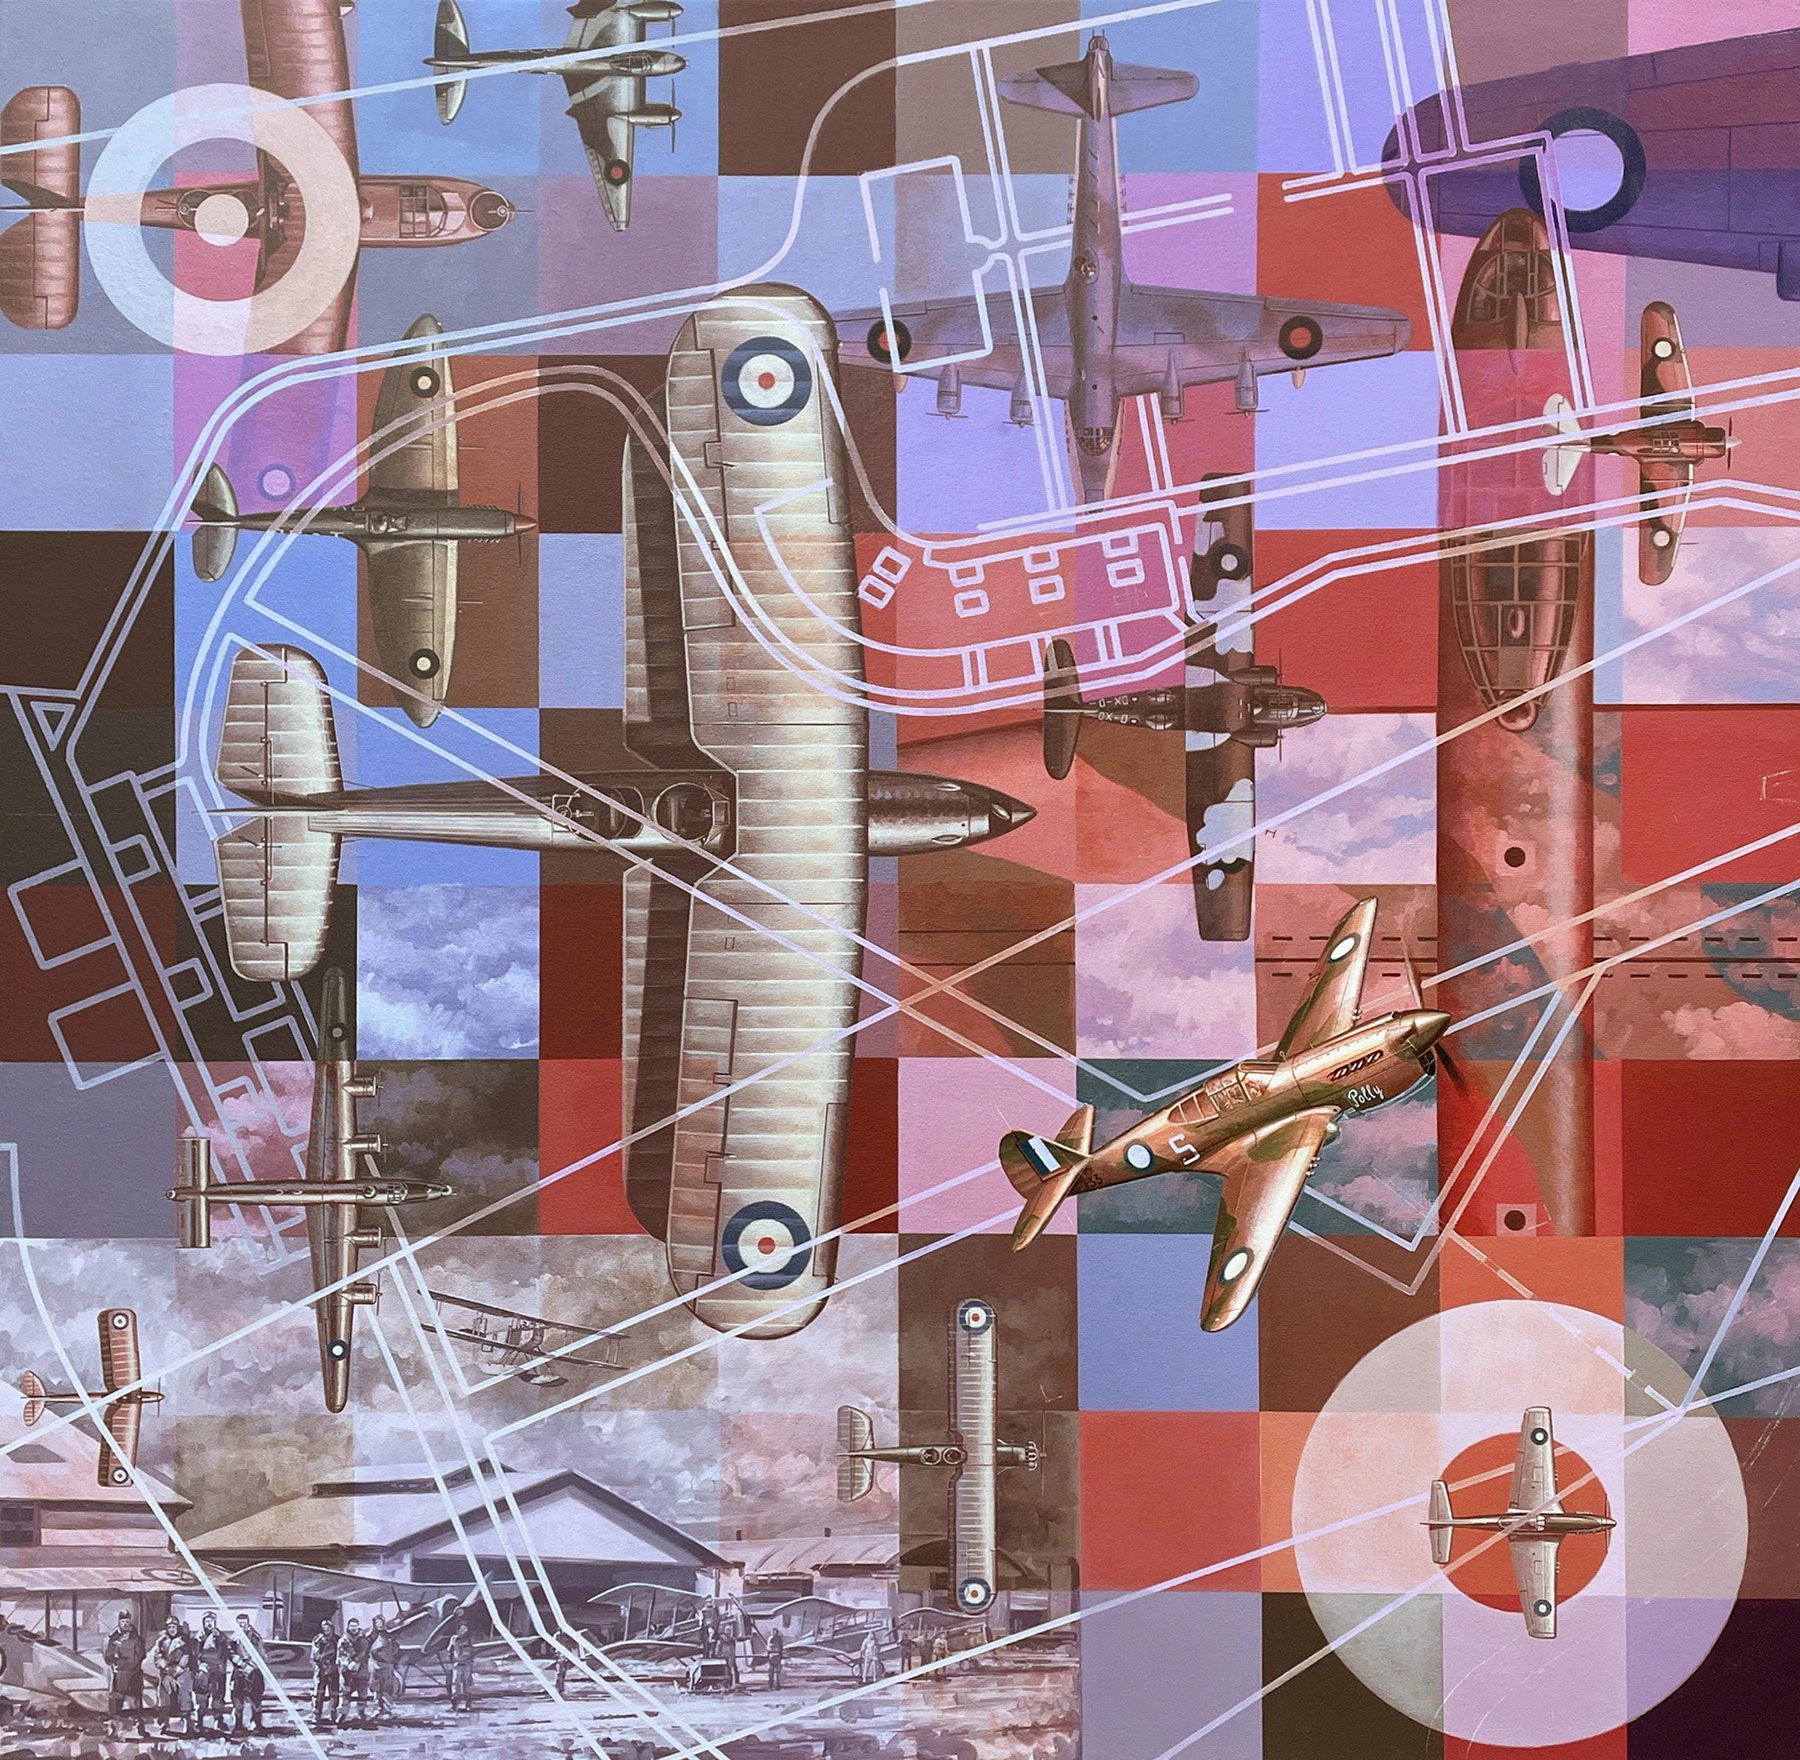
The grid, with pilot and layered aircraft was a bit ‘flat’ and needed an extra dimension to pull it all together. At some point I introduced two F-35s on the far right, represented on a three-dimensional plane, as separation from all the underlying layers. The pilot seemingly looks toward the sky and where the aircraft are flying. To tie these aircraft to the far left I extended a couple of trajectory lines. That became the next big compositional shift to tie in the overlaying graphical elements. My cue was the Point Cook historical scene that I shifted to bottom left. The lines that overlay the far left panel are actually a distorted map of the original Point Cook plan, twisted on the diagonal to match the F-35 trajectory line! Moving to the right of picture the lines morph into modern graphics from a Head-Up-Display and also parts of a radar dish schematic. On the same graphical level I introduced some other key elements, including a 100, various roundels and the Southern Cross, all important aspects of RAAF heritage.
The final balancing act was eliminating one of the F-35s and integrating an F-111 and P-51 spread across the three panels. These three aircraft are significant to RAAF history and are also hugely popular. At the very last moment before painting, the decision was made to swap the P-51 for a P-40 Kittyhawk. It is arguably a far more important aircraft to our history having flown in greater numbers and pivotal during the dark days of the Pacific and North African campaigns in 1942. All of the early design stages began in October of 2020, however, due to various reasons there was a delay in pushing the project forward. As a result I did not revisit most of the above concepts until early February 2021 by which time there was just over a month to reach the official Centenary of Air Force on 31st March! That was already a tight deadline although now the scale had been set at an ambitious three 1m x 1m panels for a design concept that had evolved into a highly complex and detailed artwork. No pressure. Some other aspects changed throughout the painting stage but more on that later.
Part 4
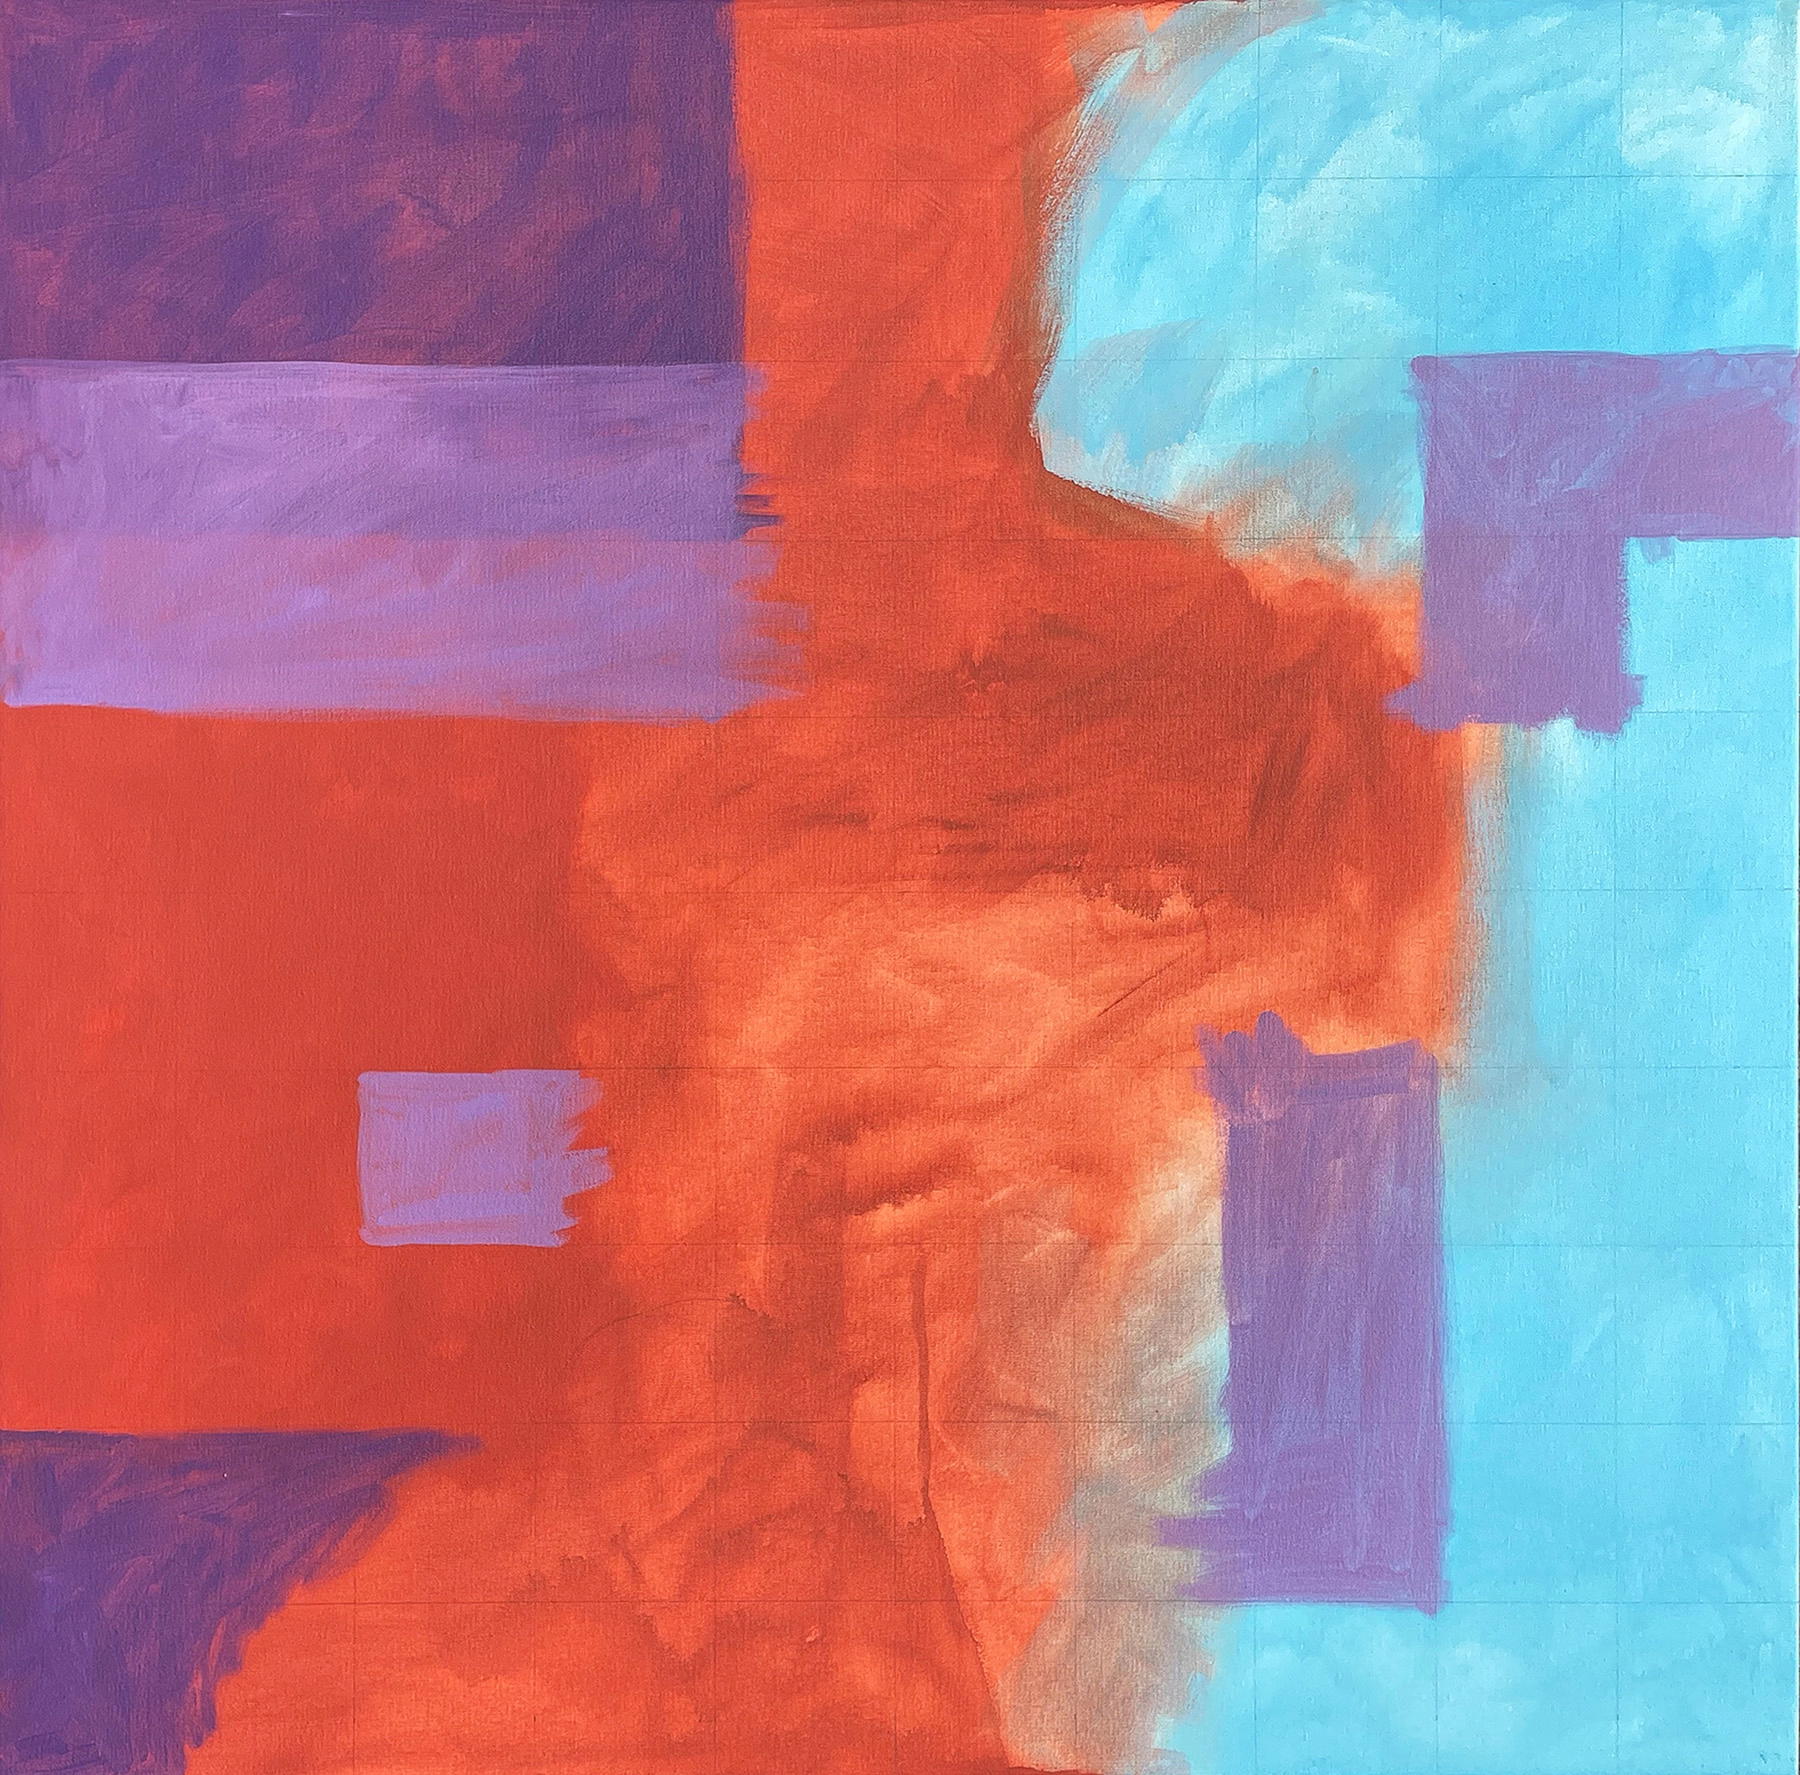
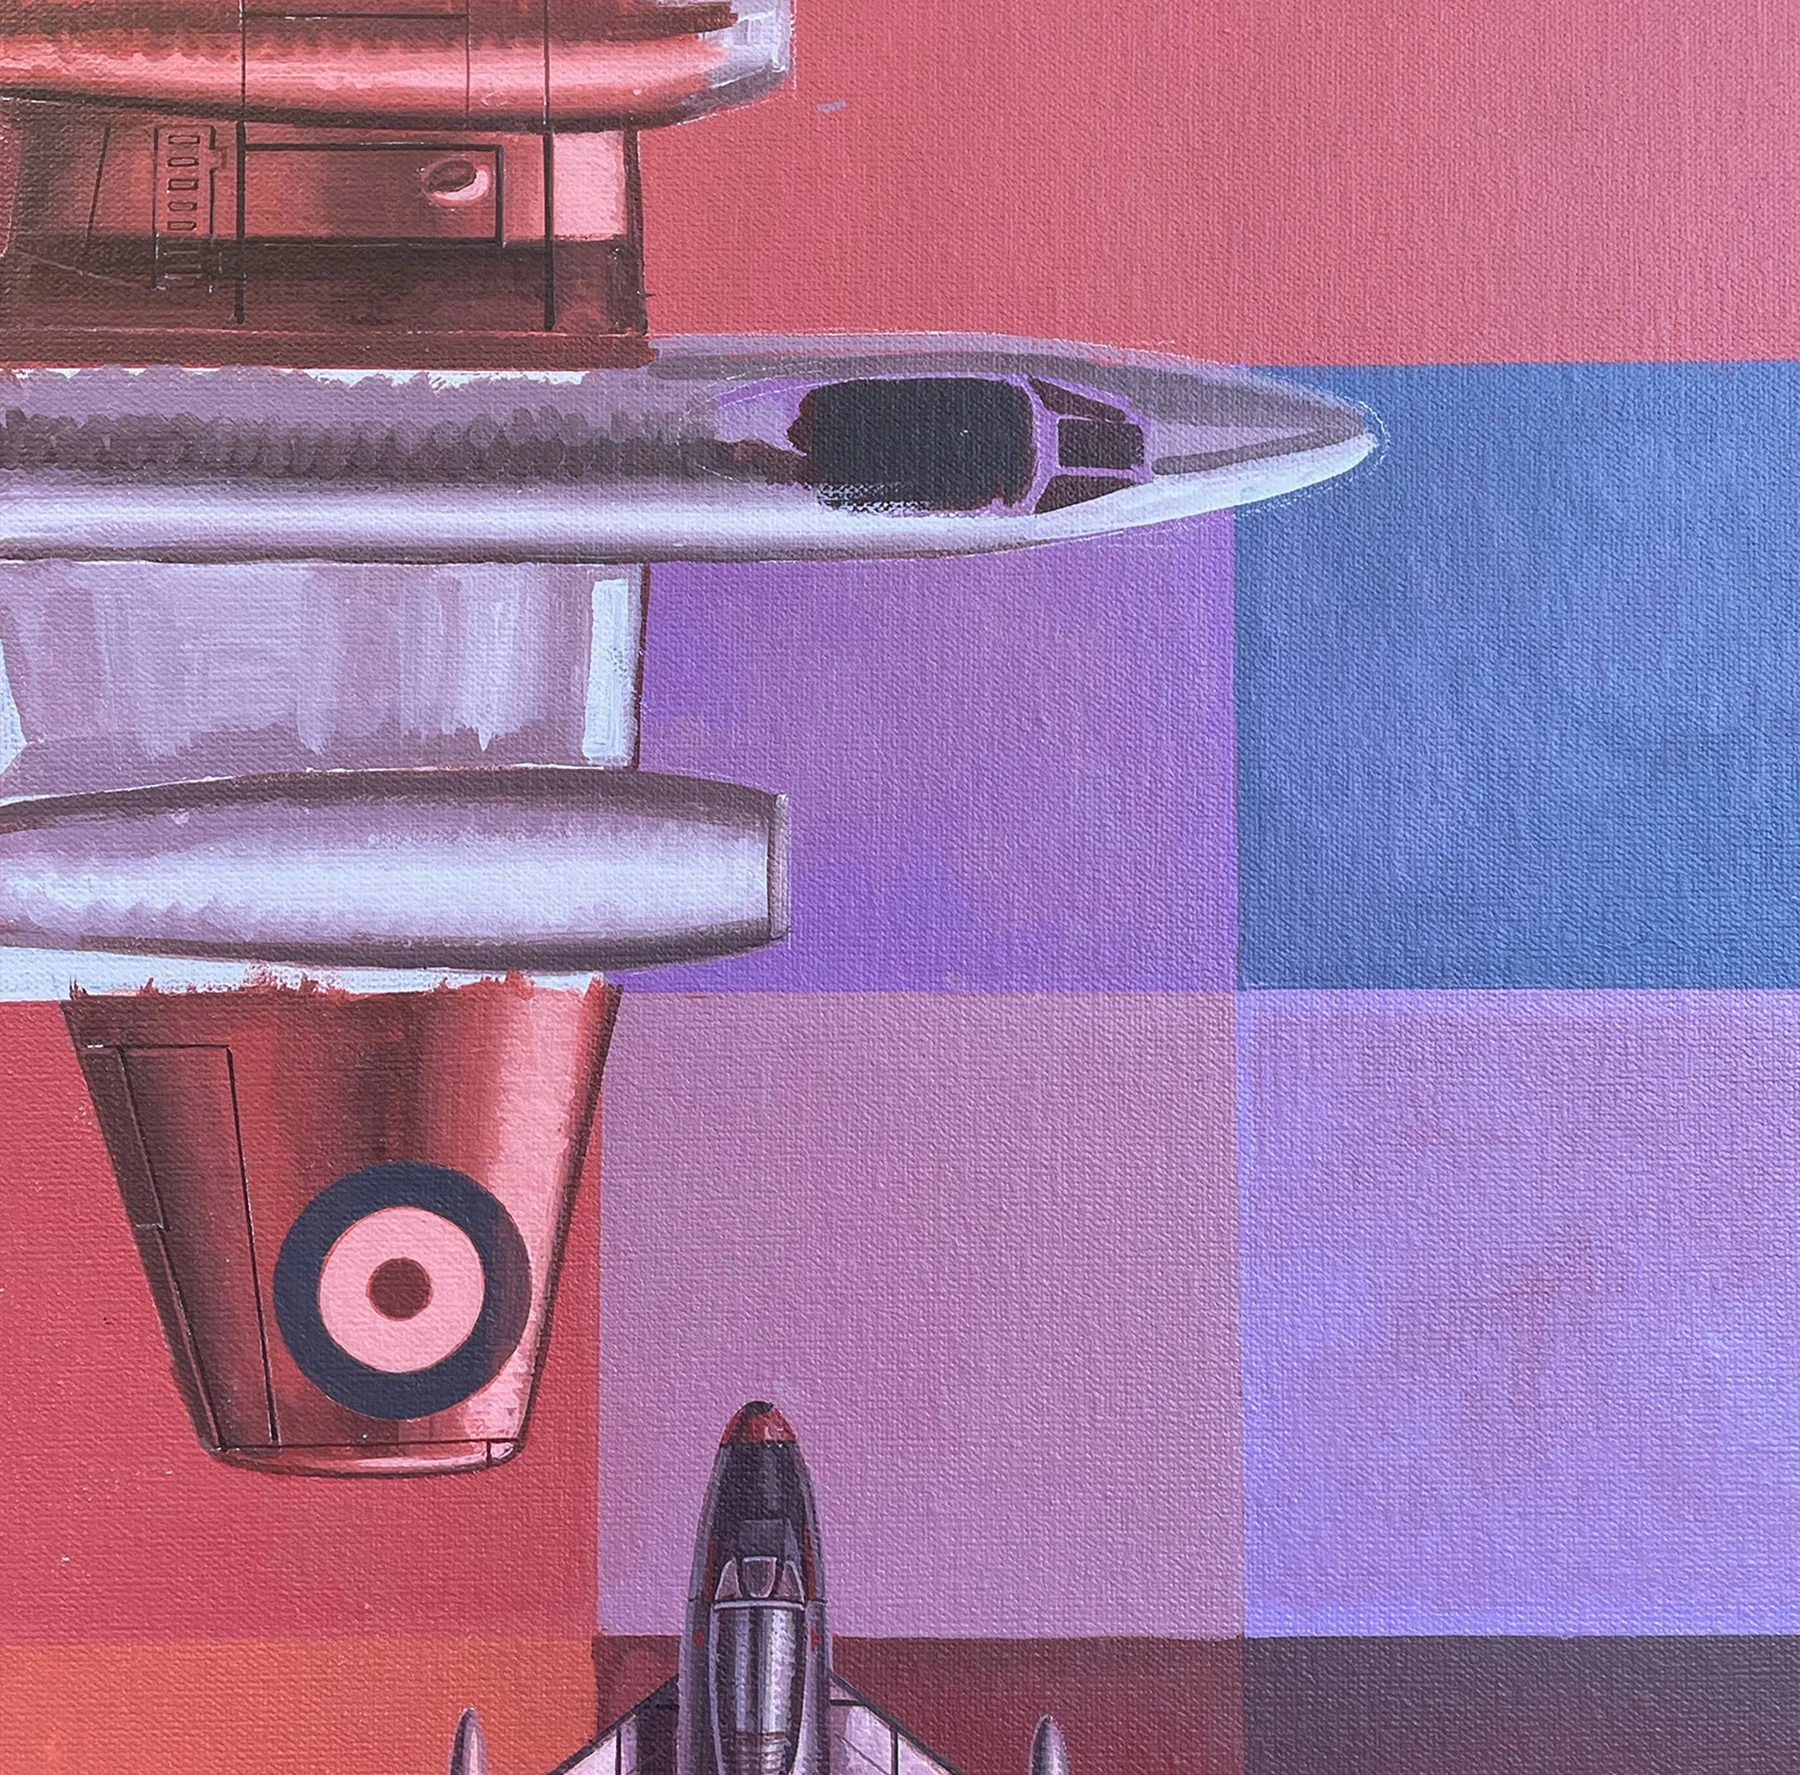
Although the major design elements were resolved the shift to painting involved making numerous micro-decisions on the go as well as complex colour mixing. Every painting involves a different mindset and I usually have no specific idea of how or where to start at the beginning of each new artwork. Additionally, my last traditional aviation painting was The Northern Approaches way back in 2018, even though I had done some small pencil sketches of aircraft for the Australia in the Great War Diary Set during the interim! Getting back into that form of painting was also a completely different approach to my recent Labyrinth expressionist works I had completed.
I have to mention the great work done by South Australian company Pimlott Framing for providing top notch stretched canvases in a very short amount of time. Even so, delivery was staggered so I only had the single canvas to begin with. This prompted my start point as the centre panel. My reasoning was somewhat fatalist thinking that if I didn’t make the deadline there would be at least one work that summed up the RAAF’s 100 years! From a practical standpoint it included a spread of colours that would appear across the other two panels. So, in many ways, trial by fire! The numbers game began. By February 13th I had painted down some basic colour and divided up the grid on the first canvas. As a matter of interest it is a lesson in perfect symmetry as each panel is formed on a grid of 10 x 10 each measuring 10cm x 10cm equating to 100 squares! I had to start factoring in time for varnishing and artwork scanning at the tail end of the project which put a tentative deadline at around mid March with approximately ten days per panel. That worked out to painting ten squares per day on top of everything else. Seemed like a simple task although each square is virtually a different colour and the very nature of the work made it too impractical to use masking or stencilling techniques. That meant individually painting the squares, similar to a ‘paint by numbers’ approach.
After painting in a couple of aircraft it gave me an indication of pace, although it was impossible to gauge the level of detail required at this stage. Because these smaller aircraft ended up as background information it was completely unnecessary to render to a high level as most are washed out when the primary focal elements are added. Admittedly the Meteor is one of my favourite early-postwar aircraft, and one I have painted before in Beyond the 38th Parallel, so it was a good starting point. Painting those early post-WWII jets is always a joy. Most were bare metal/silver and from an artistic point of view provide a fantastic high contrast finish. I could also not ignore depicting another 77 Squadron RAAF aircraft, the only Australian unit to fly these big jets in action during the Korean War.
Then. Now. Always. Artwork
Part 5
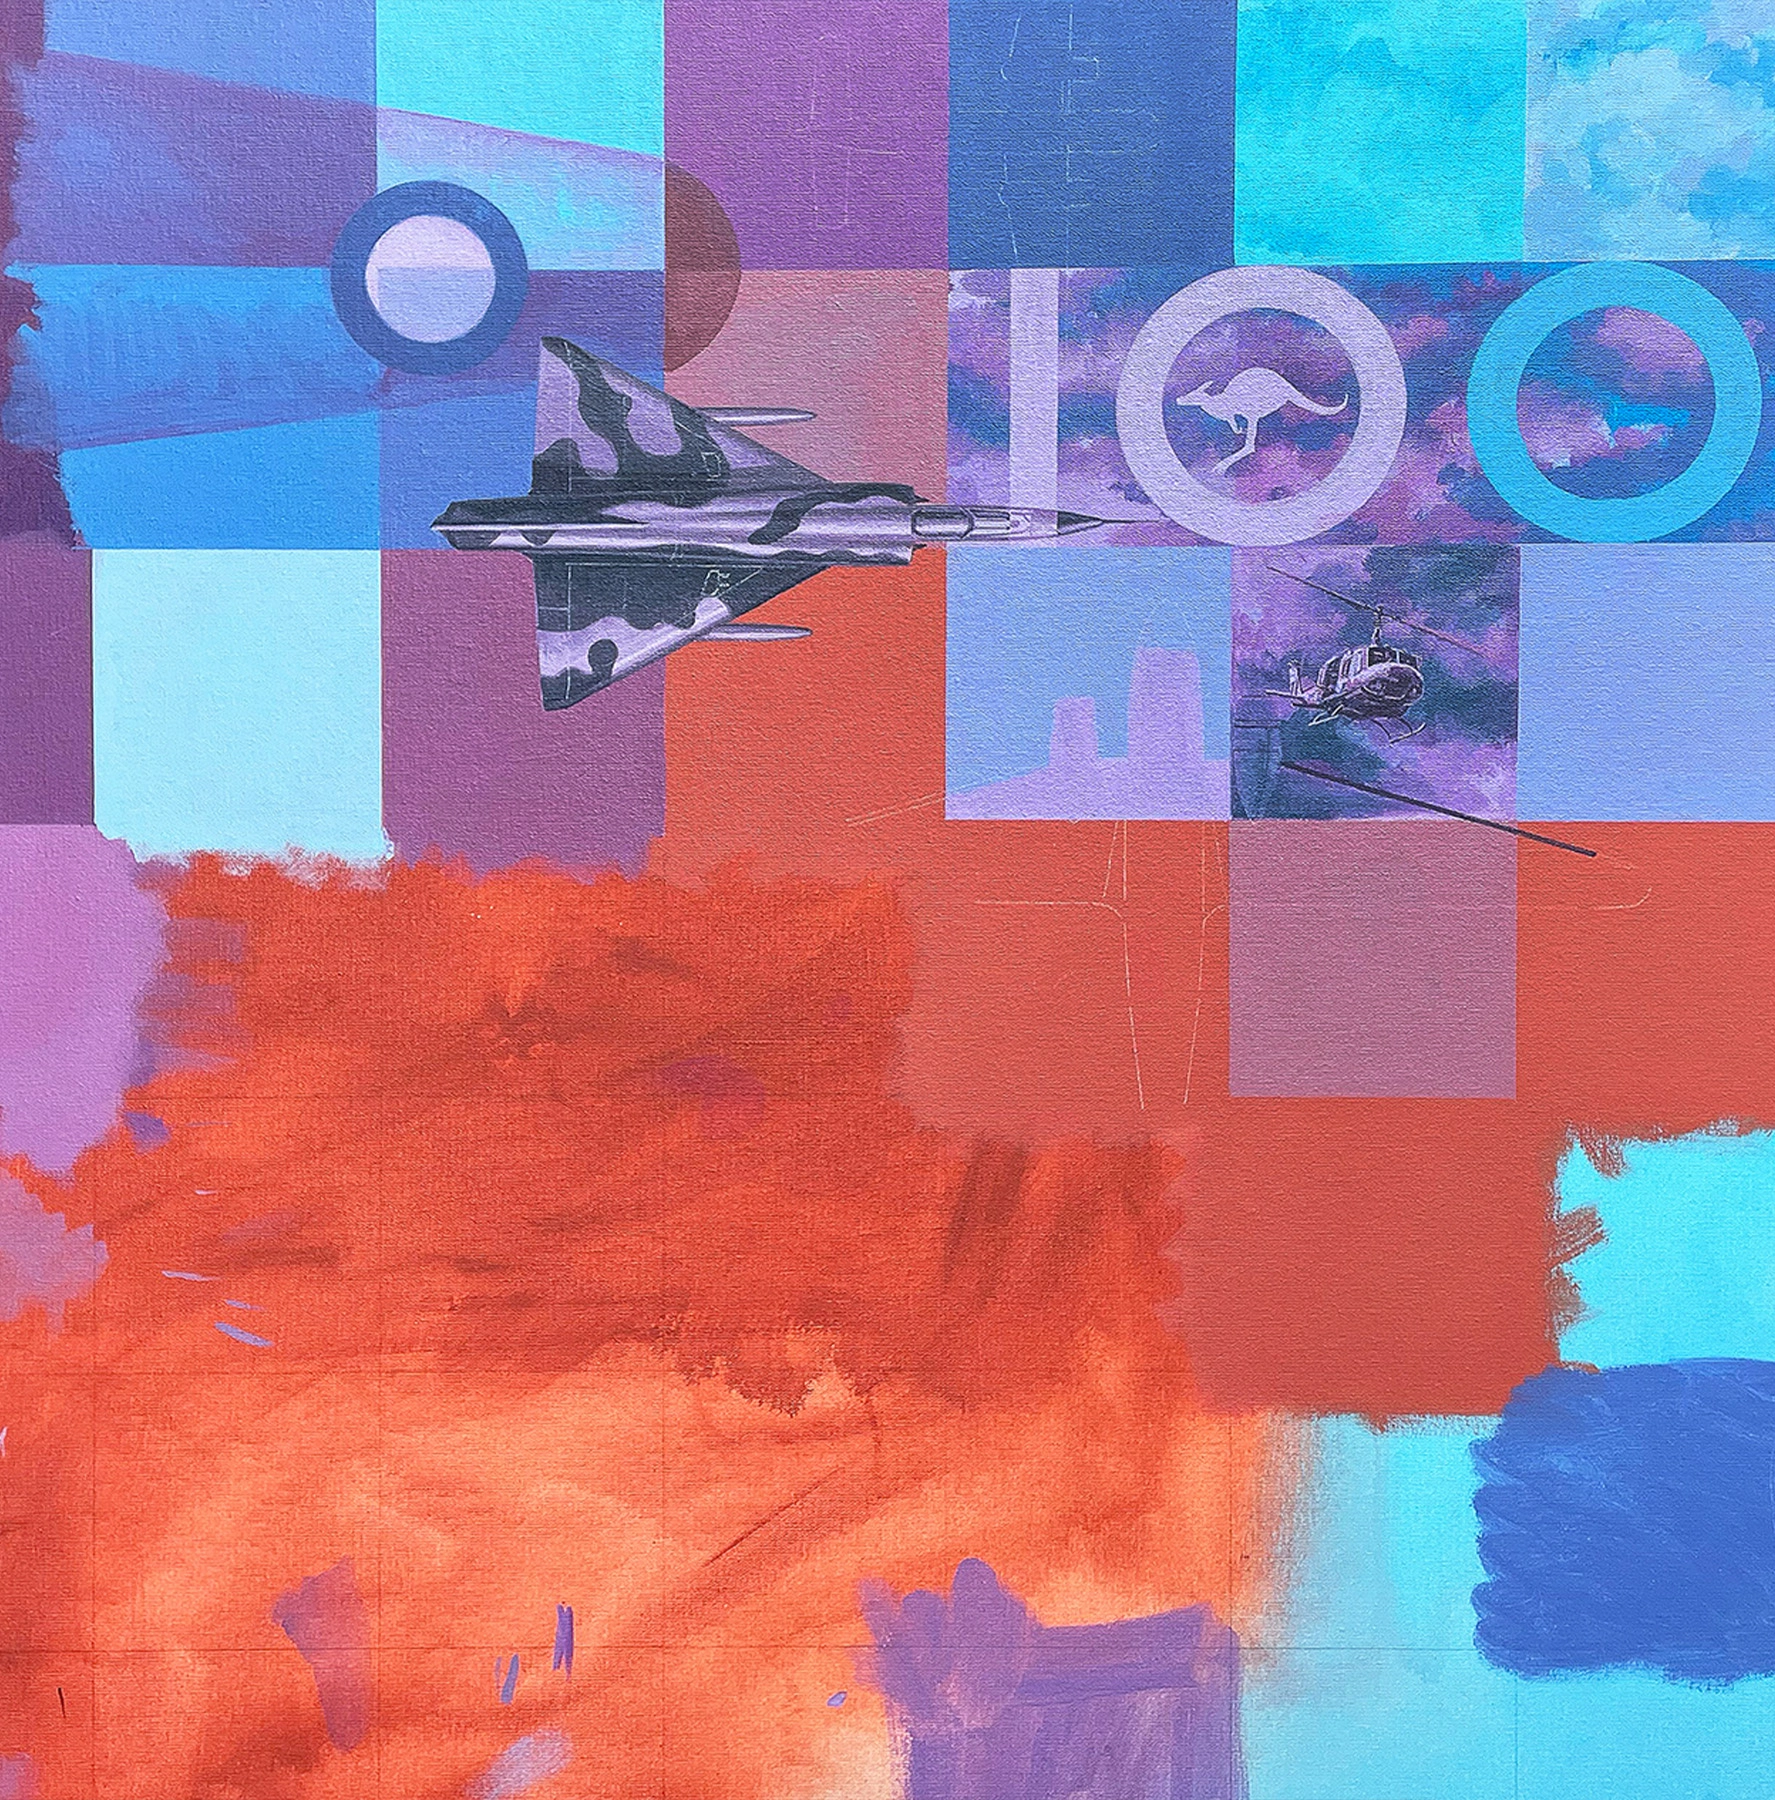
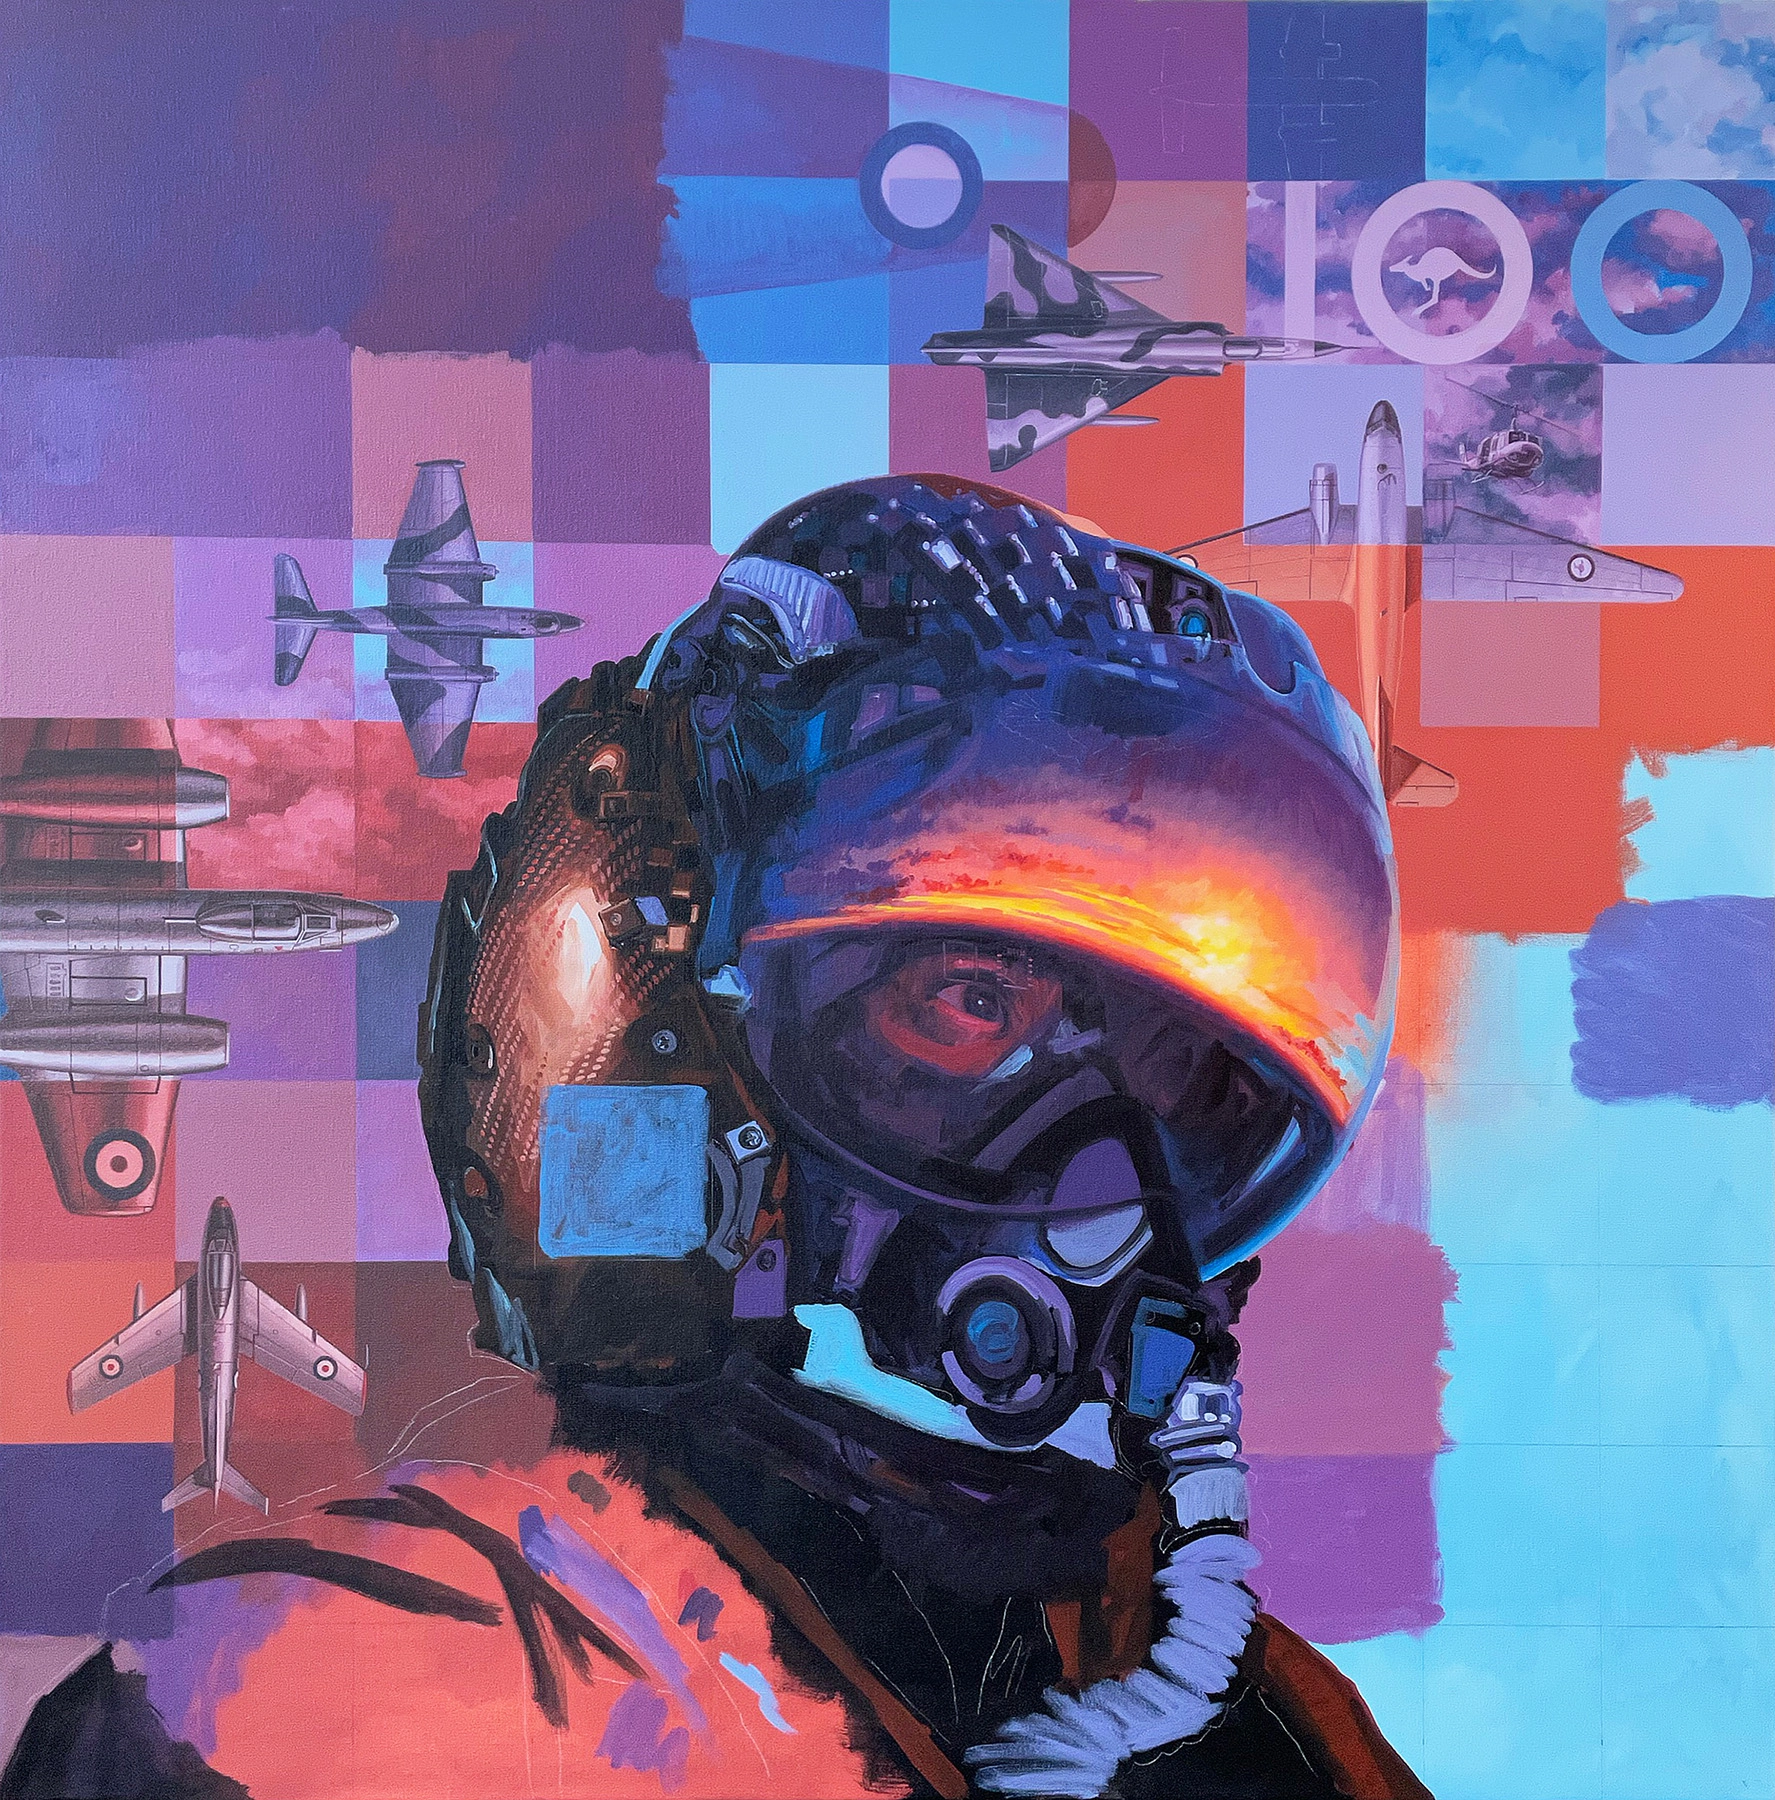
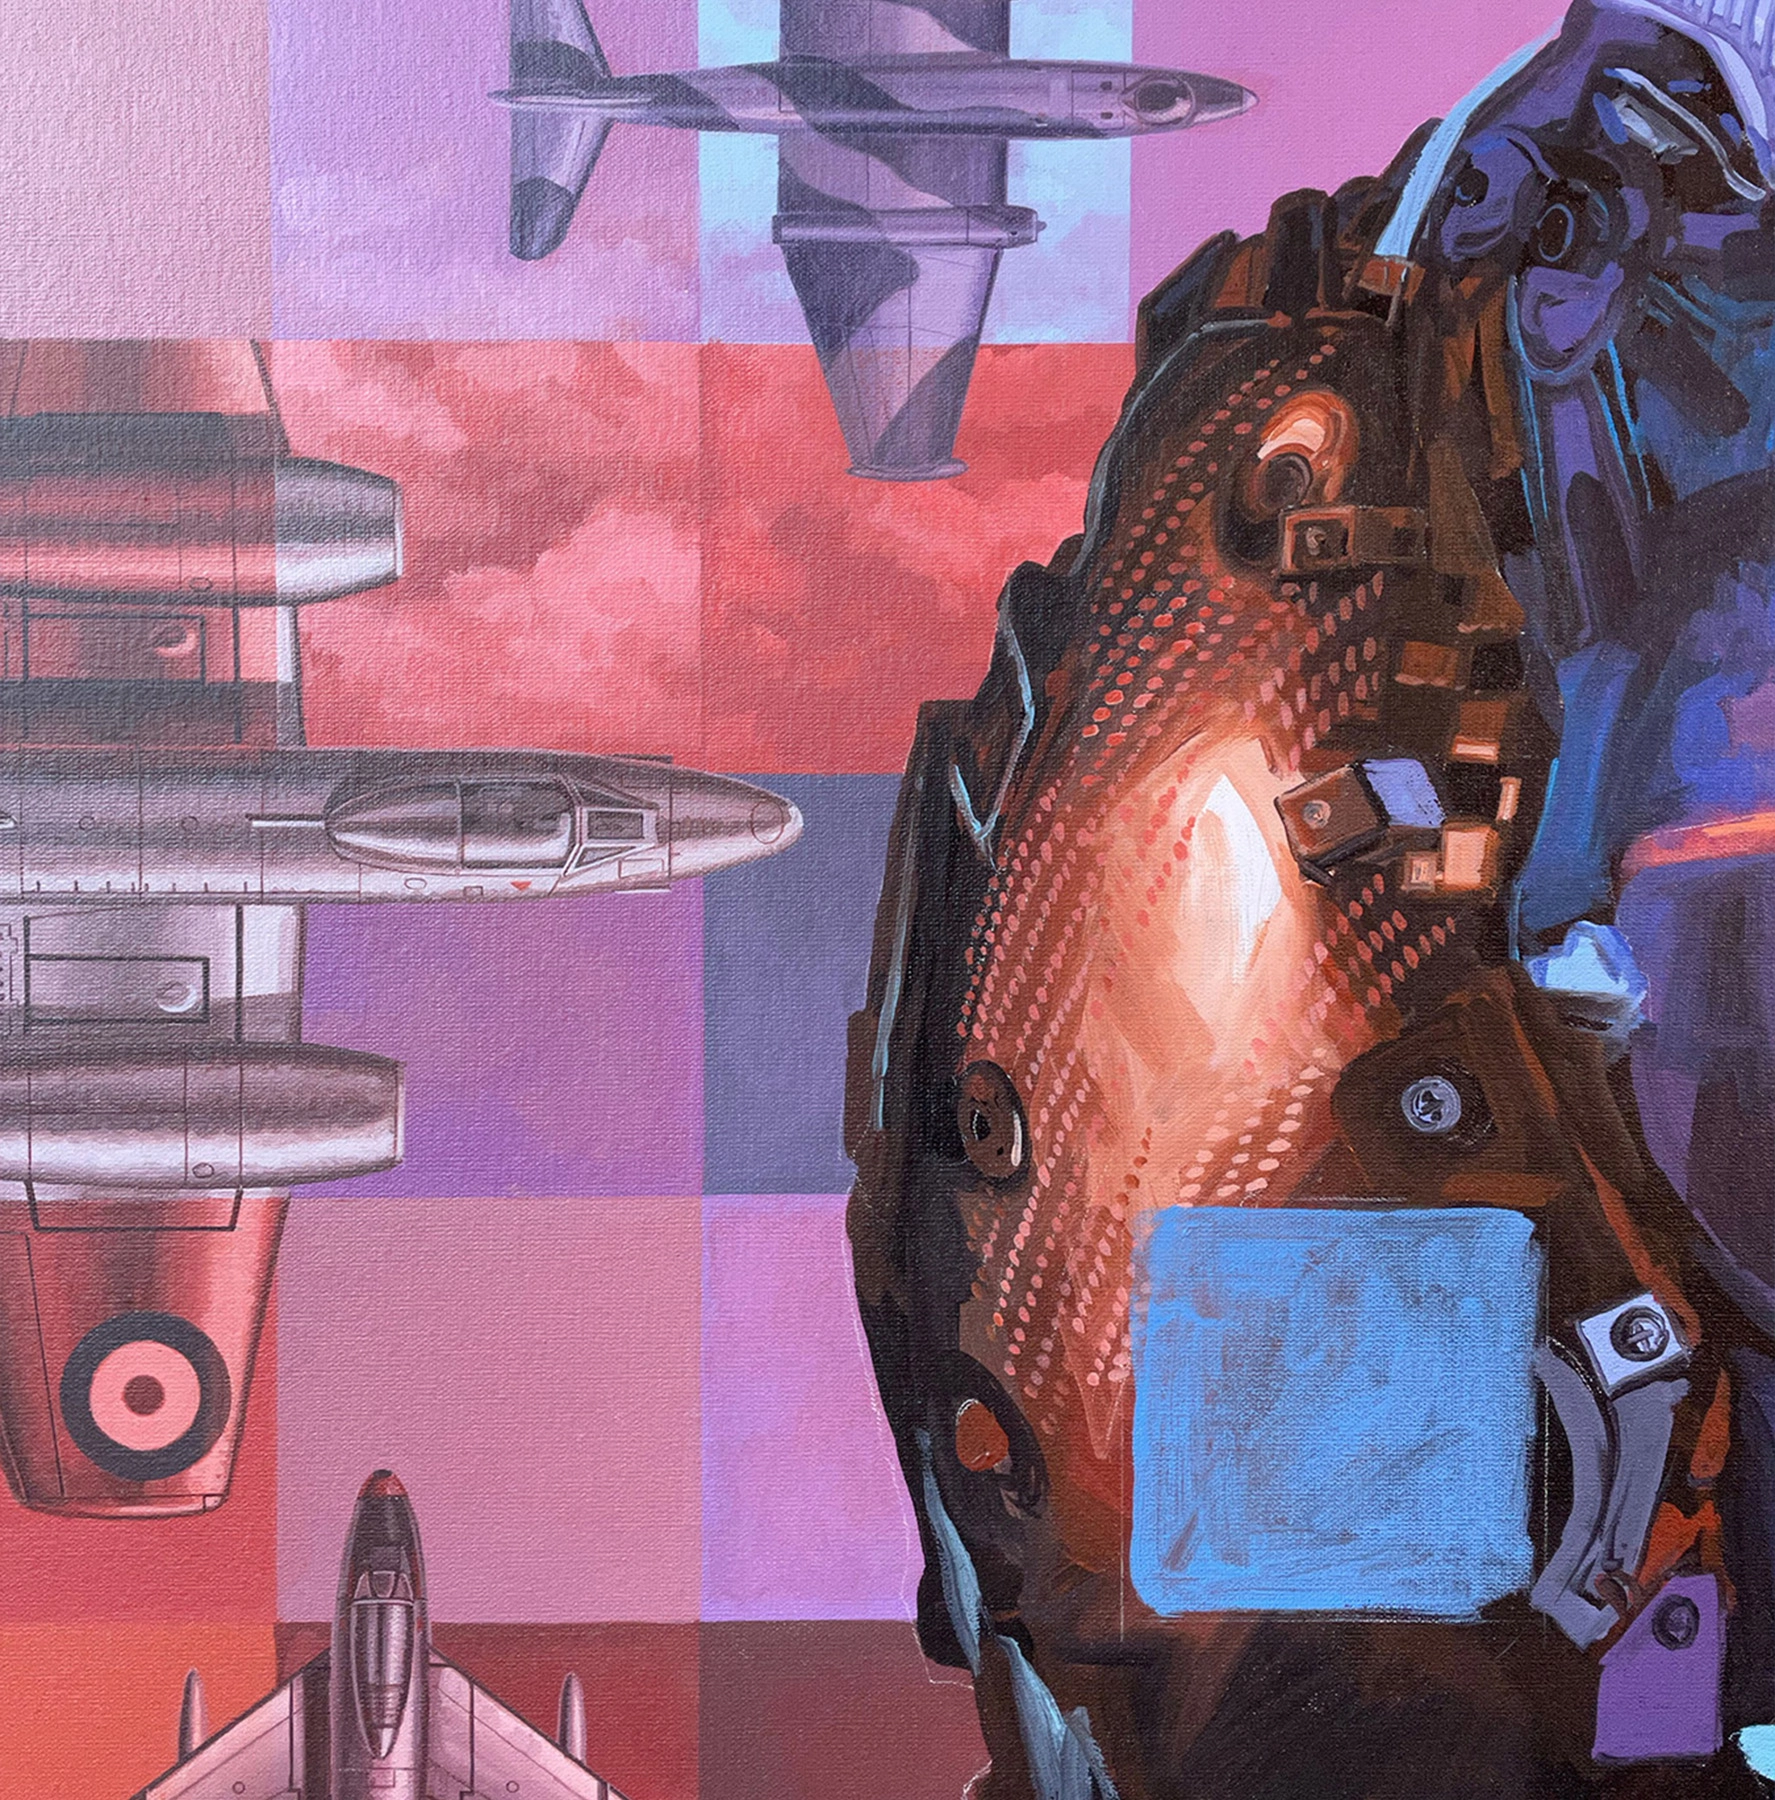
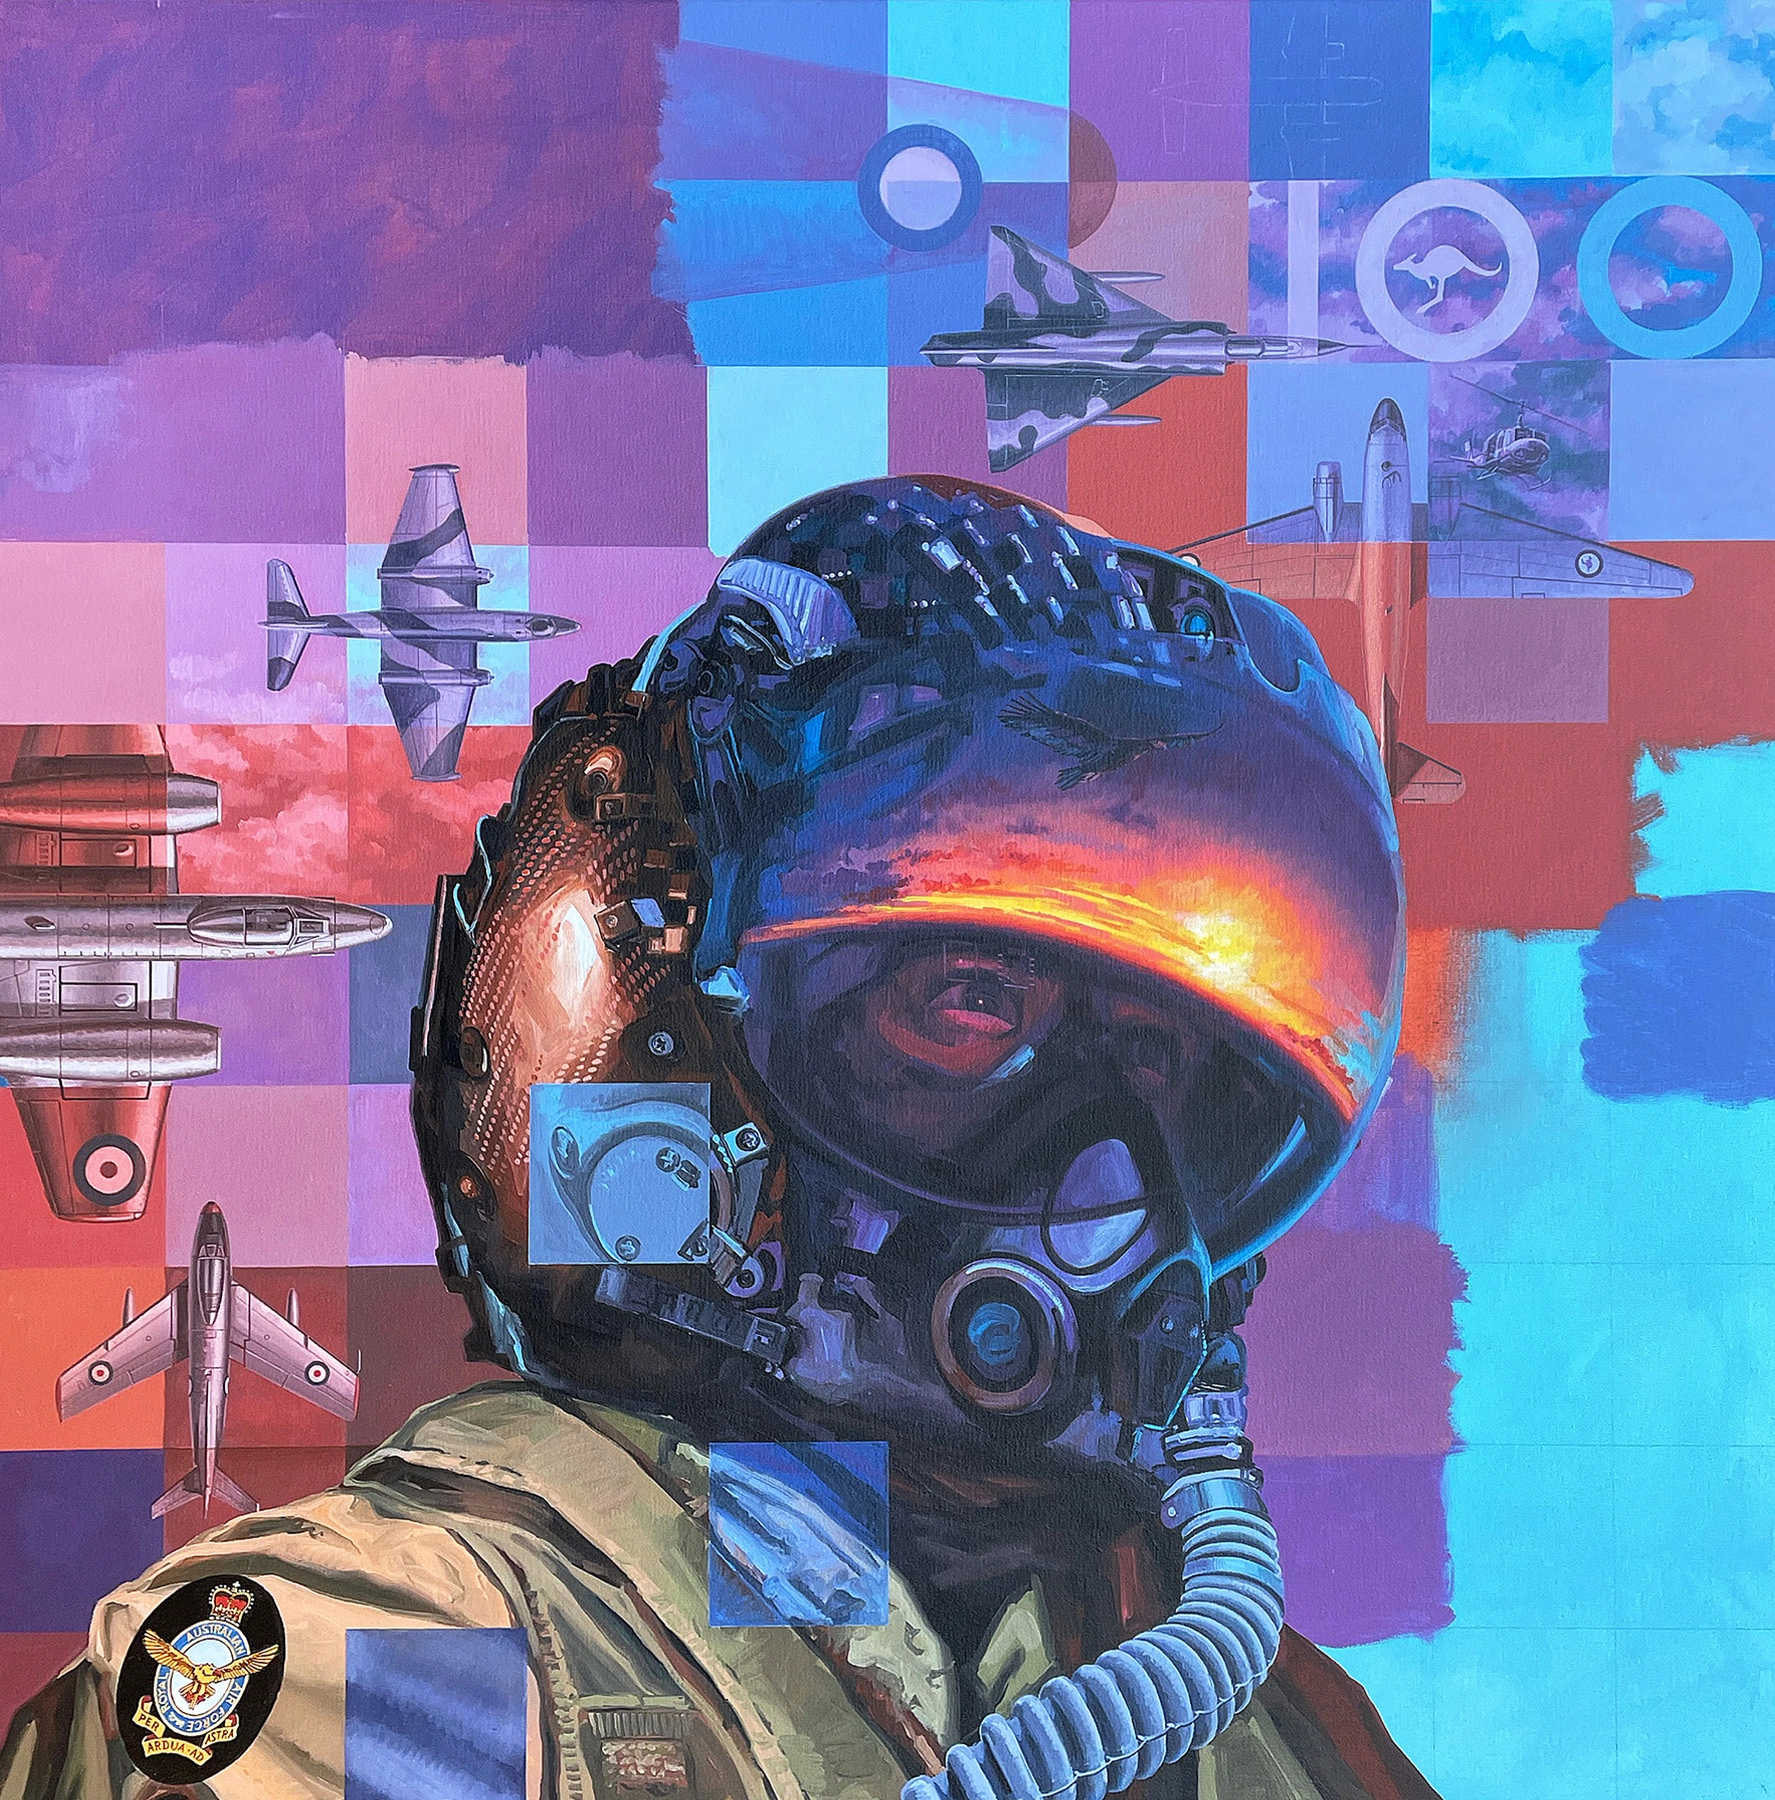
Am happy to admit I was panicking thinking about the slow progress of aircraft and squares. Almost halfway through my self-imposed schedule of ten days and there was only a Meteor, Sabre, Canberra, Iroquois and DC-3 to show for it. Crunching numbers again, this was only five aircraft out of forty across the entire painting. Aghhh! A trick I often use when reaching a painting stumbling block is to change direction. This was the perfect time to introduce the pilot. As one of the primary elements it was going to help provide a focal point and the scale would give me an enormous sense of achievement. Never underestimate the power of motivation when painting! It may seem a complex part of the artwork but in reality the style is far looser and is quicker to paint than the individual aircraft.
Although it is a realist element the colour palette has been heightened and actually draws on the tonal qualities either side of the composition. The flying outfit and left side of the helmet are defined by the browns and sepias relating to the heritage and on the right are blues and purples of the future. Many of the shapes and patterns within the helmet form their own unique little points of interest, although I am particularly pleased with the area across the visor crown. These have the appearance of stars in the night sky and provide a direct link to the Southern Cross and satellite in panel three.
I tried several different forms of skyscape reflected in the helmet and the general consensus was to go with a sunrise. The vibrant oranges cut through and give a powerful focus across the triptych and there’s a touch of poetry. As someone suggested “the dawning of a new age”. All up the helmet took two days to complete and provided the lift and confidence required during the early stages of painting. It was also a nice change of pace to tackle a sunset, eagle and several other forms that are different to aircraft. Although the RAAF crest as a shoulder patch proved problematic and not an easy graphic to replicate in Acrylic paint…..more on that later.
Part 6
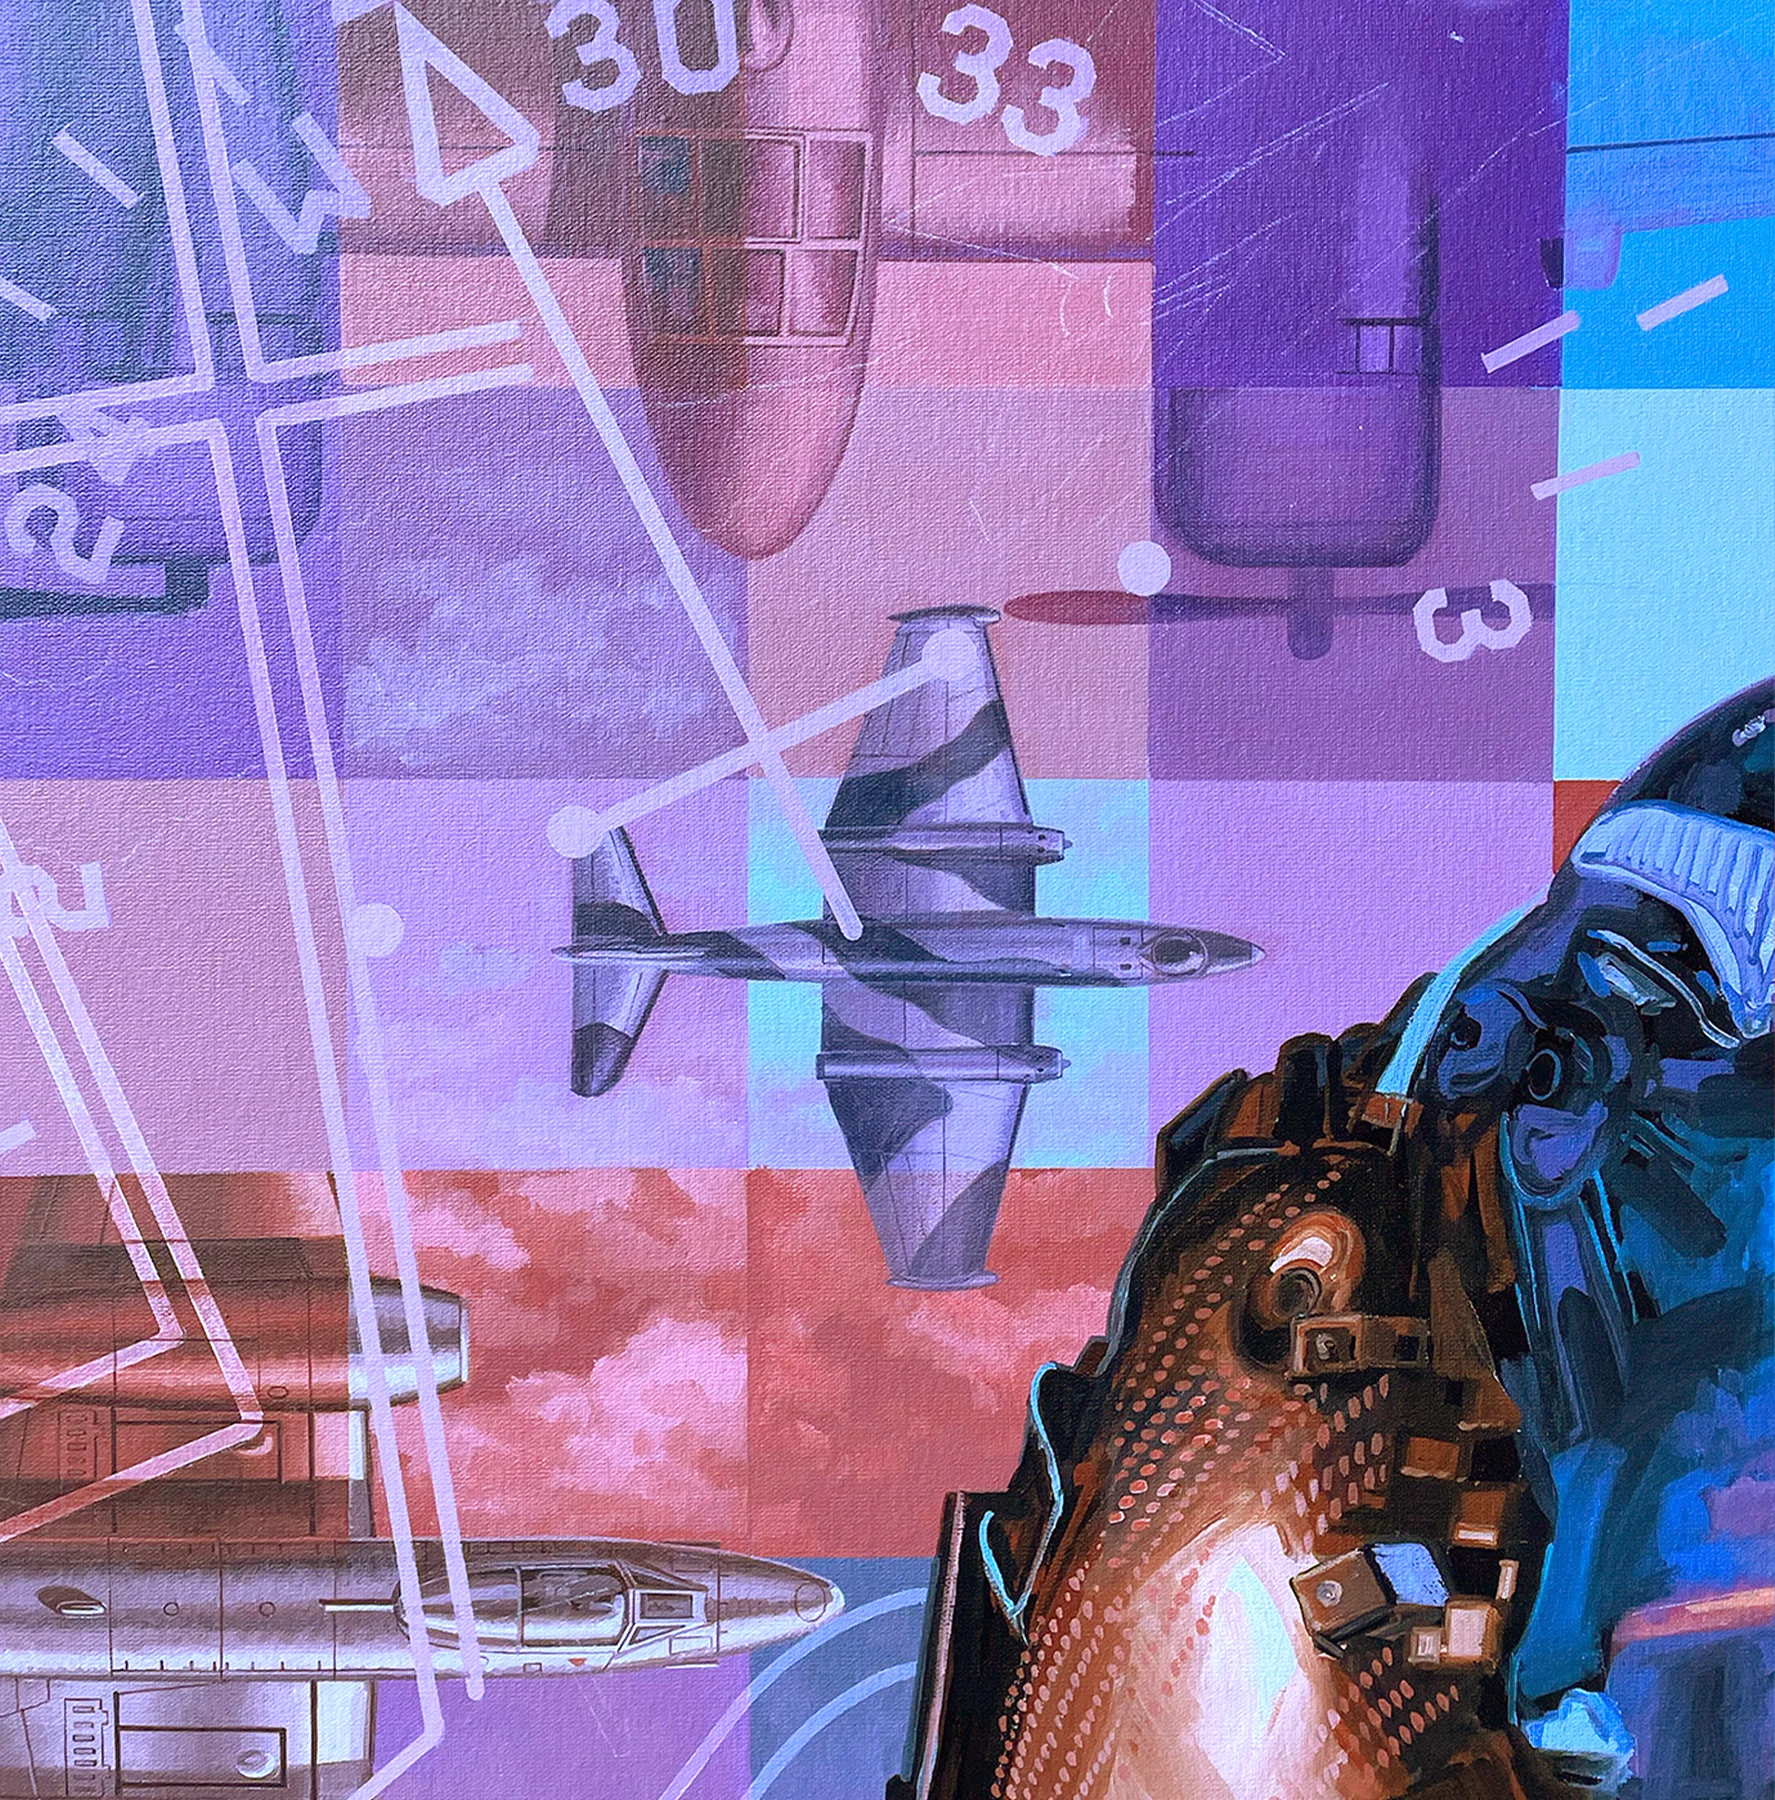
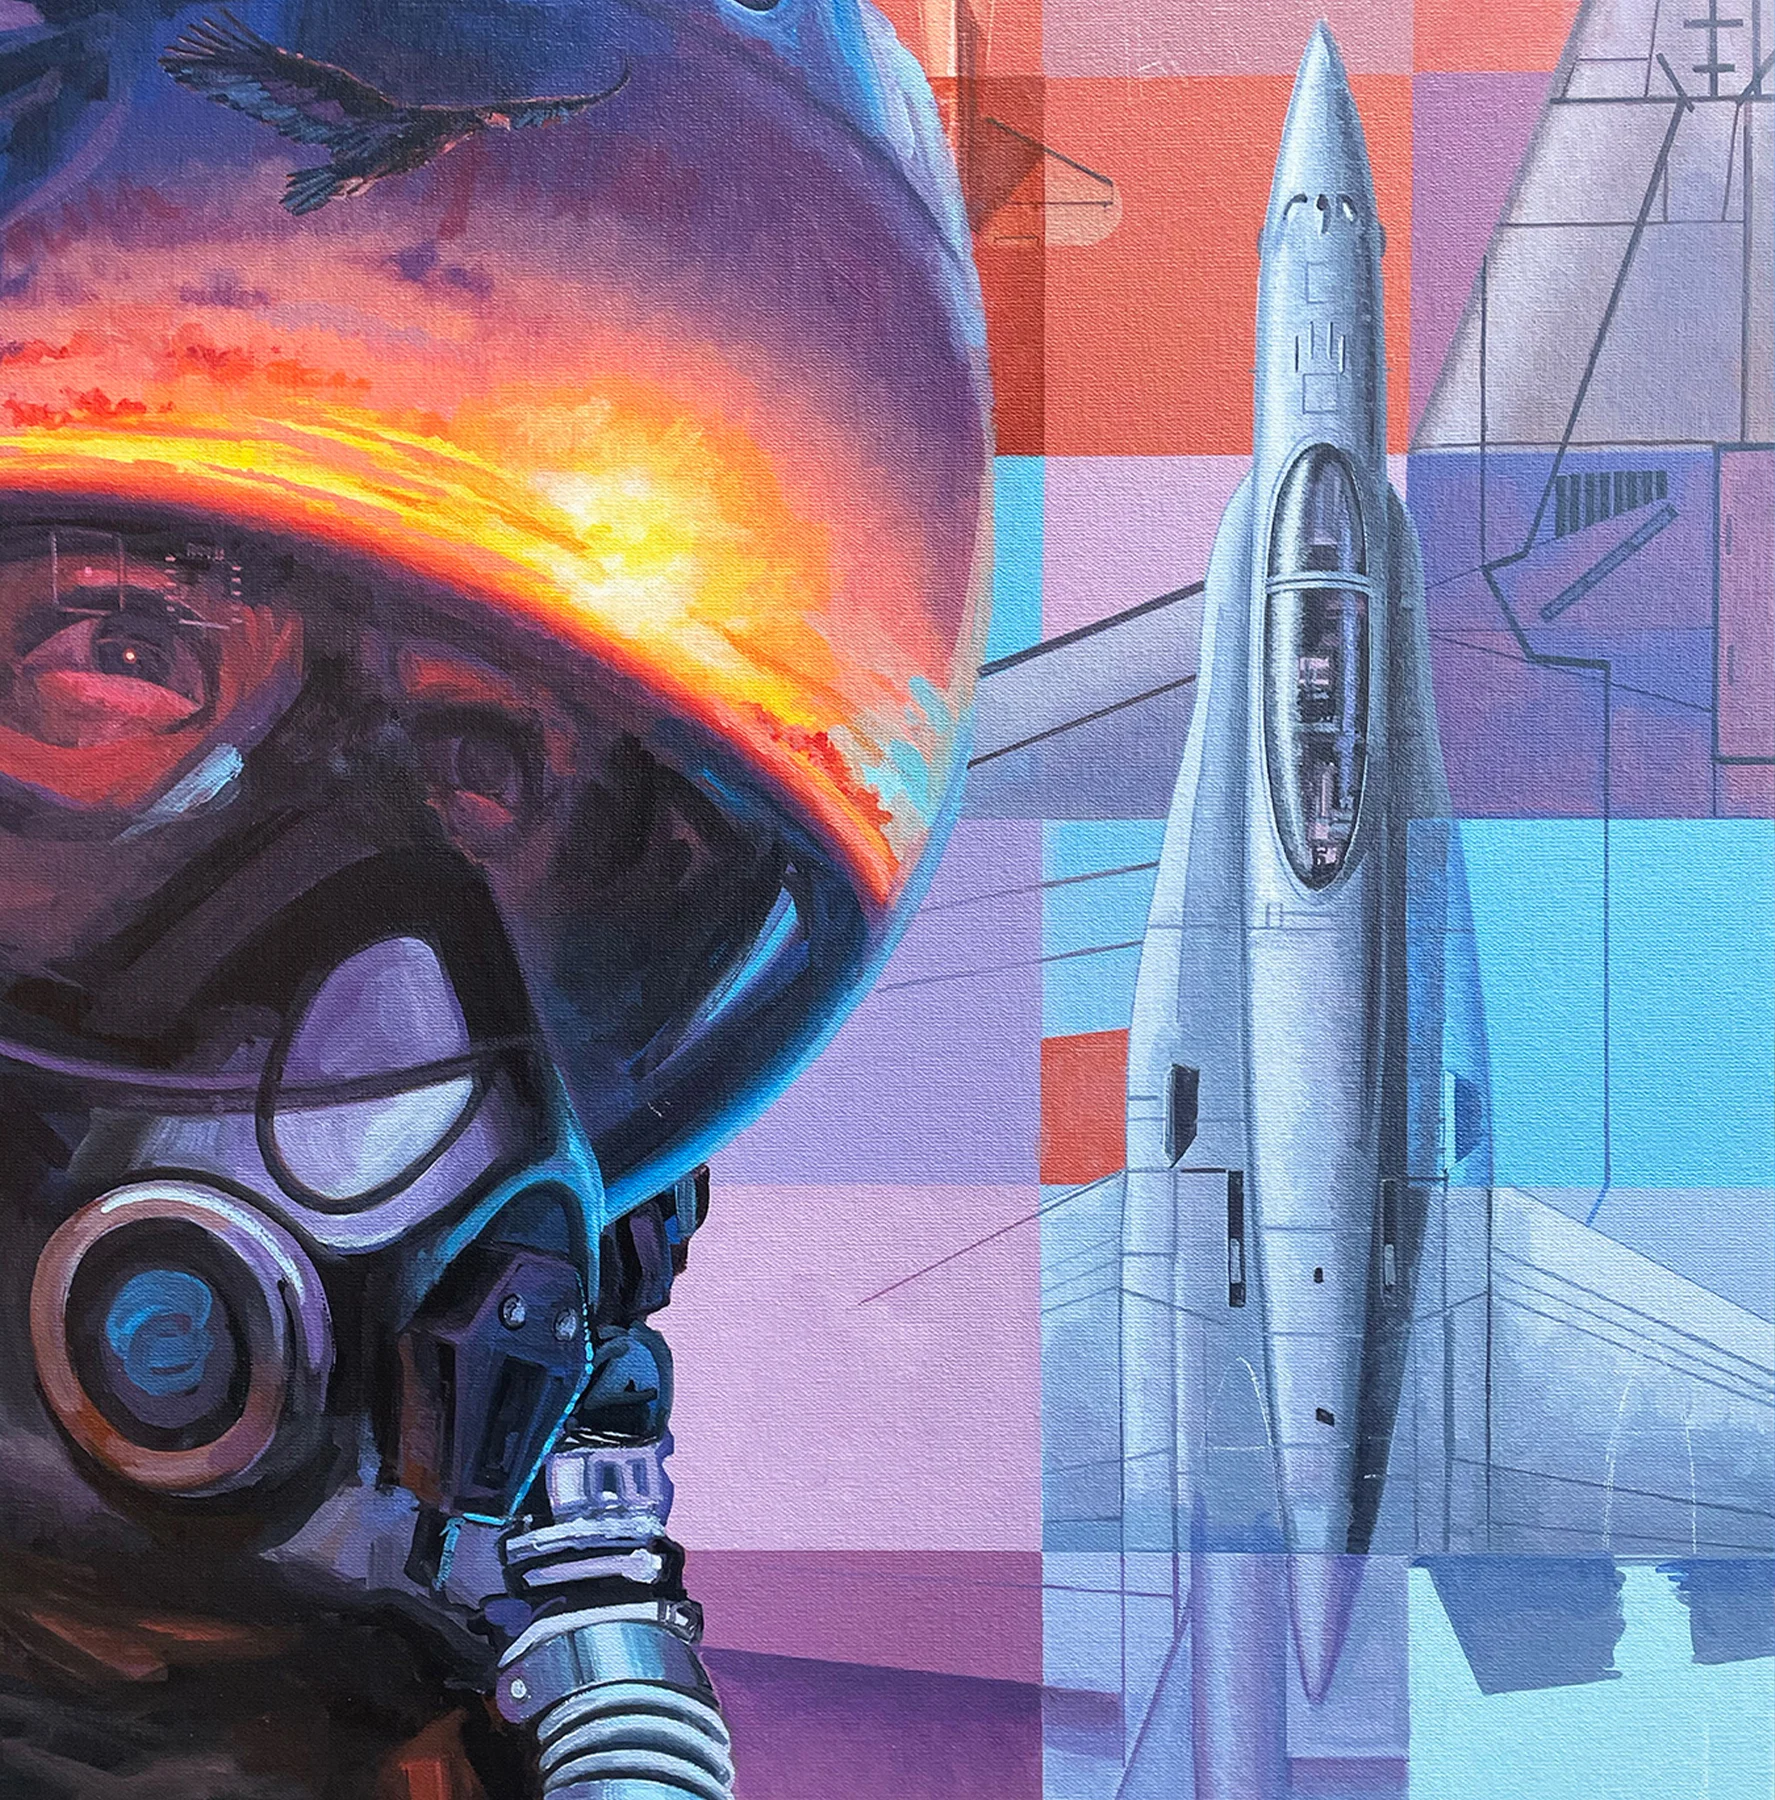
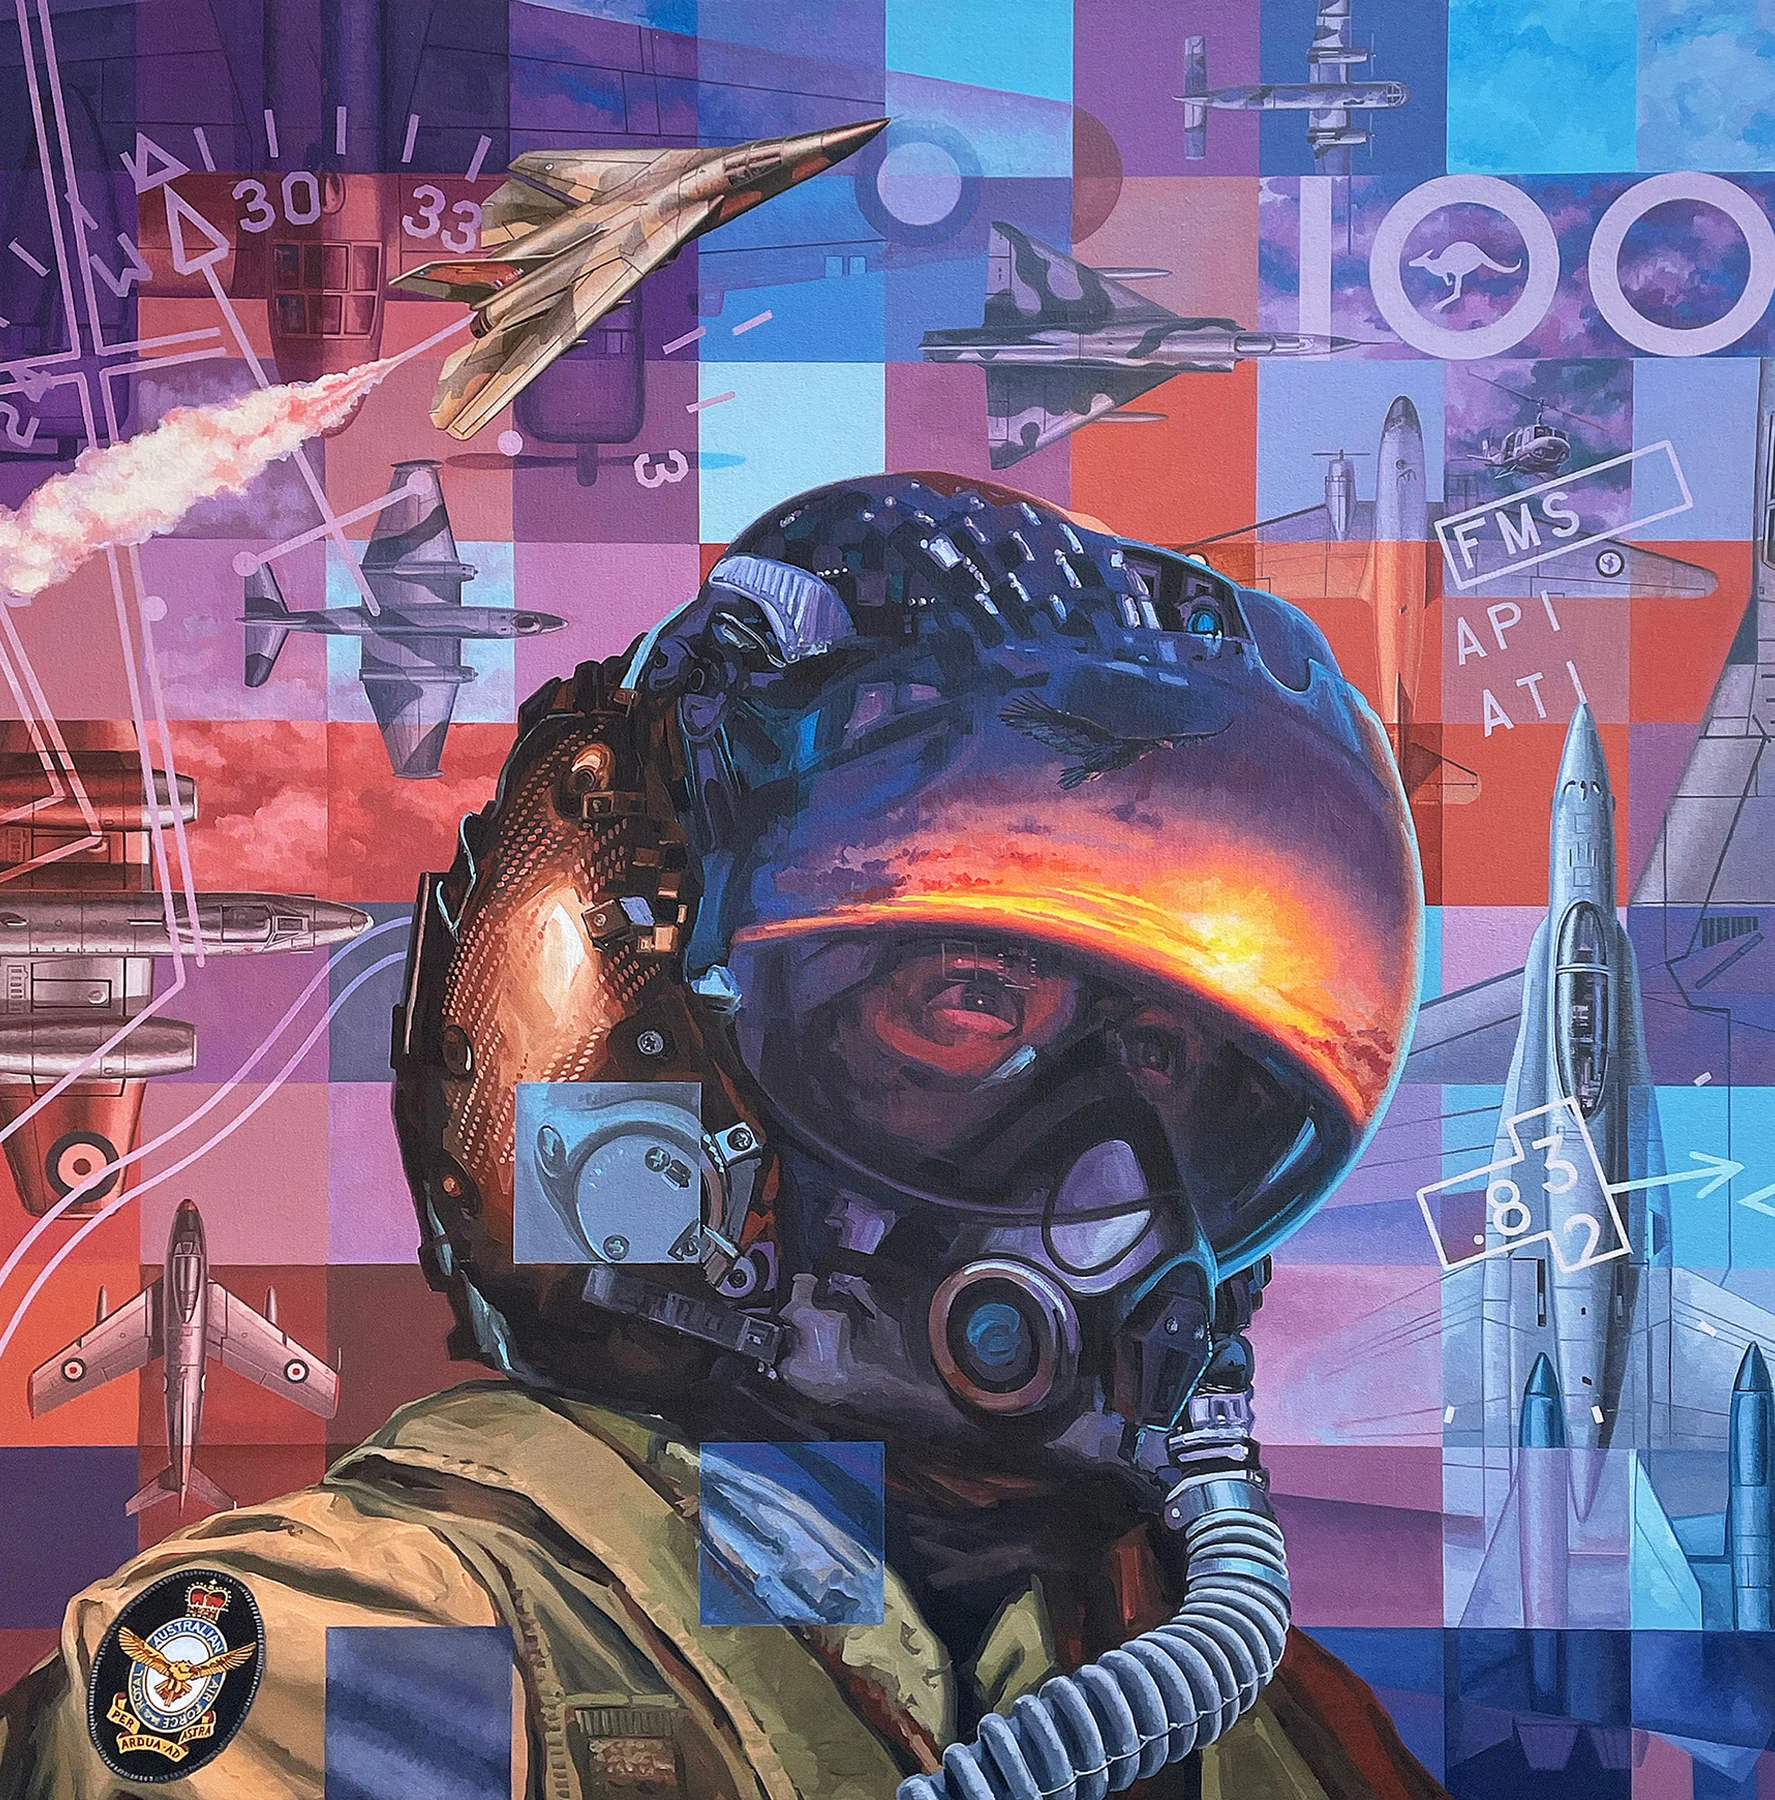
With the helmet close to completion I was able to allocate set days to tackle other areas of the composition including a few days for the Beaufighter and F-111 at top left. It is not often you see a purple Beaufighter! Because this was the first panel to paint I knew some areas would have to be revisited later. The F-111 was one of those areas. Initially the discussion was to mark this icon as the Australian War Memorial’s A8-134, although this changed. My aim all along was to make the three prominent foreground aircraft of P-40, F-111 and F-35 representative of significant Australian squadrons. My preference was a camouflaged 1 Squadron RAAF F-111C primarily because this unit was THE first RAAF squadron having evolved from 1 Sqn AFC and being in continuous service since 1921. As far as I am aware 134 was not with 1 Squadron during the early days of camouflage. Why is there another F-111? Why not?! In actual fact this was left over from an earlier design before the previously mentioned, prominently camouflaged F-111 became part of the composition. I decided to keep the original plan view aircraft, which could represent a 6 Sqn RAAF ‘G’ model. It was also a nice chance to show the swing-wing aspect of this iconic supersonic strike aircraft. I was hesitant in approaching the graphic overlays knowing full well they impact and connect on the surrounding panels.
Some parts could not be added until later though. These are not painted by masking as this technique is prone to paint bleeding under the tape. No, each line is drawn using a ruling pen which is essentially an old drafting tool that can be loaded with paint. It is not a simple task of ruling a single line as each line represented here is around 5mm wide and the ruling pen has a maximum setting of 1mm. That means each line comprises two passes with the ruling pen and then blocking in the gap…and then repeat! However, it does make mapping circles a little easier than freehand painting. The compass dial under the F-111 was a real challenge of mathematics going back to my geometry days at school. It was around this time I realised ten days was not going to be sufficient for each panel so made the tough decision and extended this to twelve days. Even so there were some loose ends that had to revisited after tackling the others. Time for a break. Nope, straight into the next one!
Part 7
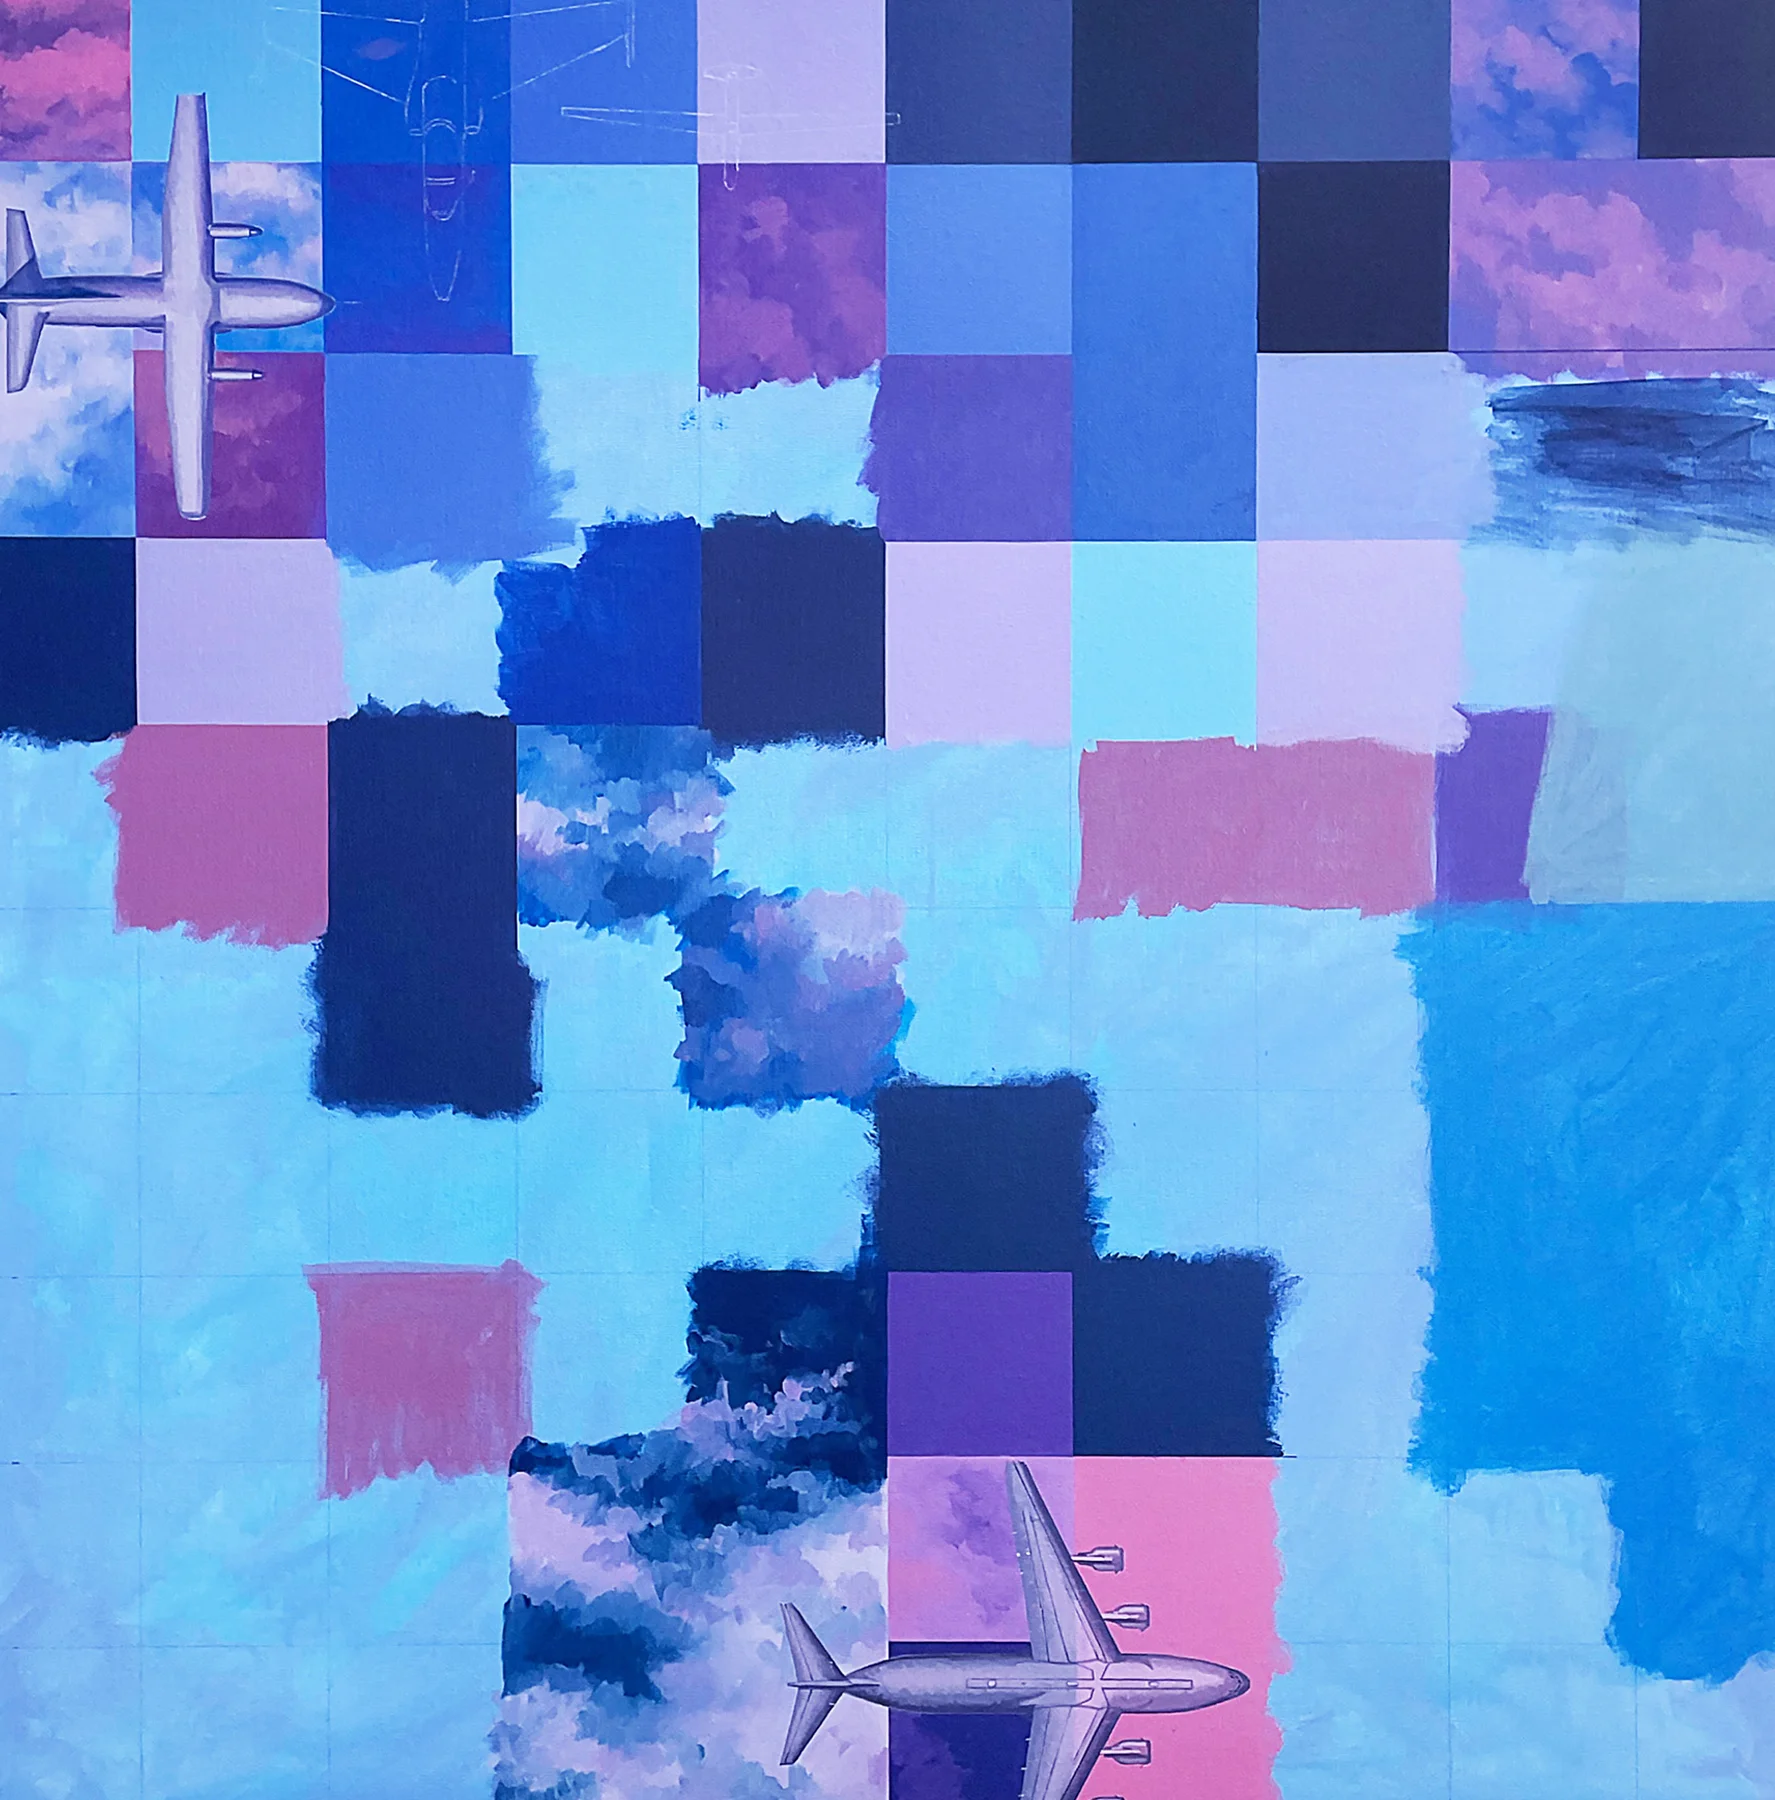
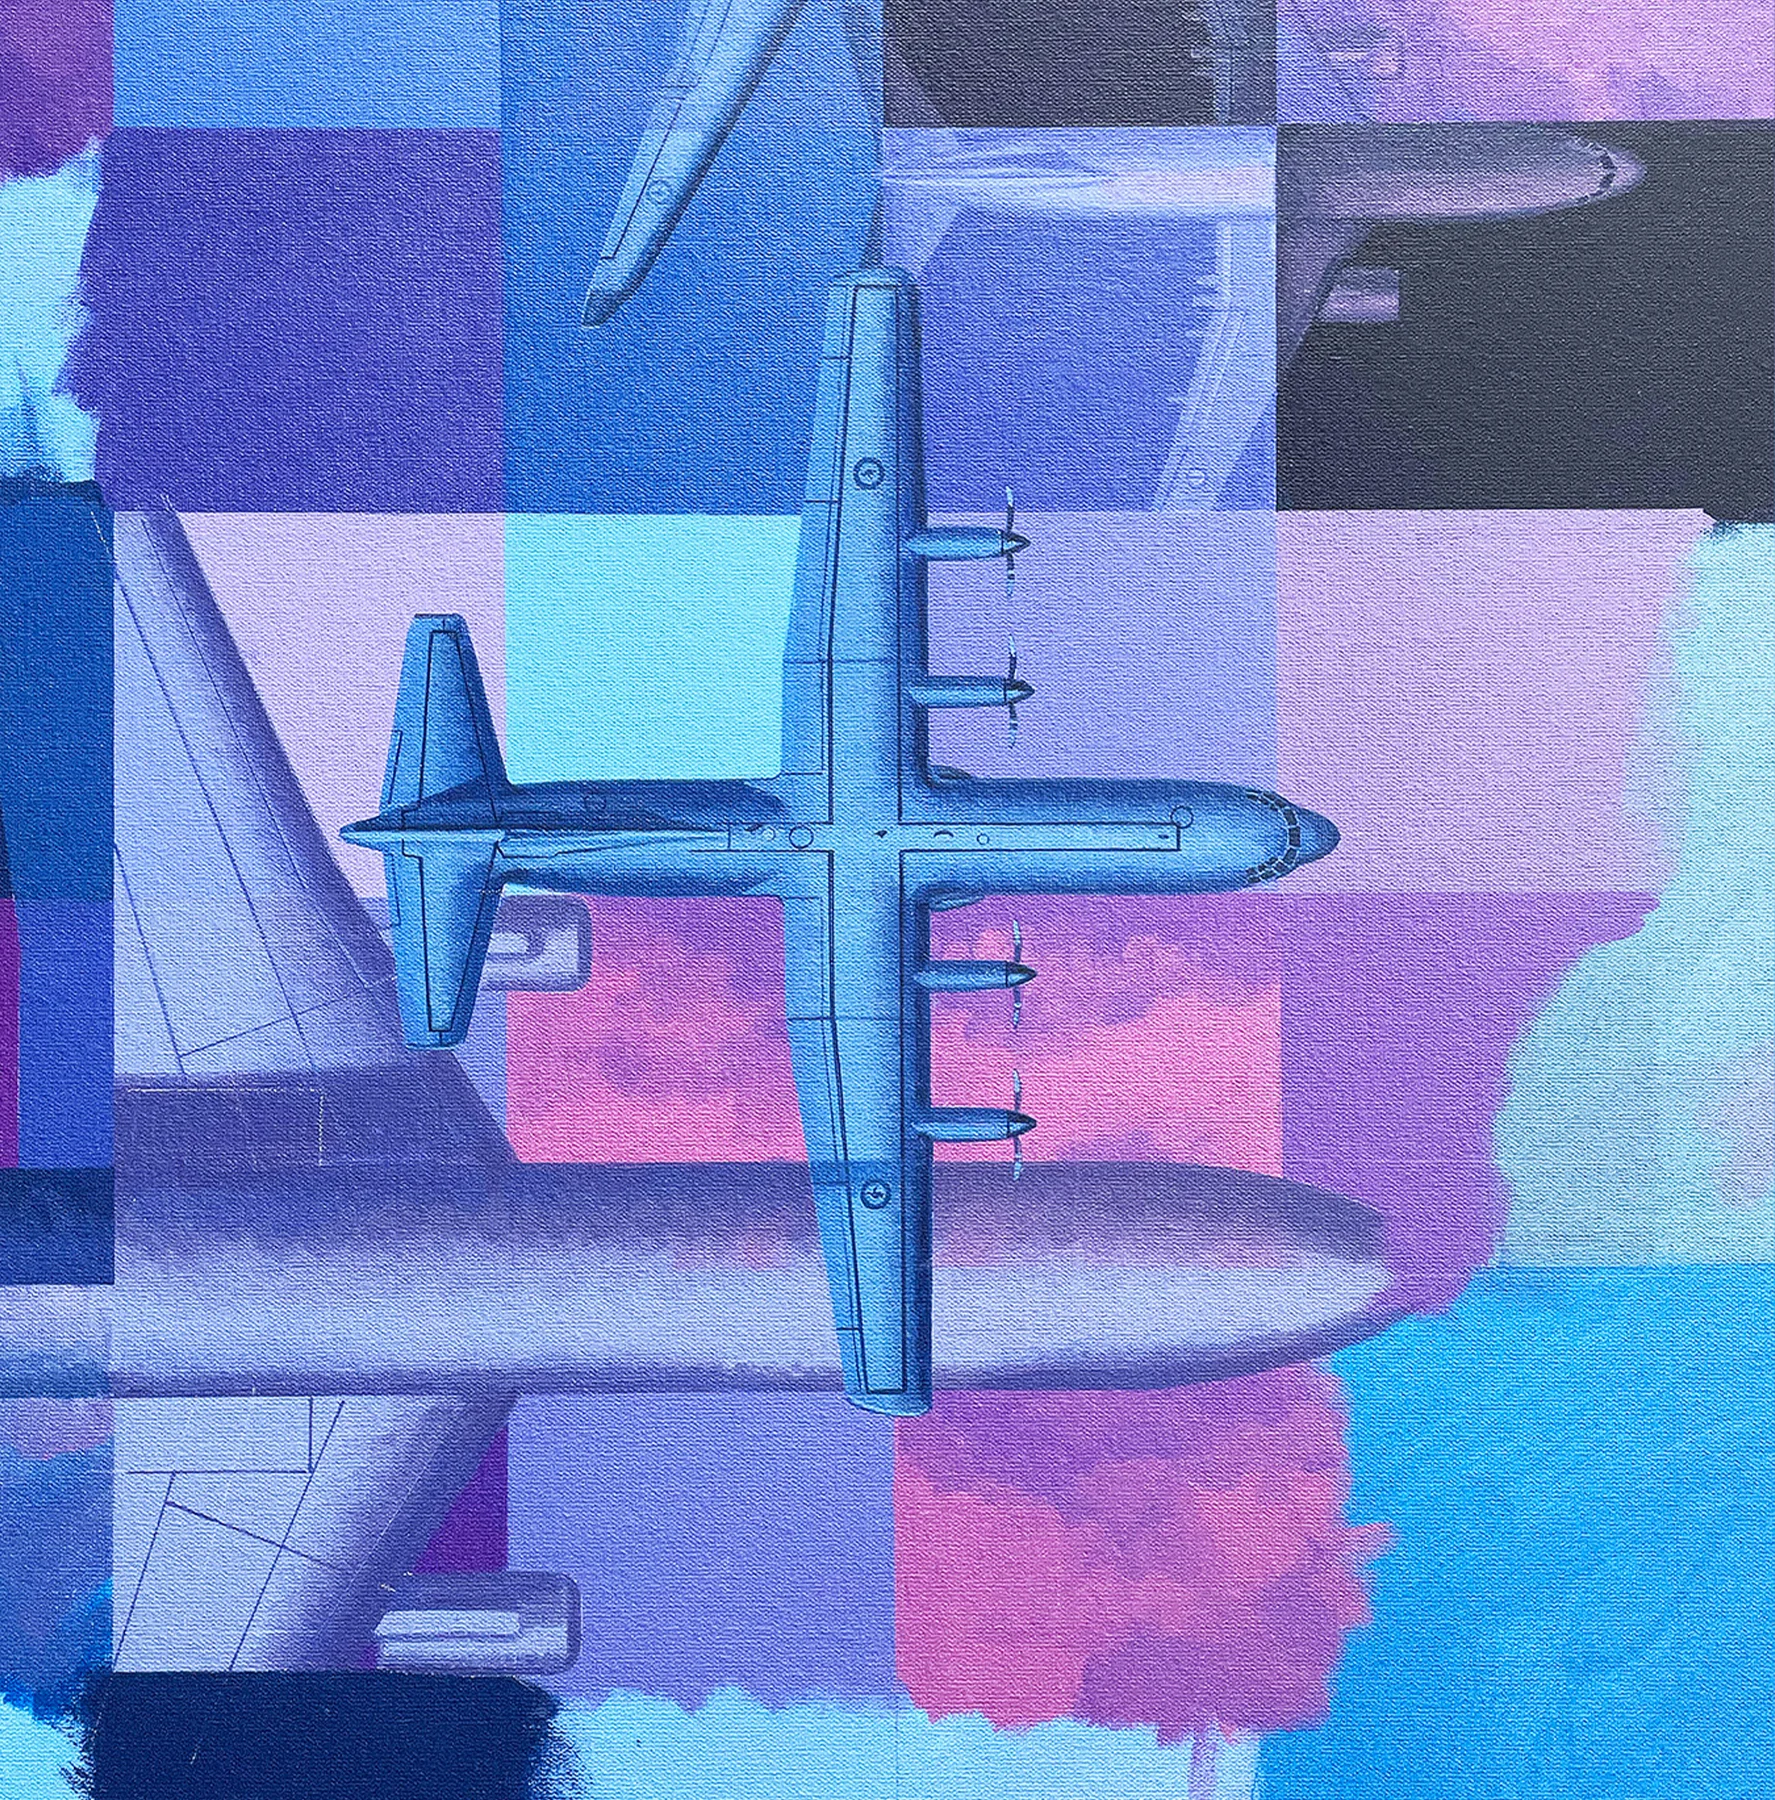
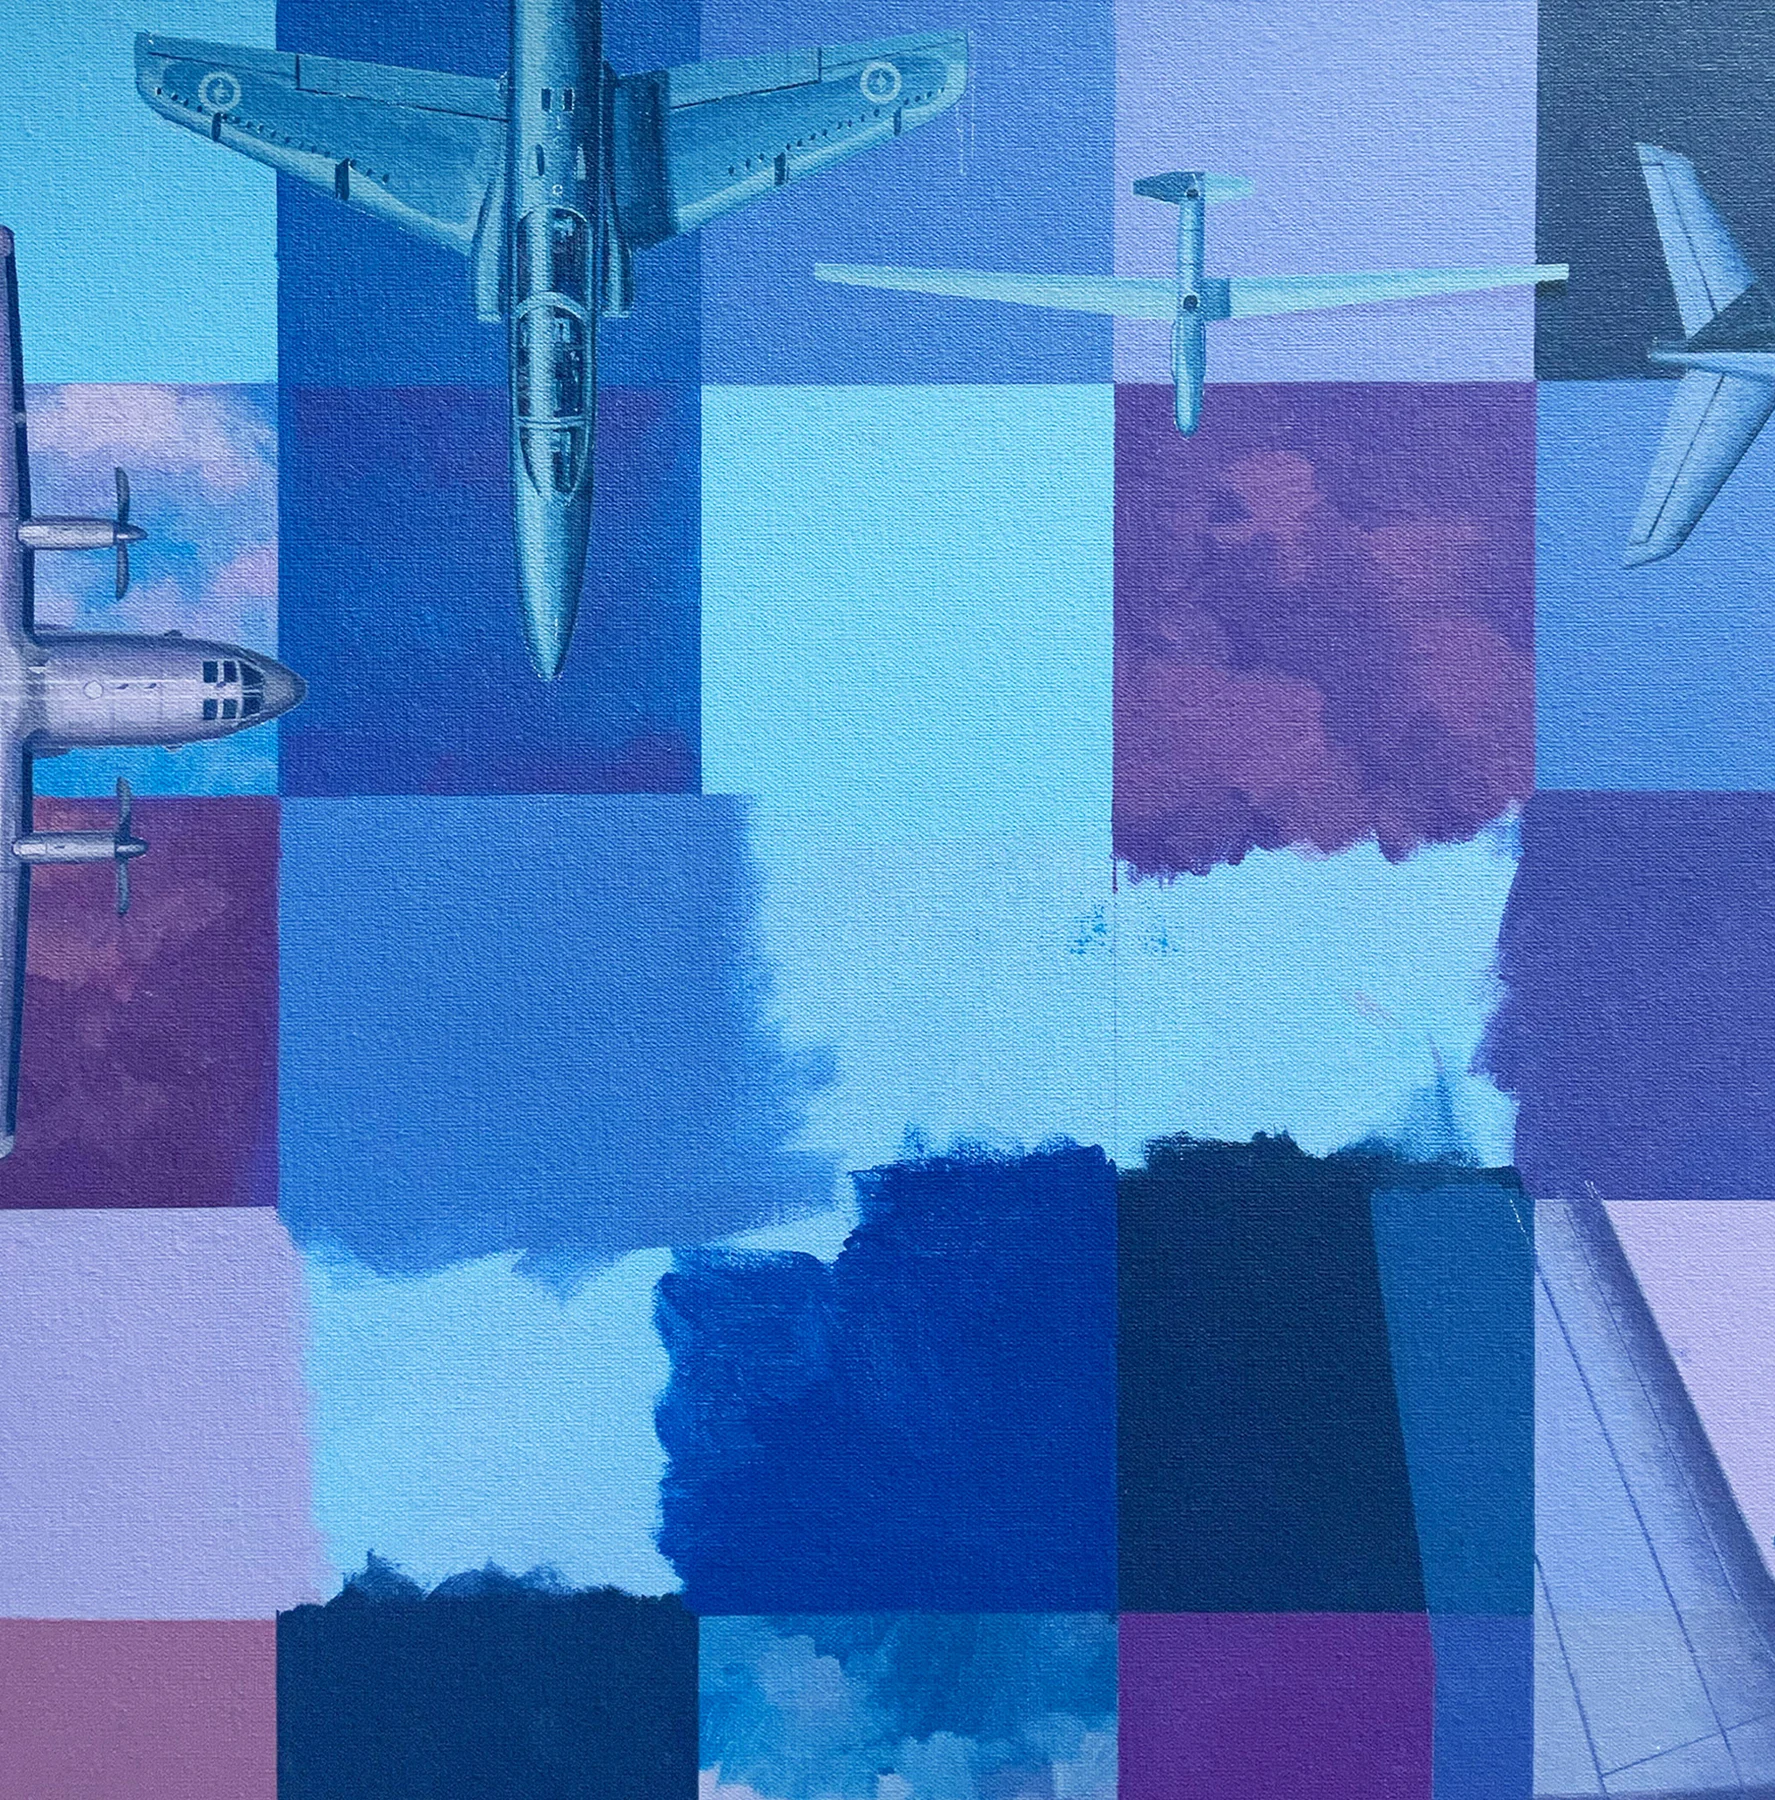
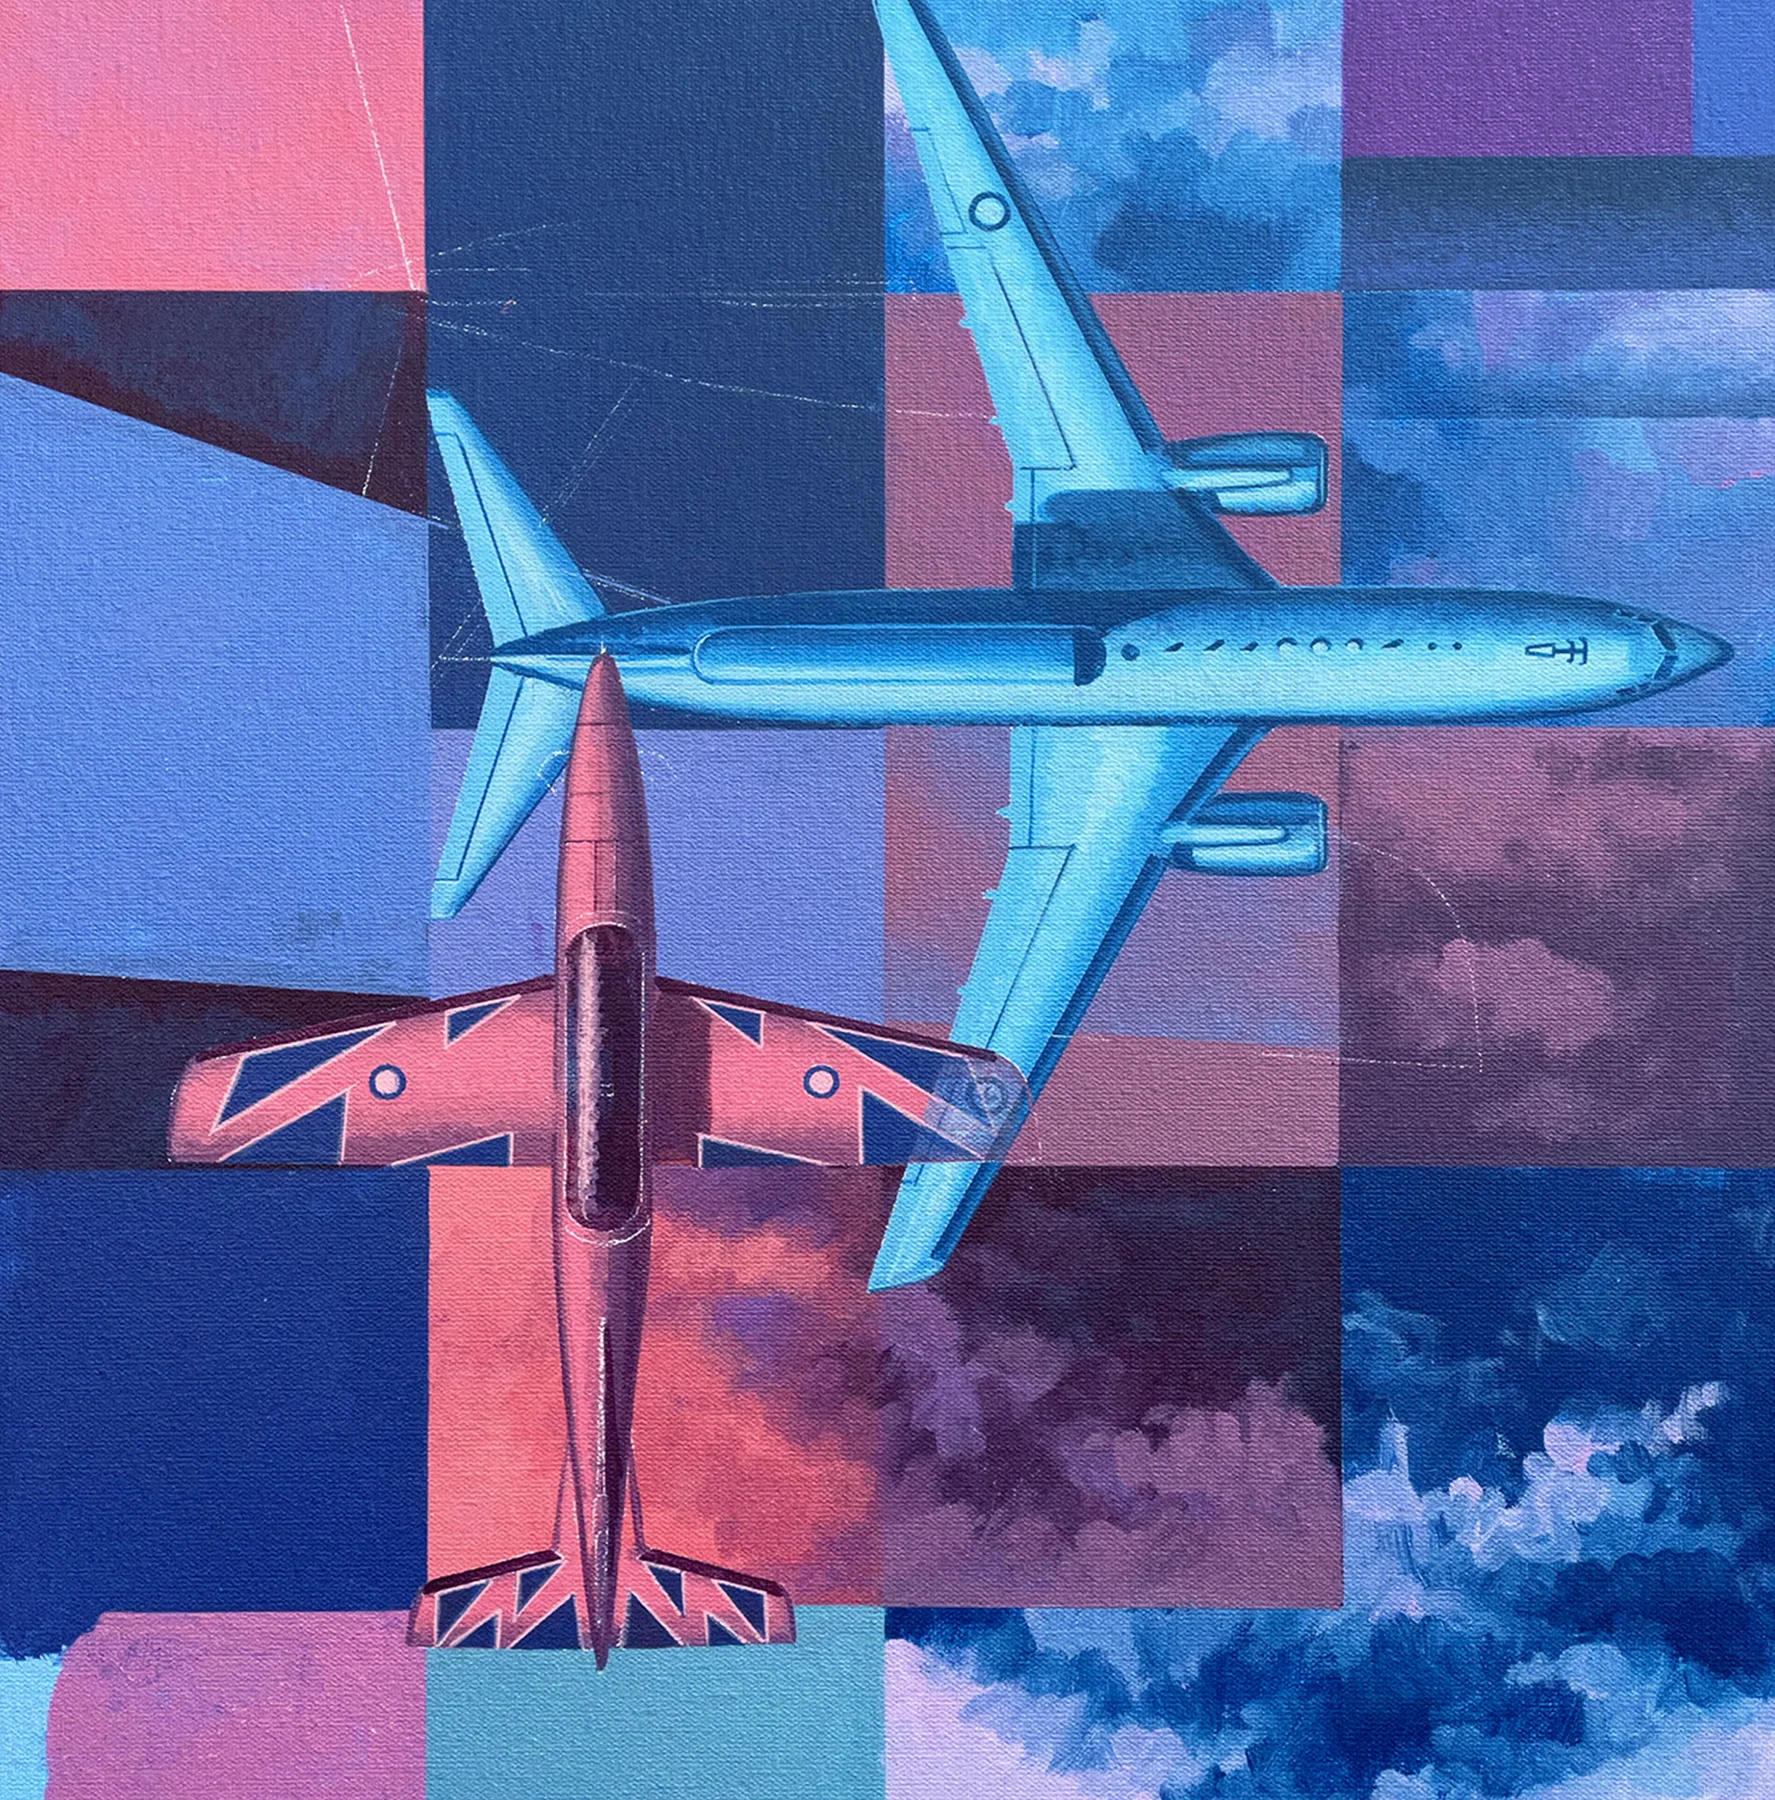
First hurdle down and only two to go! The middle panel was 99% complete on the 25th February and by the next day I had started the blocking in phase of panel three. It was a logical step at the time to move right mainly so it would be easier to continue the Orion, F-111 and F/A-18 Hornet grouping from the previous panel. As it turned out these were painted much later! The early stages of a painting are always the hardest but less inhibited because there is nothing to stuff up! Most of the time is spent colour mapping. And while there was a core group of colours the number of subtle variations were extreme. I had no idea how tackle the large kangaroo roundel and decided to avoid that and start painting in the background aircraft. Turned out to be a wise decision, more on that later.
Although there are many more aircraft in the third panel these are the current fleet and mostly all the same in terms of camouflage – overall grey. To make them appear grey in context to the colour palette meant painting a wide variety of purples and blues. Ironically the C-17 was the first to be filled in although this was later painted over! As with the previous painting I spent almost half of the allotted twelve day schedule blocking in aircraft. While it was not necessary to include maximum detail it took time researching various images of all the different types, everything from a C-27 Spartan to Triton drone. Here it was important to highlight the multi-role capabilities of the RAAF including Air Combat, Air Mobility, Intelligence, Surveillance and Reconnaissance as well as Aviation training. With a bit of wrangling it was possible to include the majority of the current fleet with only a few minor exclusions.
The F-111G and Orion also make a faded appearance in this panel, reflecting the transition to their replacements and a passing of the guard. Probably one of the trickier elements was the integration of a PC-21 in Roulette markings. In comparison to every other combat aircraft the Roulettes are blatantly bright red and colourful. To minimise that vibrant impact I had to soften the colour palette and pickup touches of similar tones in surrounding squares across the composition.
Part 8
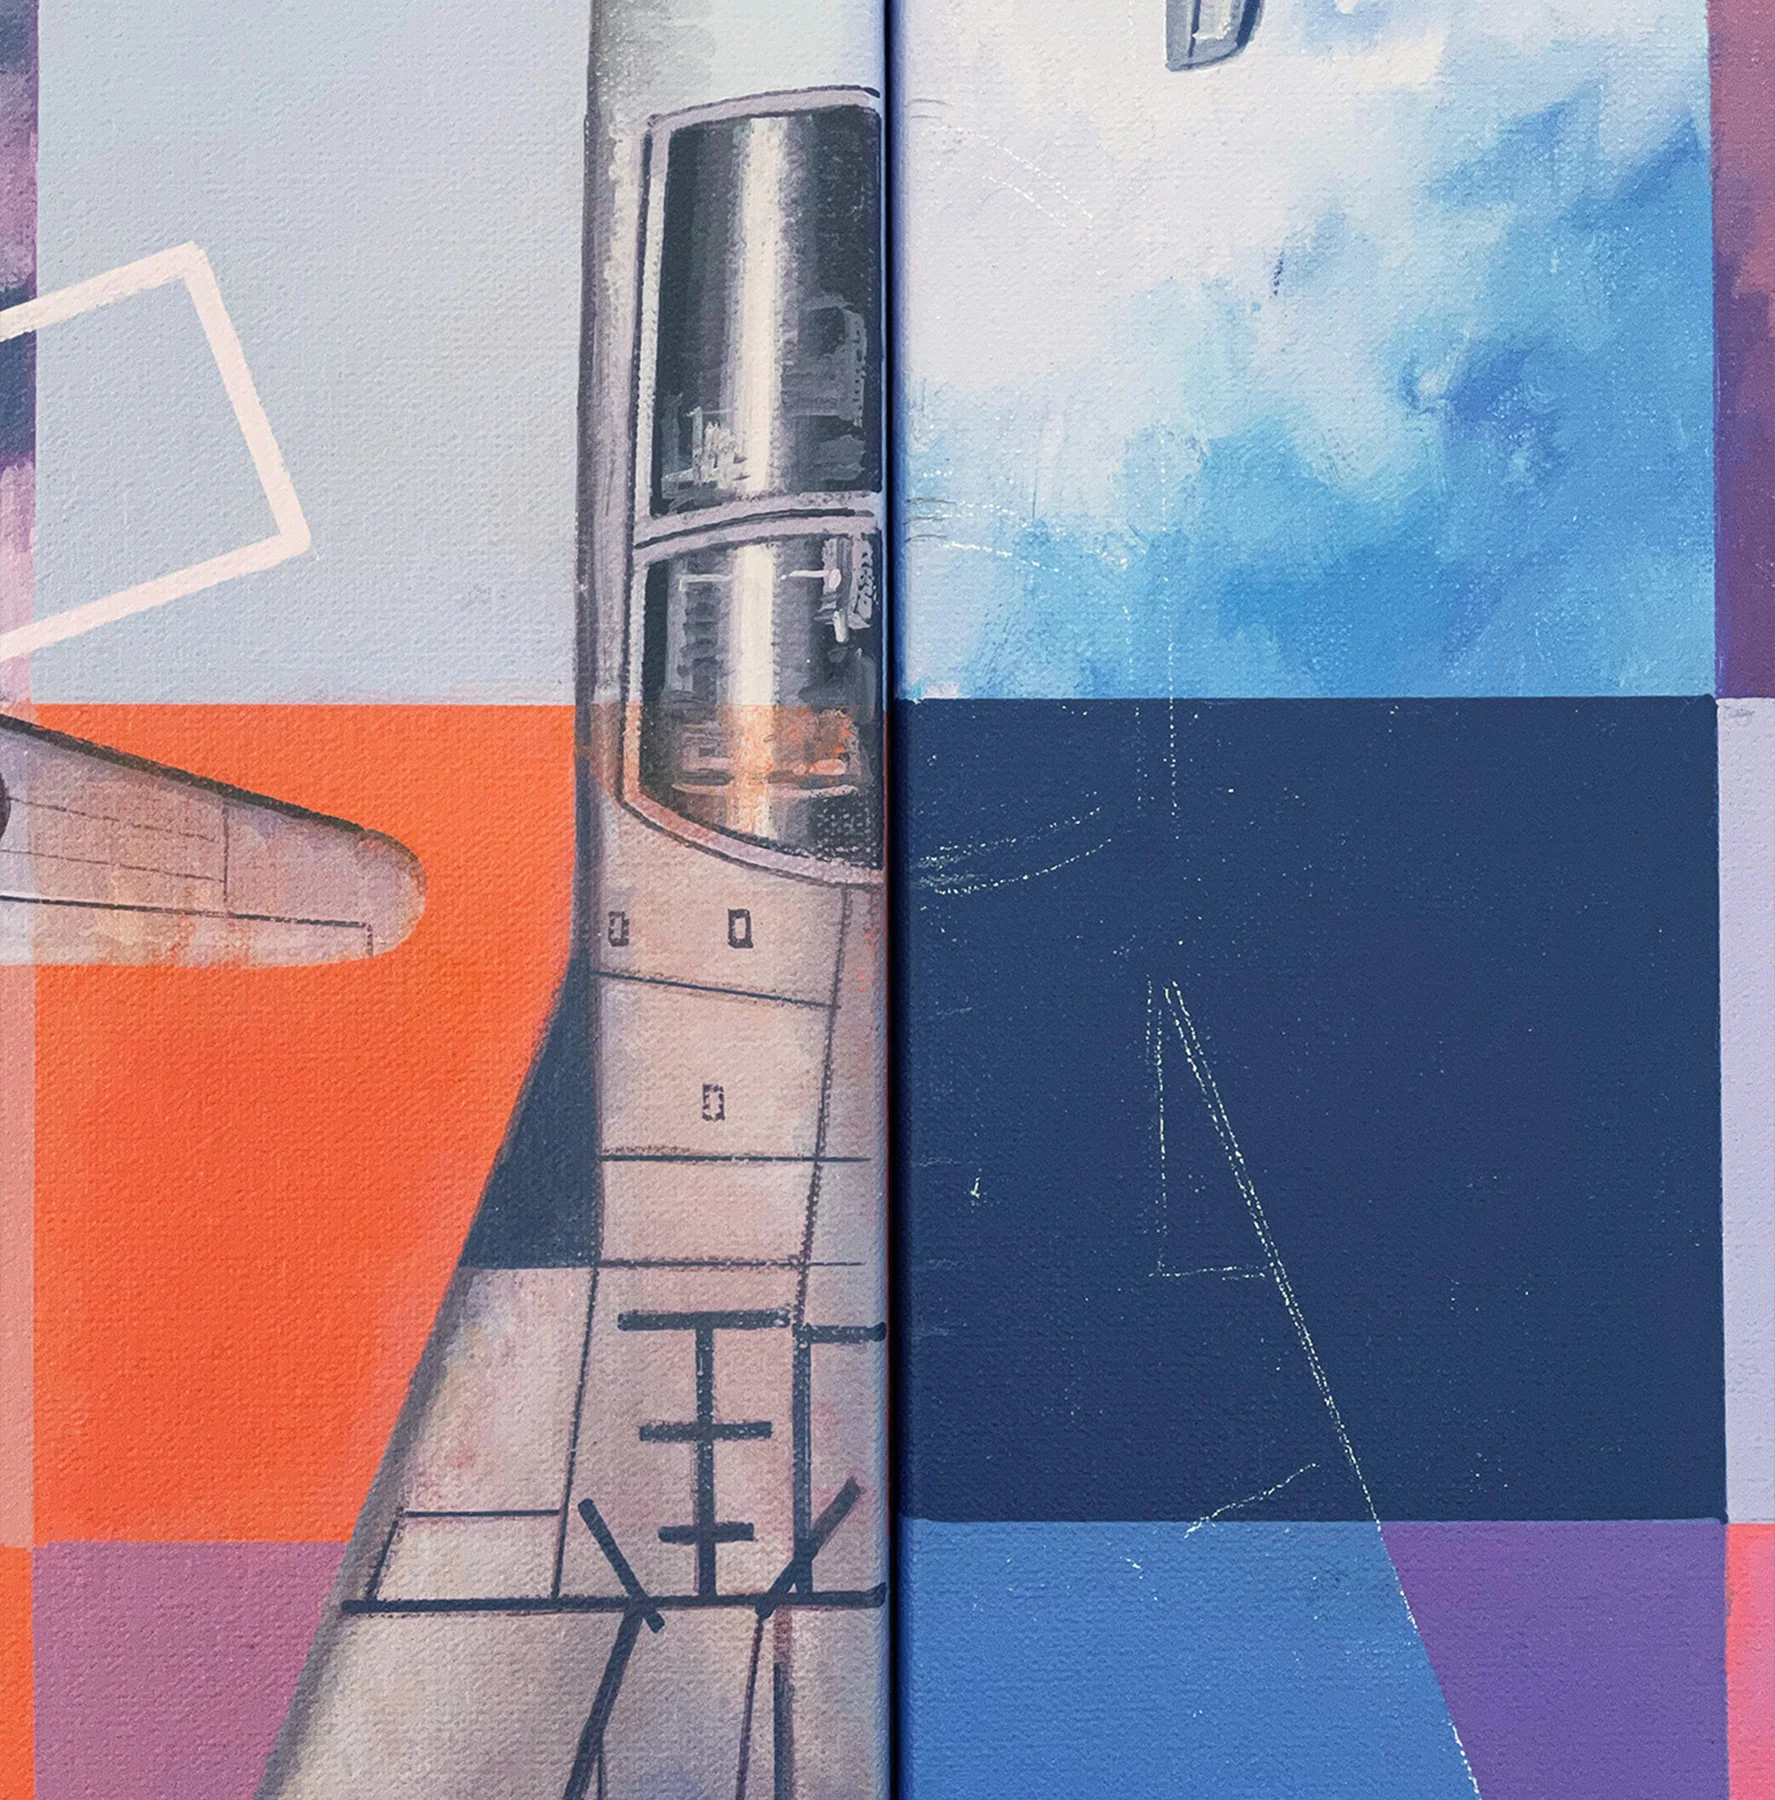
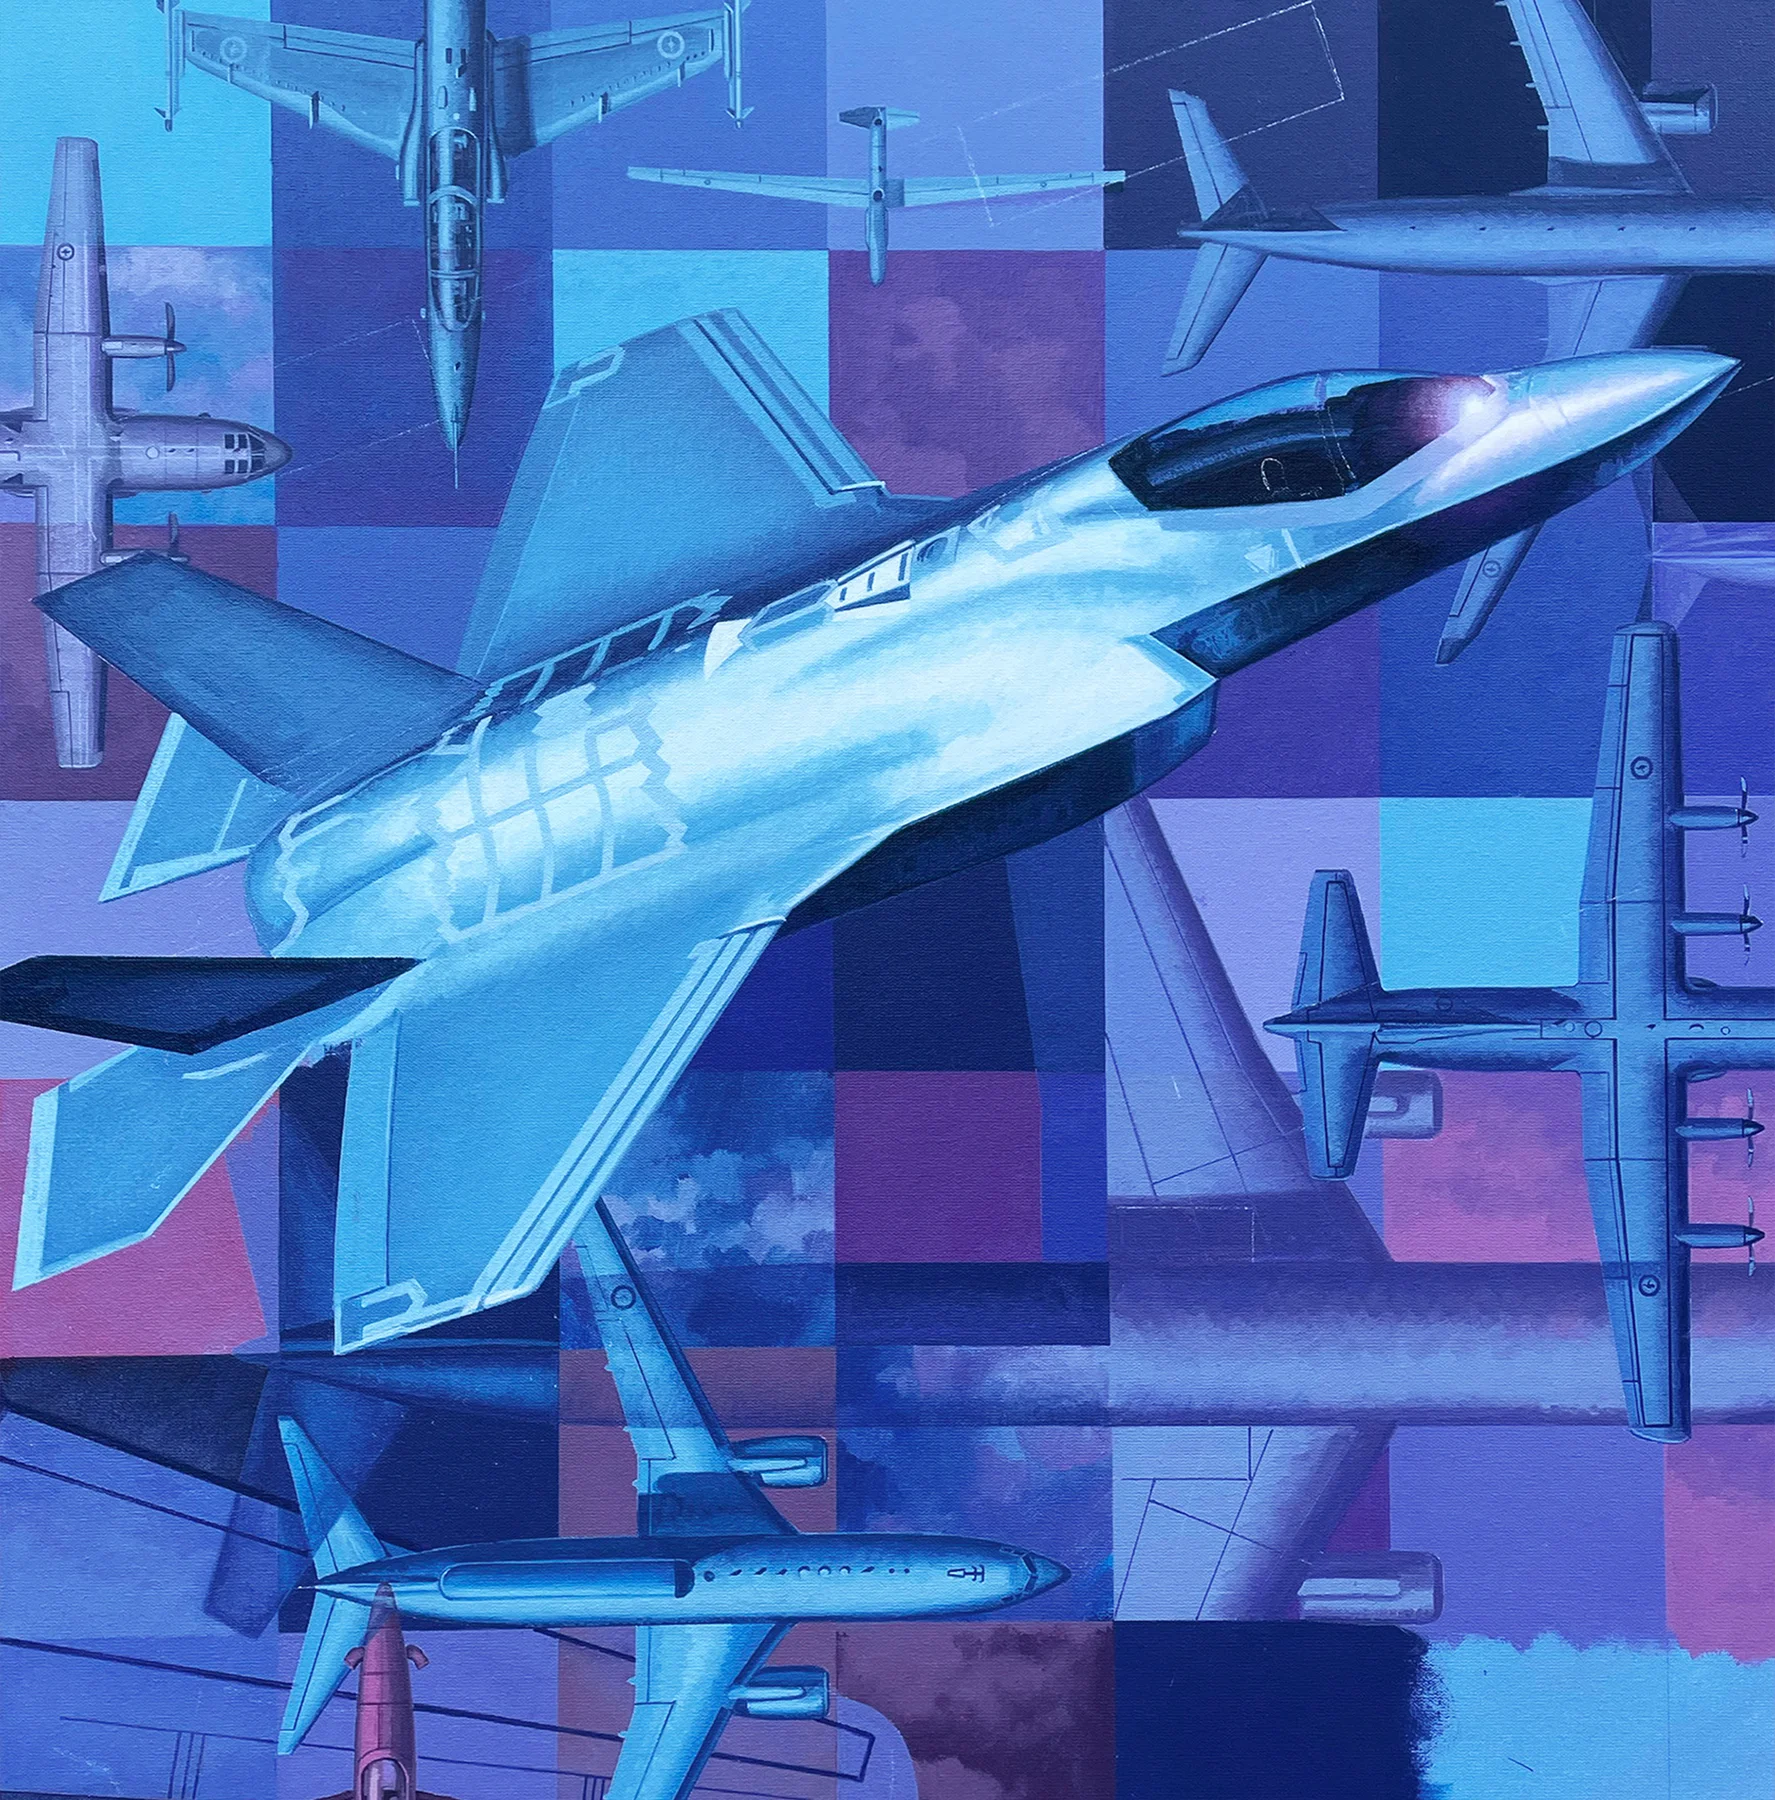
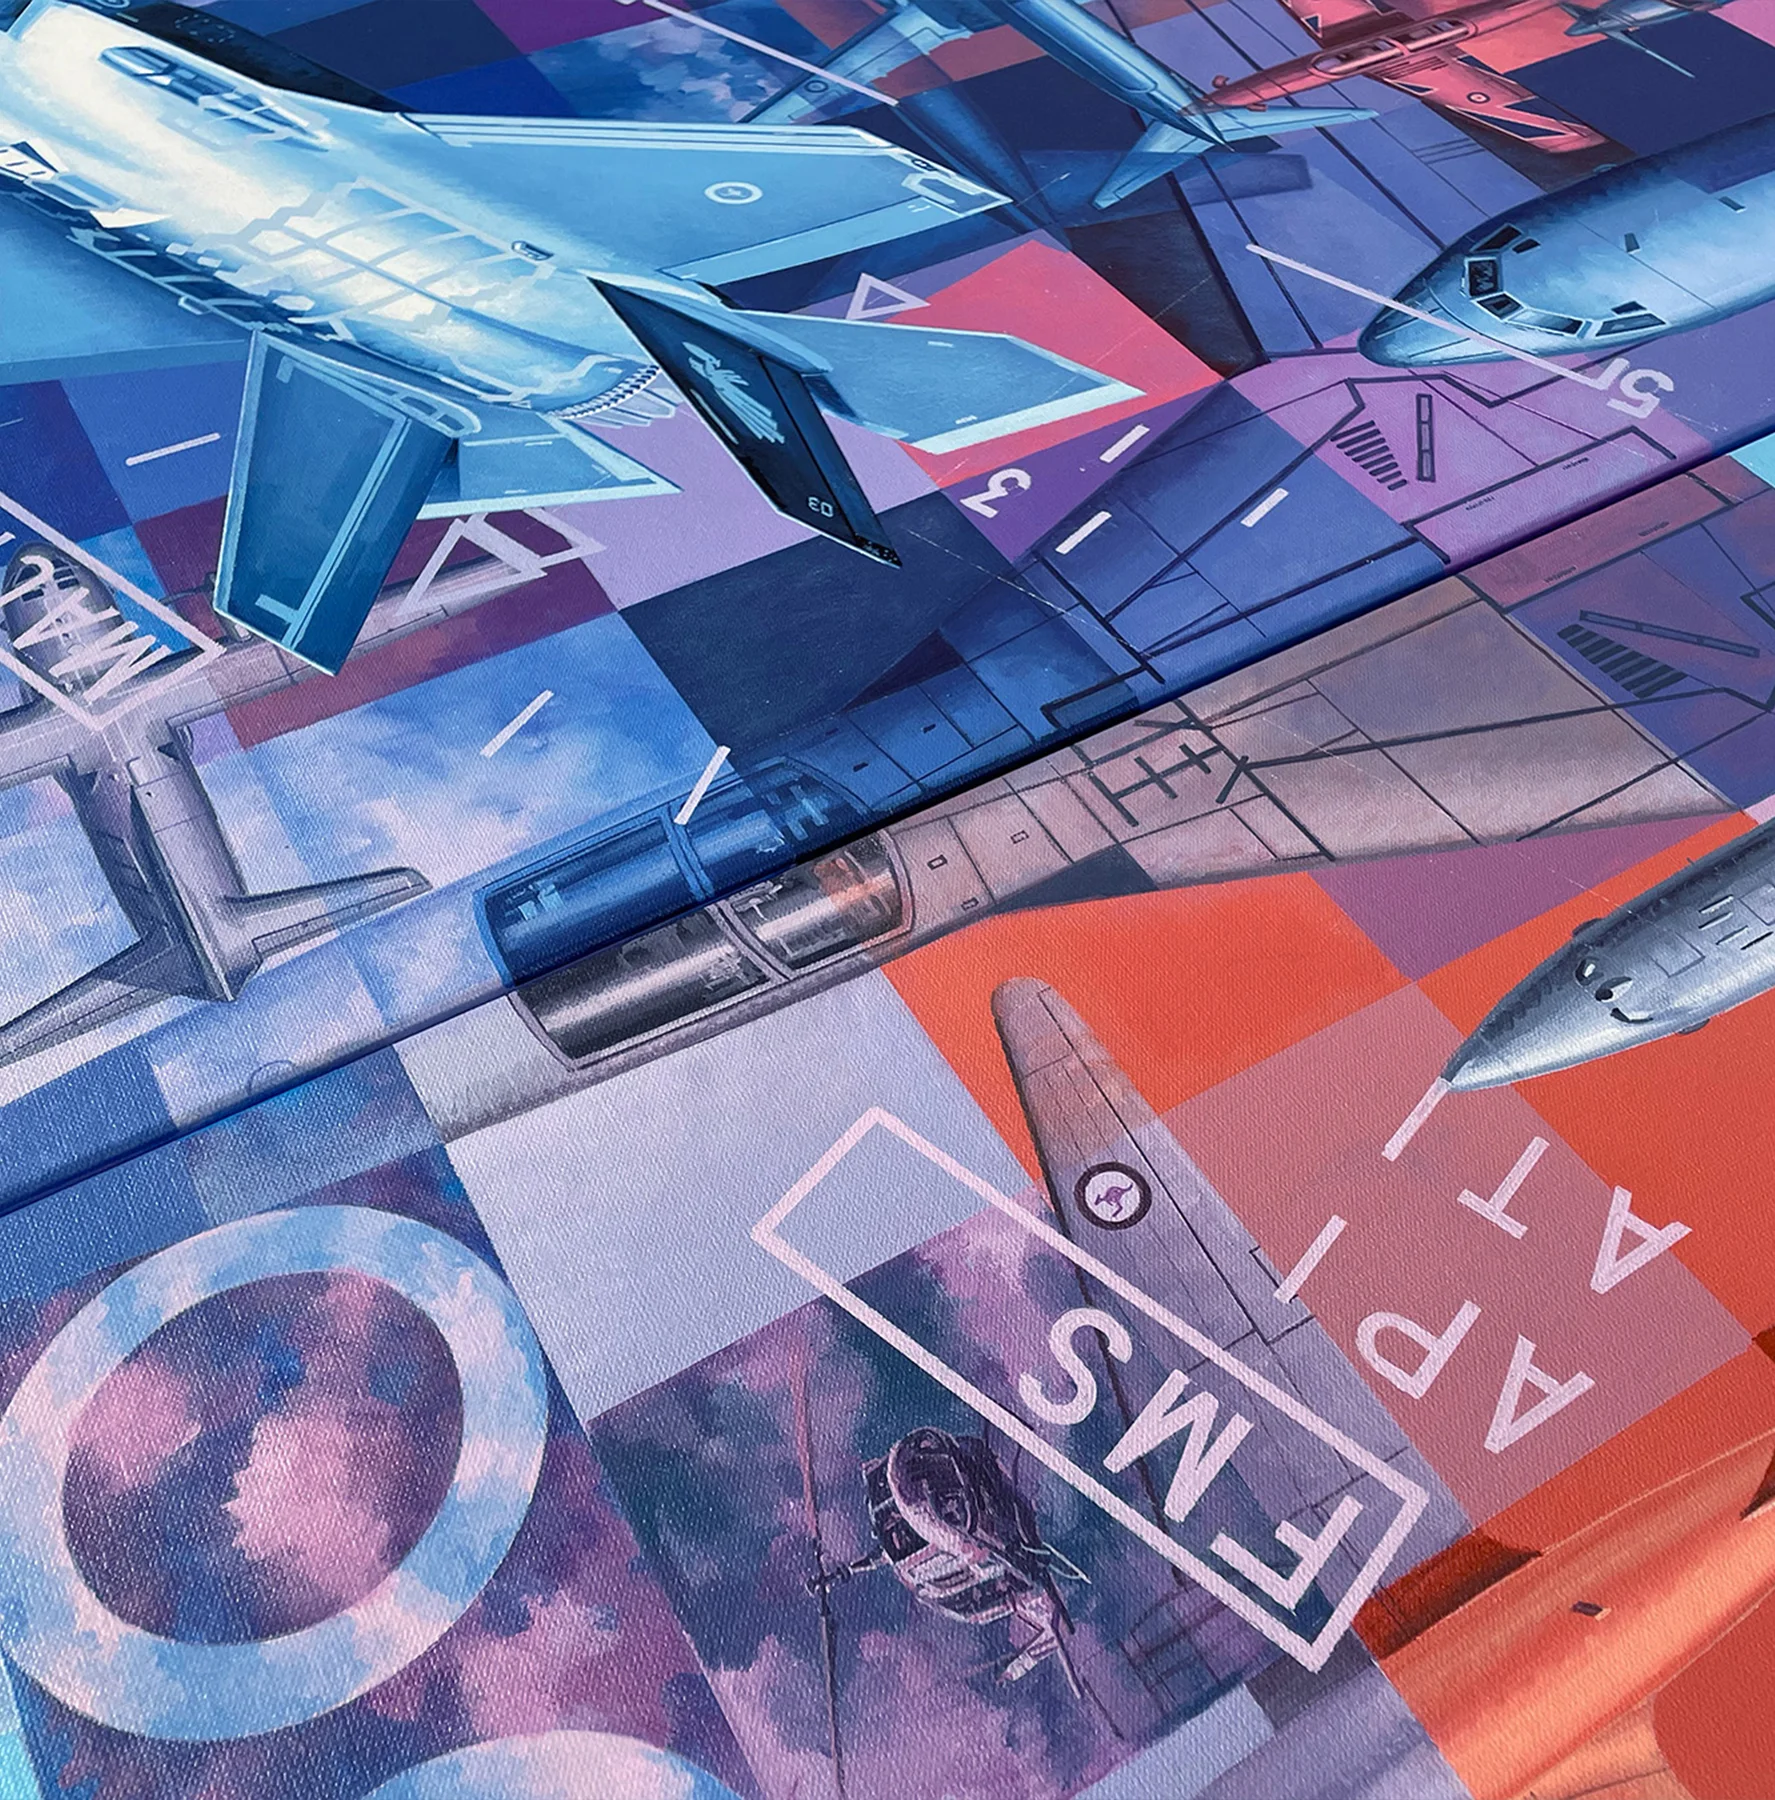
When working across a complex painting it is very easy to lose focus of the overall composition. As early as possible I made sure to start aligning the panels to transfer the interconnecting points. The F-111 was one of those first transitions. In most realist or representational paintings such as a landscape or still life the light and shadow are paramount in providing cohesion of forms. Because the centenary work leans further towards modern contemporary it was easy to twist and distort lighting to best suit the composition. As a result there are multiple light references working across the varying layers. The pilot and primary trio of foreground aircraft P-40, F-111 and F-35 are represented in high contrasting colour for impact with an approximately uniform light source. Although the pilot’s eyes rely on a slightly different reference.
All of the background aircraft have a singular imagined light source emanating from approximately just below the pilot oxygen mask, essentially a low centre point. This provides a radiating effect of light. Equally considered are the irregular shapes and forms created by cast shadows across each individual aircraft. That diversity of angles and triangles, along with wavy camouflage patterns cut through the very orderly square grid in a pseudo-form of abstraction. At the halfway point it was time to switch gears and start working on the primary F-35 focal point. This was the first time I had tackled a new jet fighter, they are very different to paint due to the very smooth, radar minimising surfaces. As mentioned previously, this aircraft sits on a different plane to the other layers and required high contrast and richer colour. There is some distortion in the points of light as these are deliberately placed to create balance with the pilot. I was particularly pleased with the subtle colour variation contained within the specular highlight of the F-35’s windscreen. This mirrors some of the warmer colours seen in the visor sunset while also picking up a tinge of purple.
I selected F-35 003 of 3 Squadron RAAF. Again, this is an RAAF squadron rich in history. Raised in 1921 from its WWI predecessor in 3 Sqn AFC it is arguably one of the premier fighter squadrons and certainly the unit with the RAAF’s highest combat tally. A worthy inclusion for this third panel.
Then. Now. Always. Artwork
Part 9
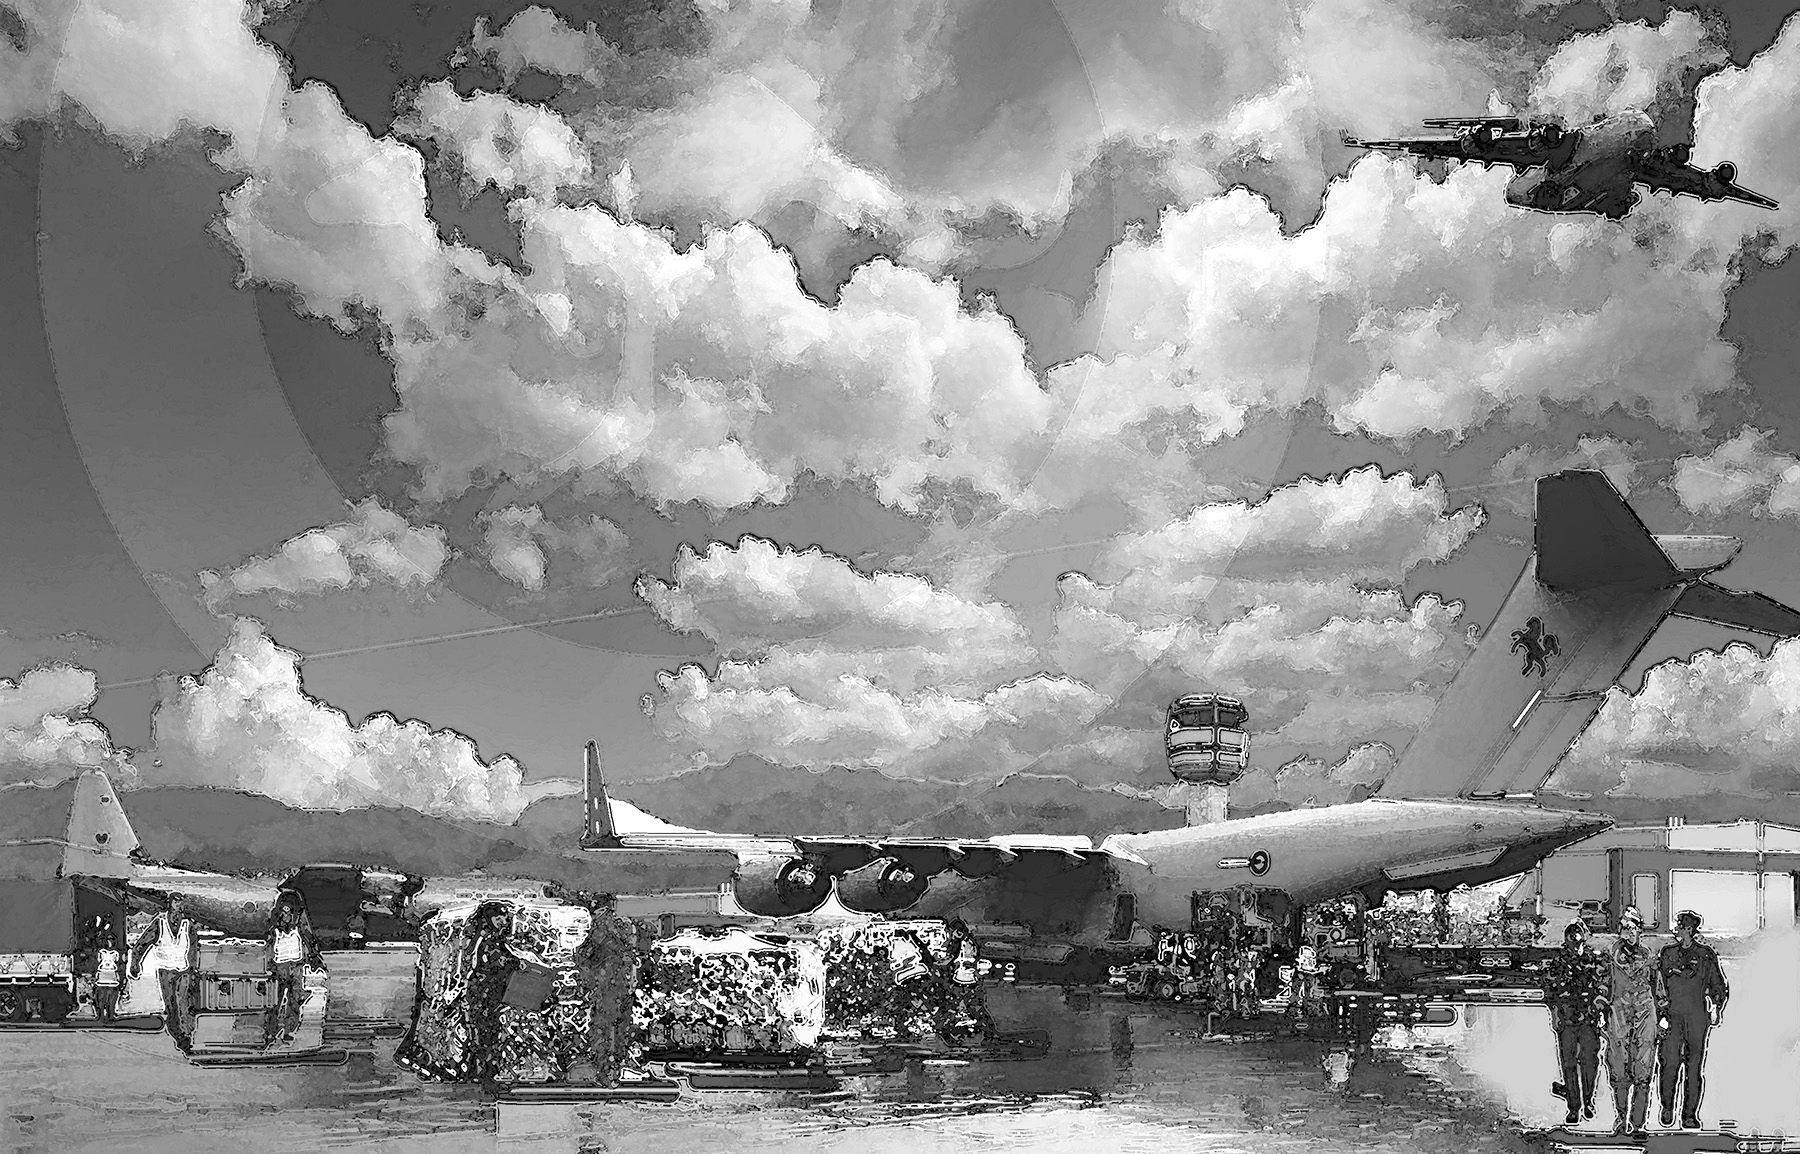
Due to the condensed development time for this project there were many elements that did not reach full resolution during the planning stages. This began to unravel further into the painting as it was rightly pointed out we probably needed to include a modern day scene as a counter point to the Point Cook vignette at bottom left of panel one. This occurred around the time I had finished the F-35. It is never an easy task to chop and change a composition during the painting stages. I often tell my art students it has a domino effect – one little alteration can upset the balance and then it becomes a never-ending game of changing other elements to compensate – dominoes fall! This is where the digital platform makes it easier to experiment and move points around.
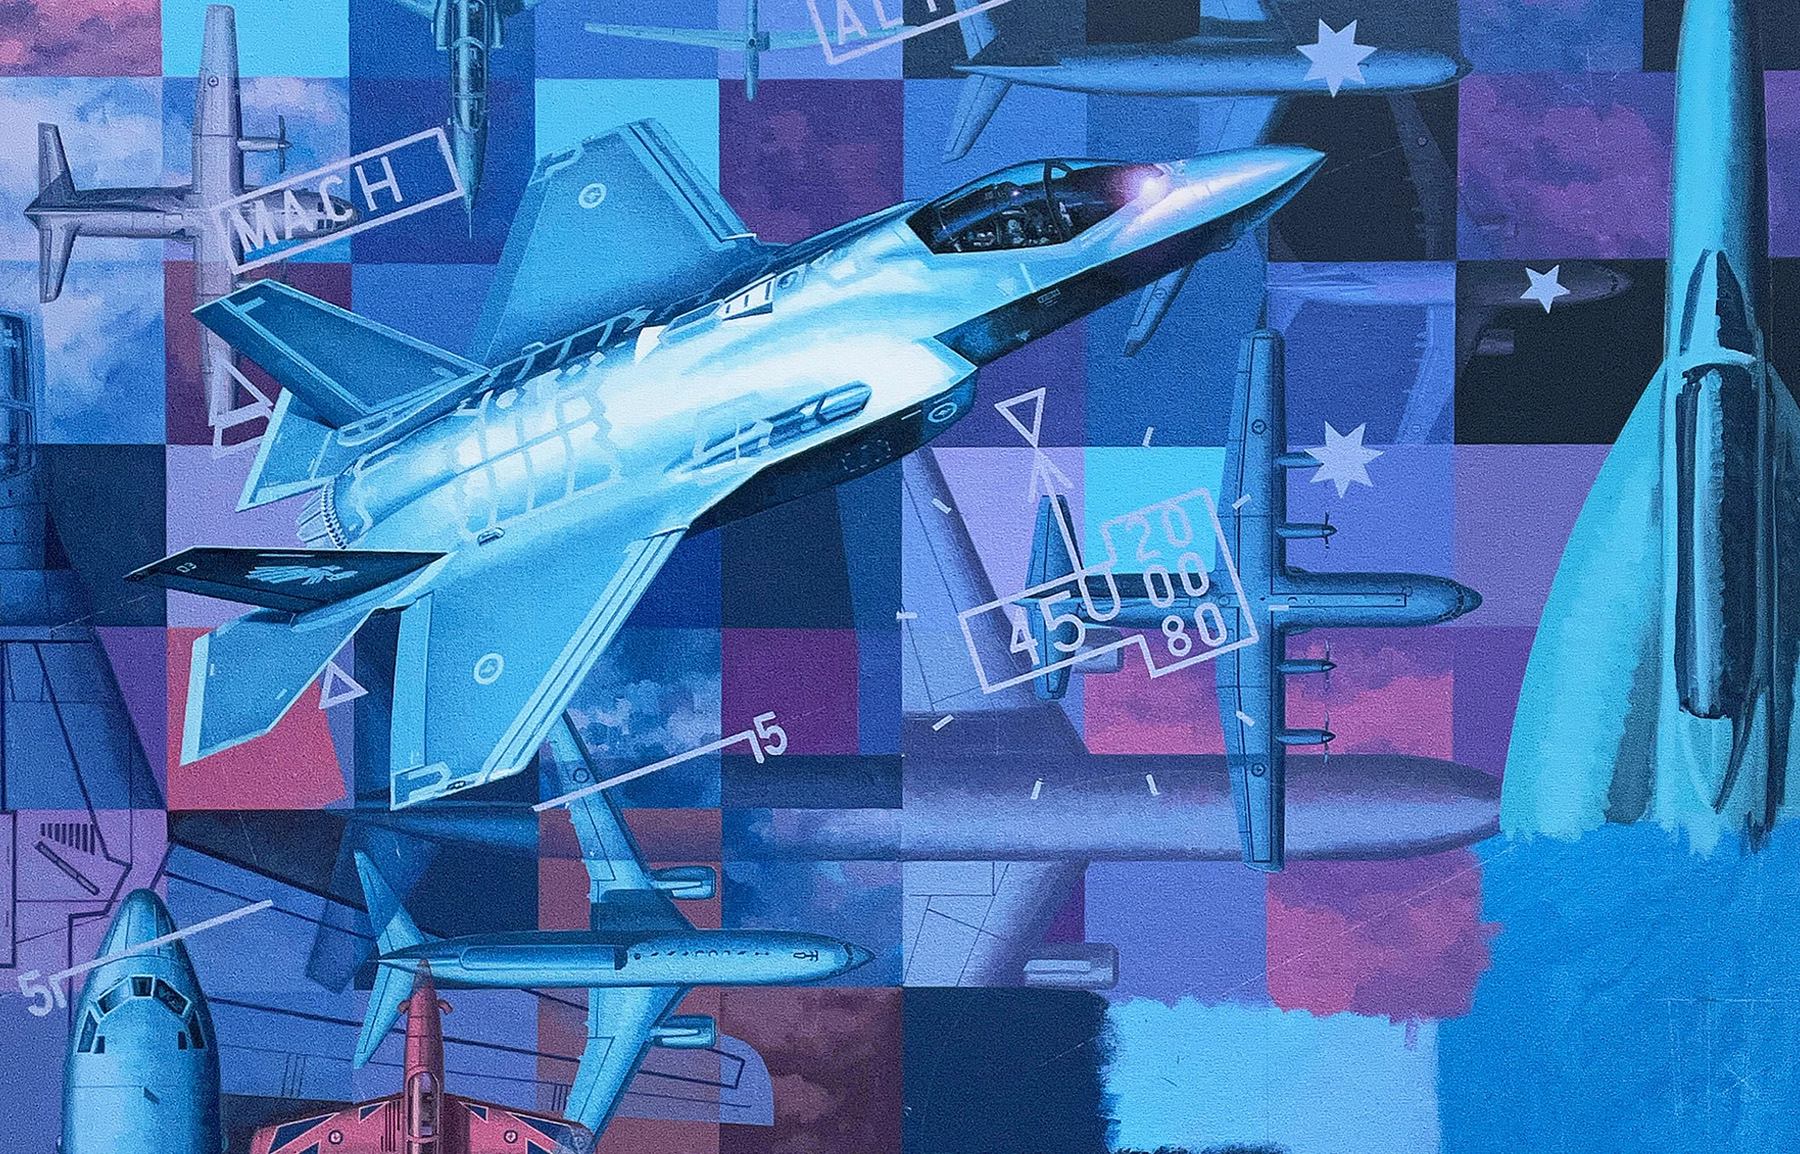
Fortunately, there was space at bottom right and the proposed position did not impact too greatly on the sections I had already painted. With RAAF guidance I was able to develop an appropriate modern day composition reflecting the roles, standards and diversity of today’s organisation. It was also a perfect opportunity to give focus to transport operations and the awesome C-17, even though it involved painting over another C-17! Anyway, I am much happier this made it into the painting even though I was gritting my teeth at the time! As would be expected, all the above planning took time away from painting, however I had to maintain a tight schedule. While waiting for approval on the transport scene design I continued on painting and finished what could be done. This involved the P-3 Orion on left and E/A-18G Growler on right. I think there would have been a major protest if I had omitted the Orion! As one of the RAAF’s longest serving aircraft it has been a major workhorse involved on numerous maritime operations. I paid special attention to maritime patrol aircraft across the entire centenary artwork as they are clearly an important asset to a nation surrounded by water. Sorry, but the Neptune did not make it in.
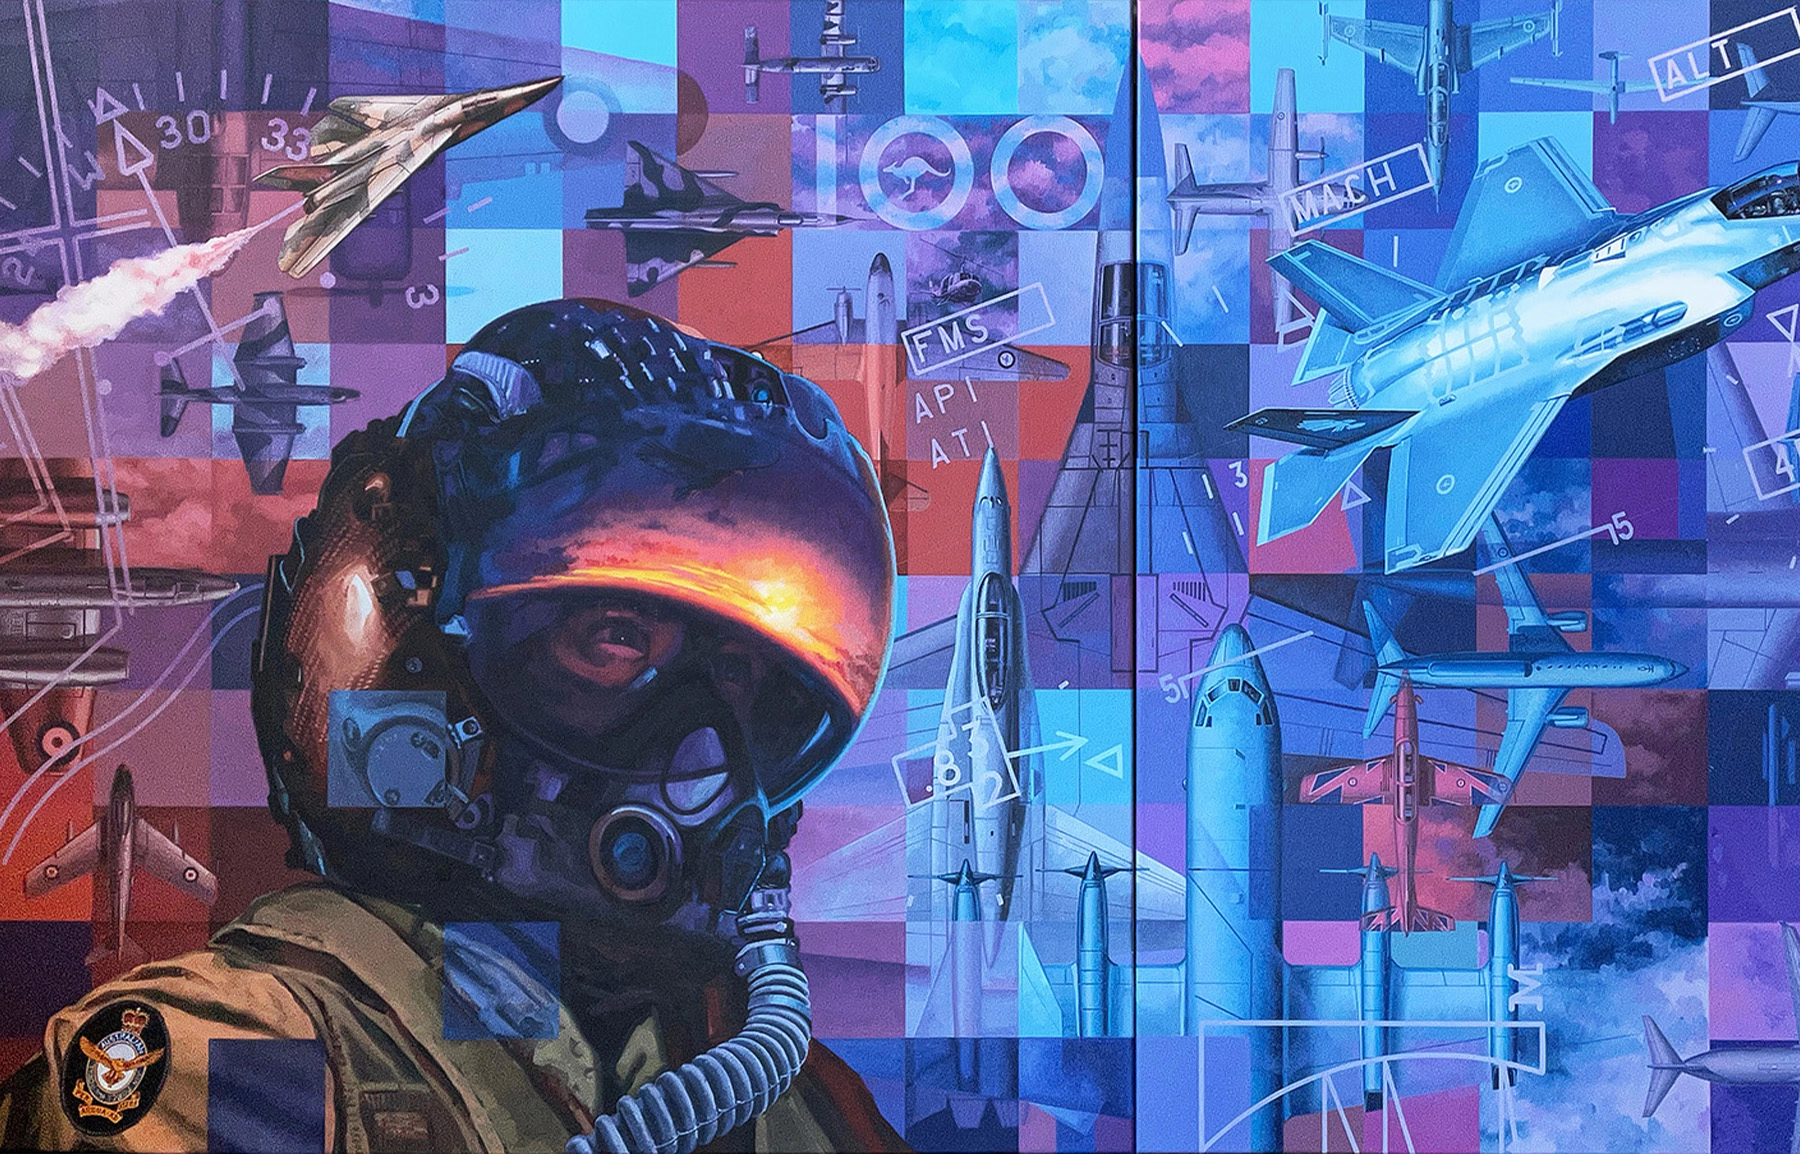
The Growler is a much newer addition to the RAAF fleet and this features prominently on the far right. In context to the overall painting it forms a repetition and symmetry of vertical forms. In panel one (left) there is the Lancaster, followed by the classic Hornet and F-111 between two and three (middle) and then the Growler at the very end (right). These aircraft more or less performed the same tactical bombing role and are presented much like pillars in the composition. Generally speaking each aircraft became progressively smaller, more advanced and able to haul a large payload than the one before. A heavy day of mathematics took hold during this time when serious calculations for the overlaying grid became necessary. The trajectory lines from P-40, F-111 and F-35 cross over multiple panels and help give direction to the Head-Up-Display graphics and Point Cook map. Some idiot (me!) designed these on a diagonal and not all run off at right angles. Out came the tape measure for plotting the trajectory lines and then sheets of paper were used to plot right angles for the FMS, MACH, ALT and number graphics. Repeated numbers were traced to appear identical. By 8th of March panel three was as far advanced as I could go.
Part 10
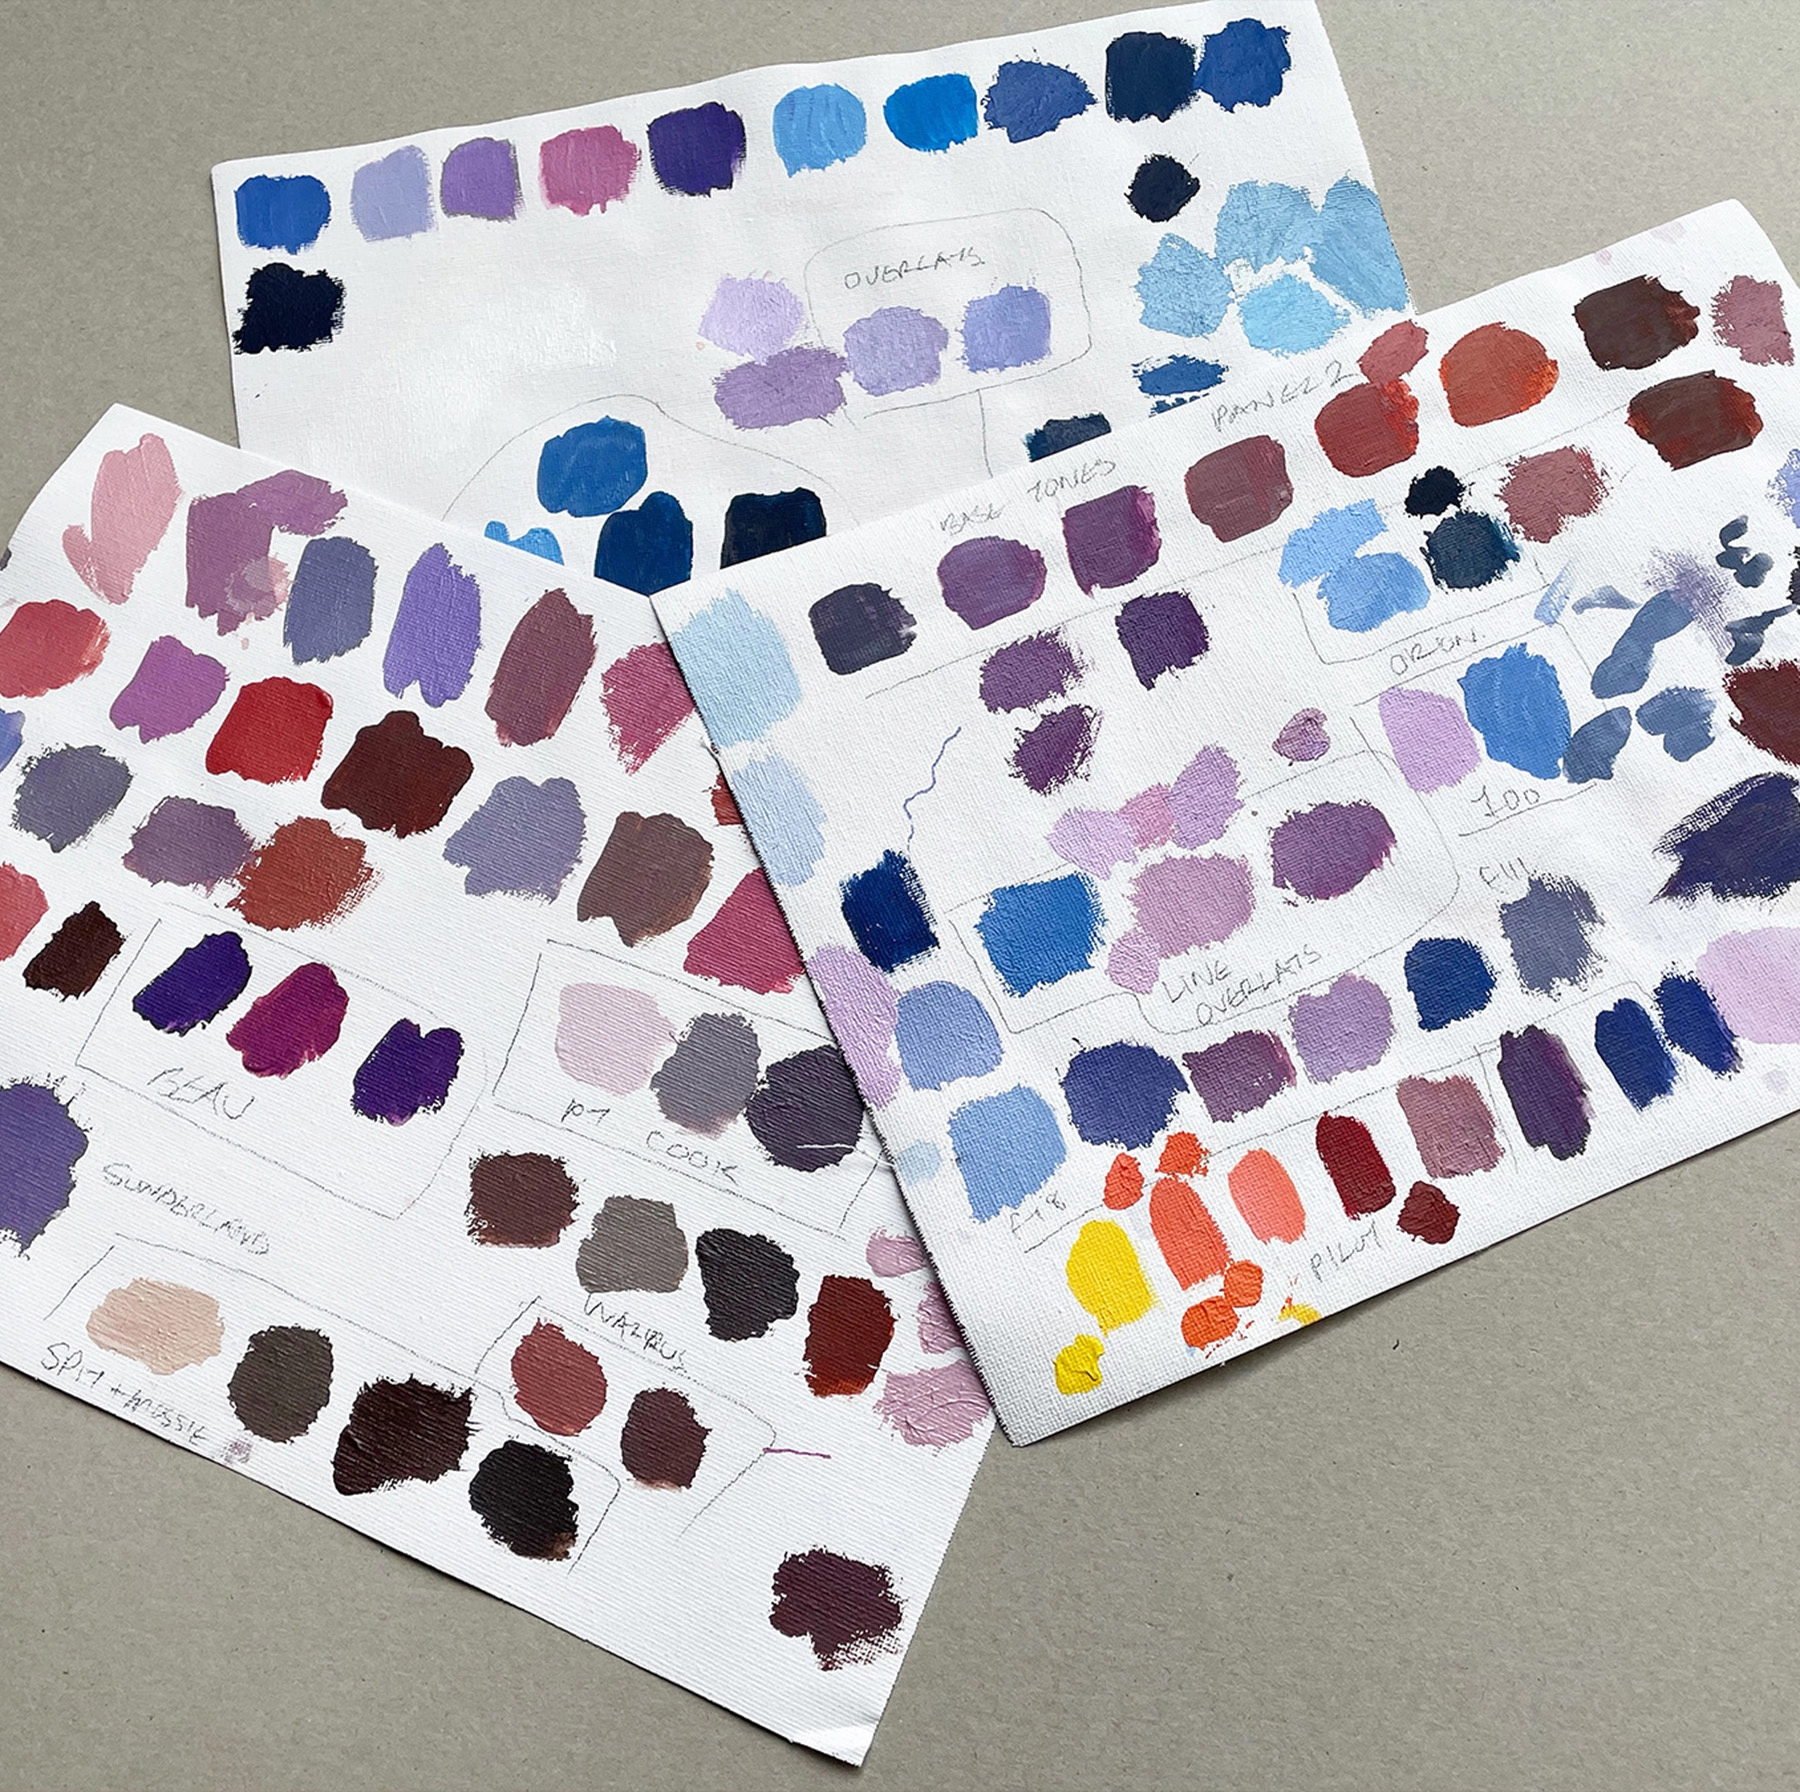
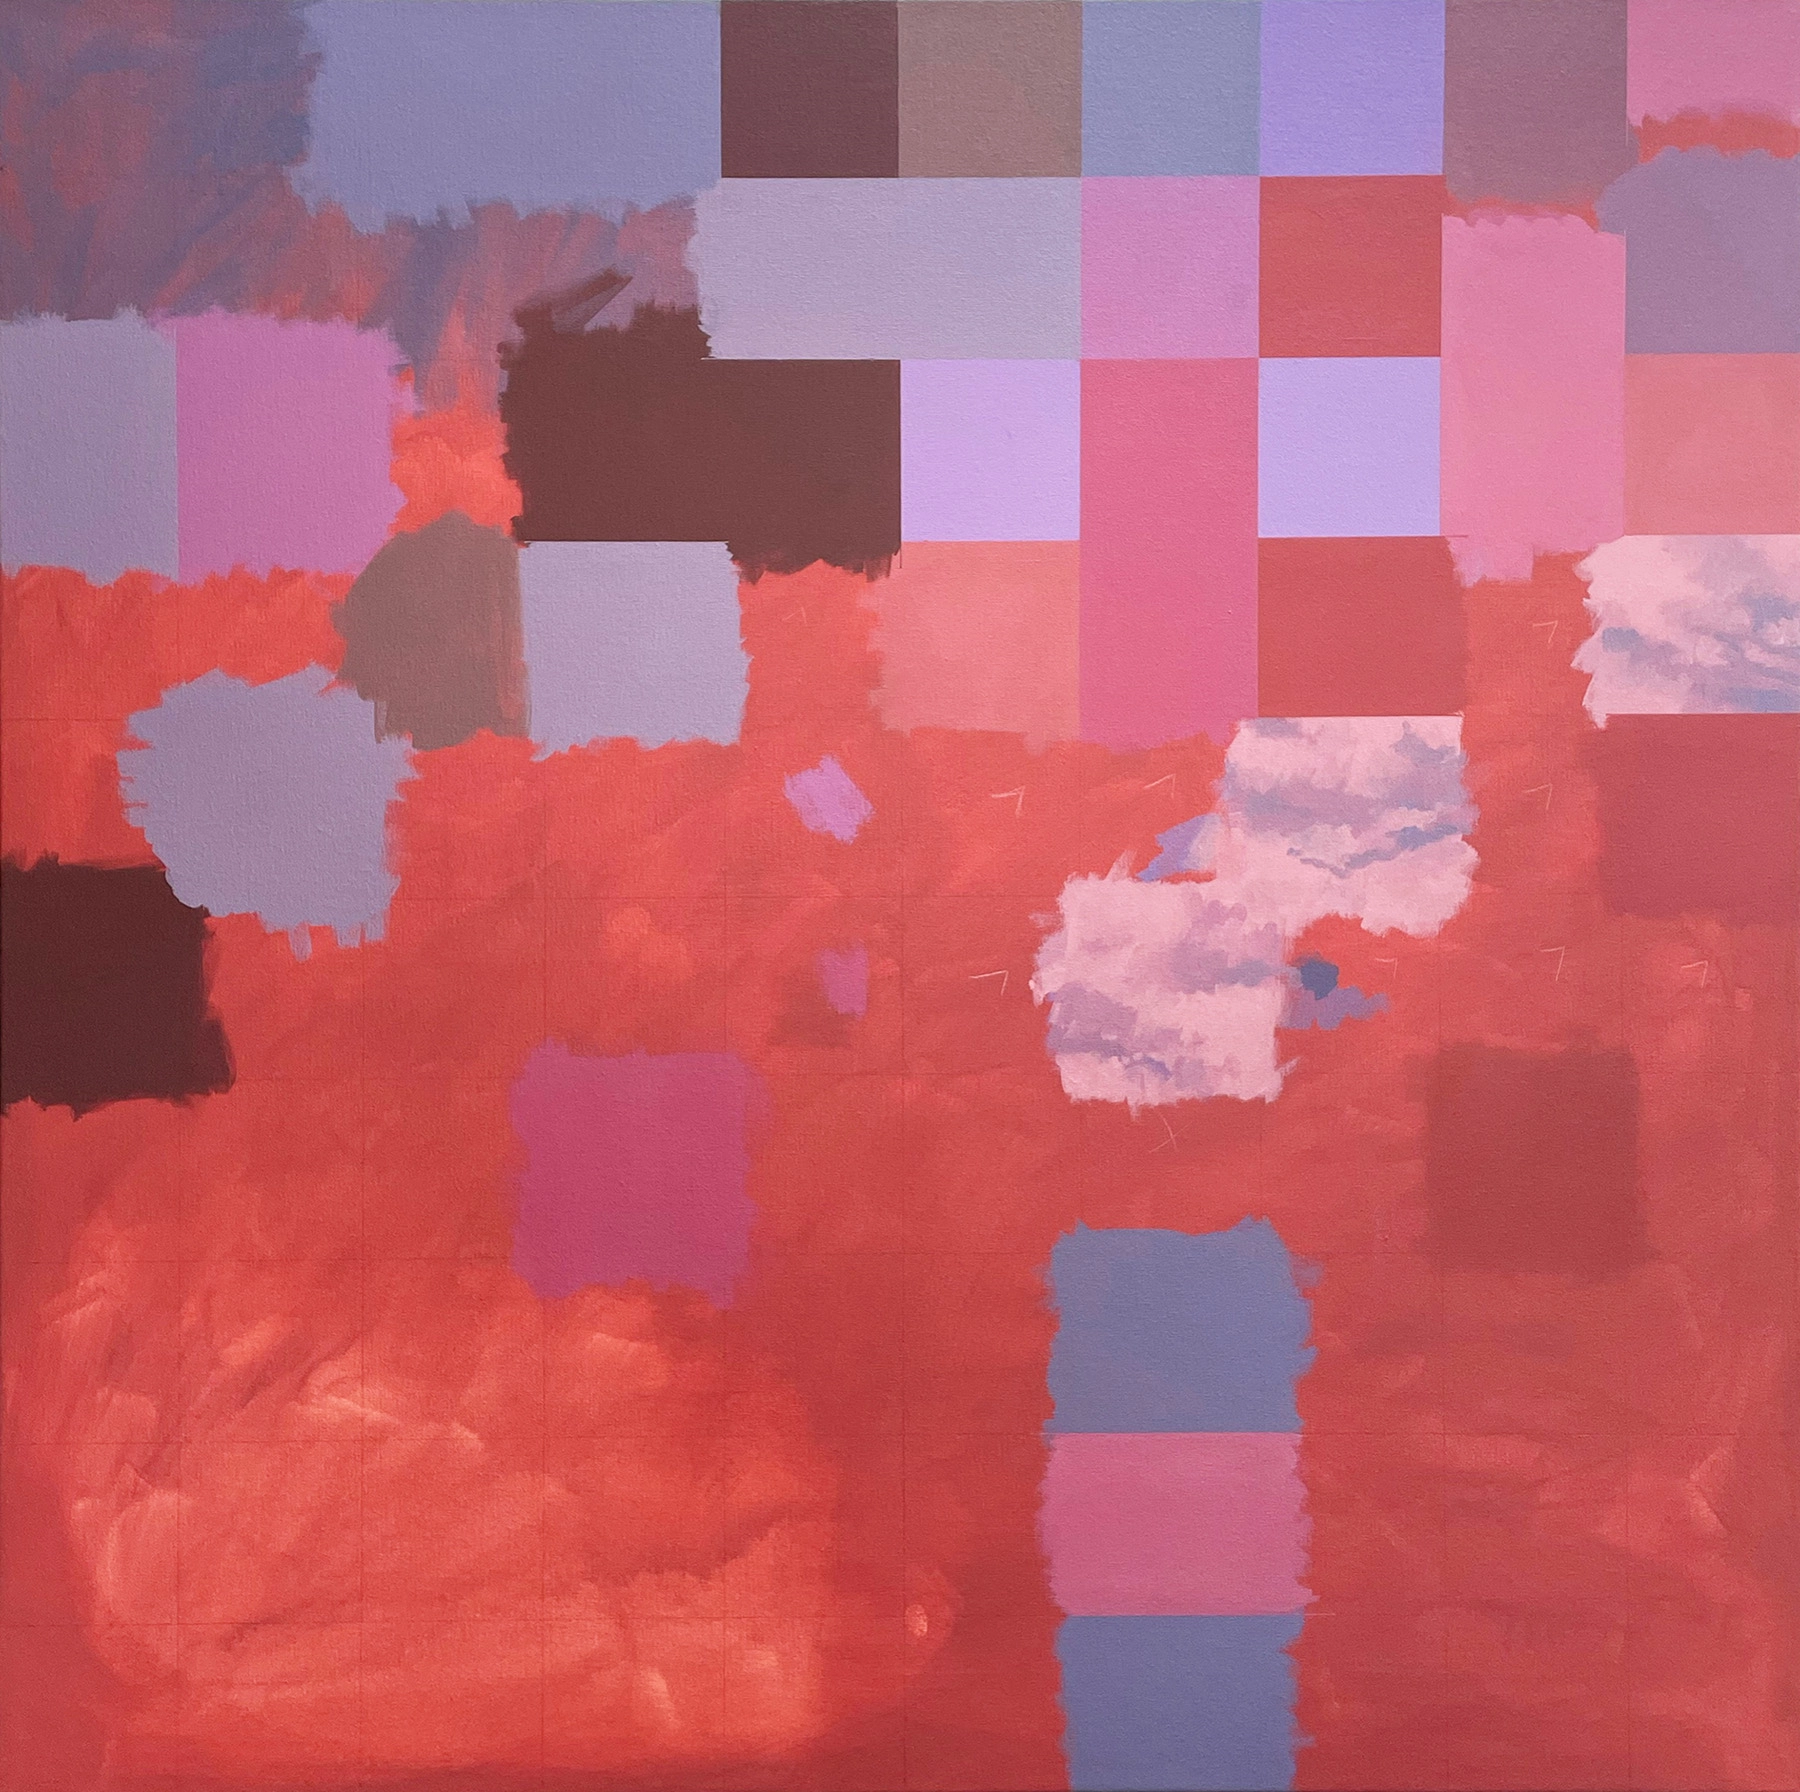
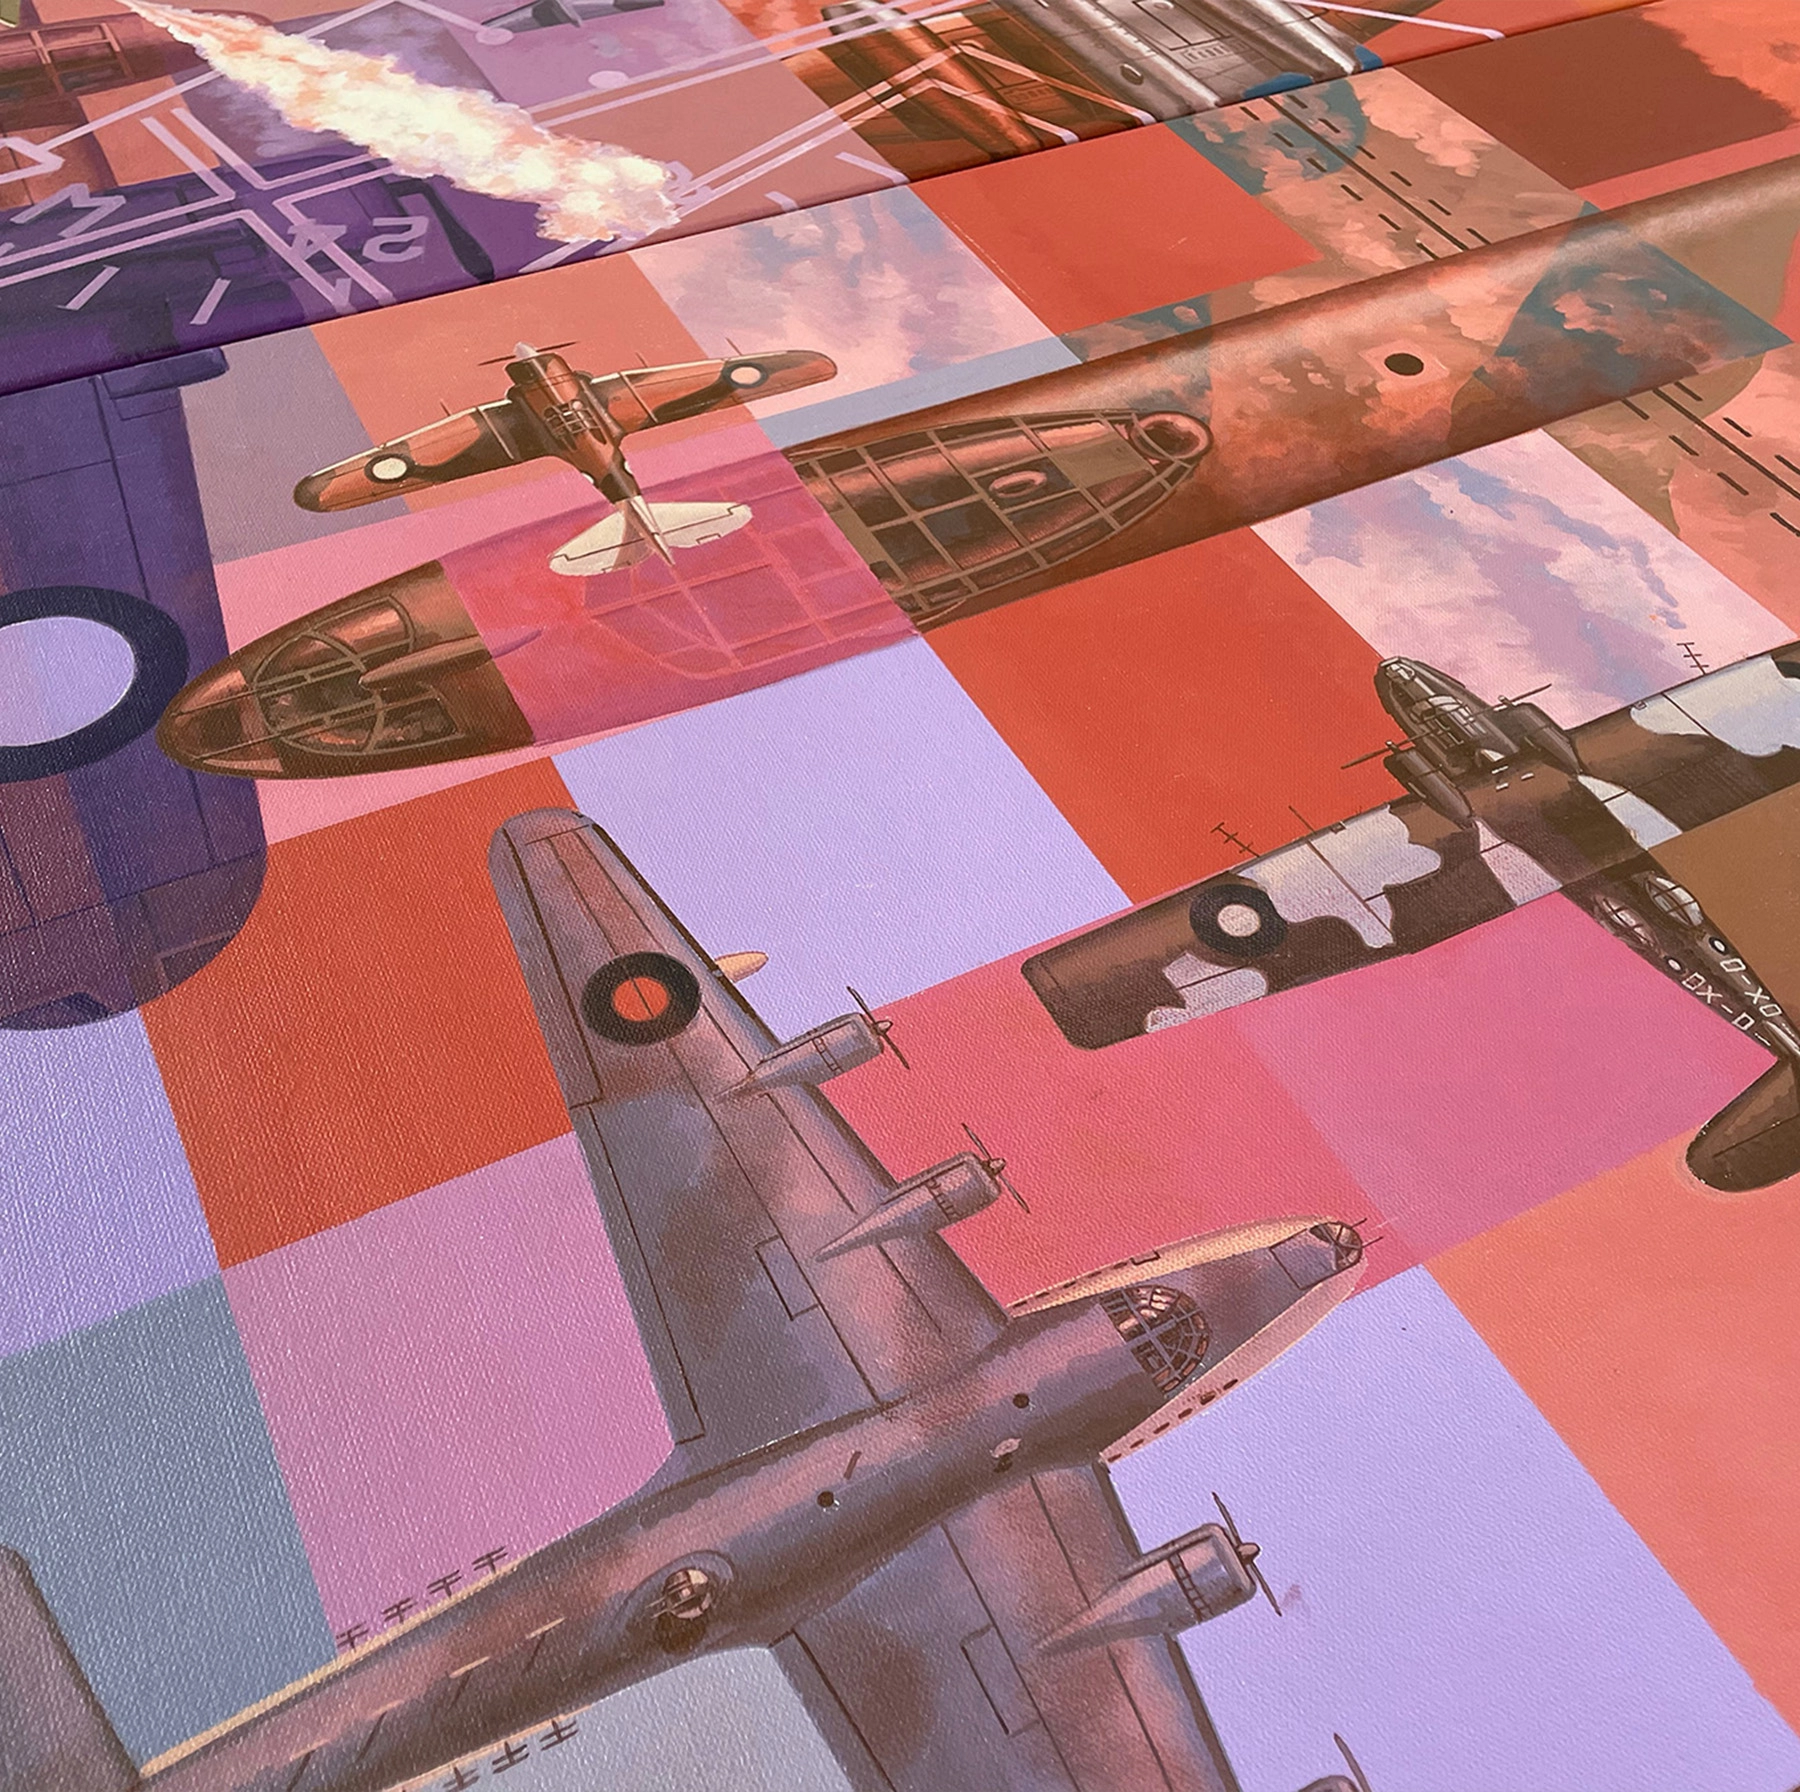
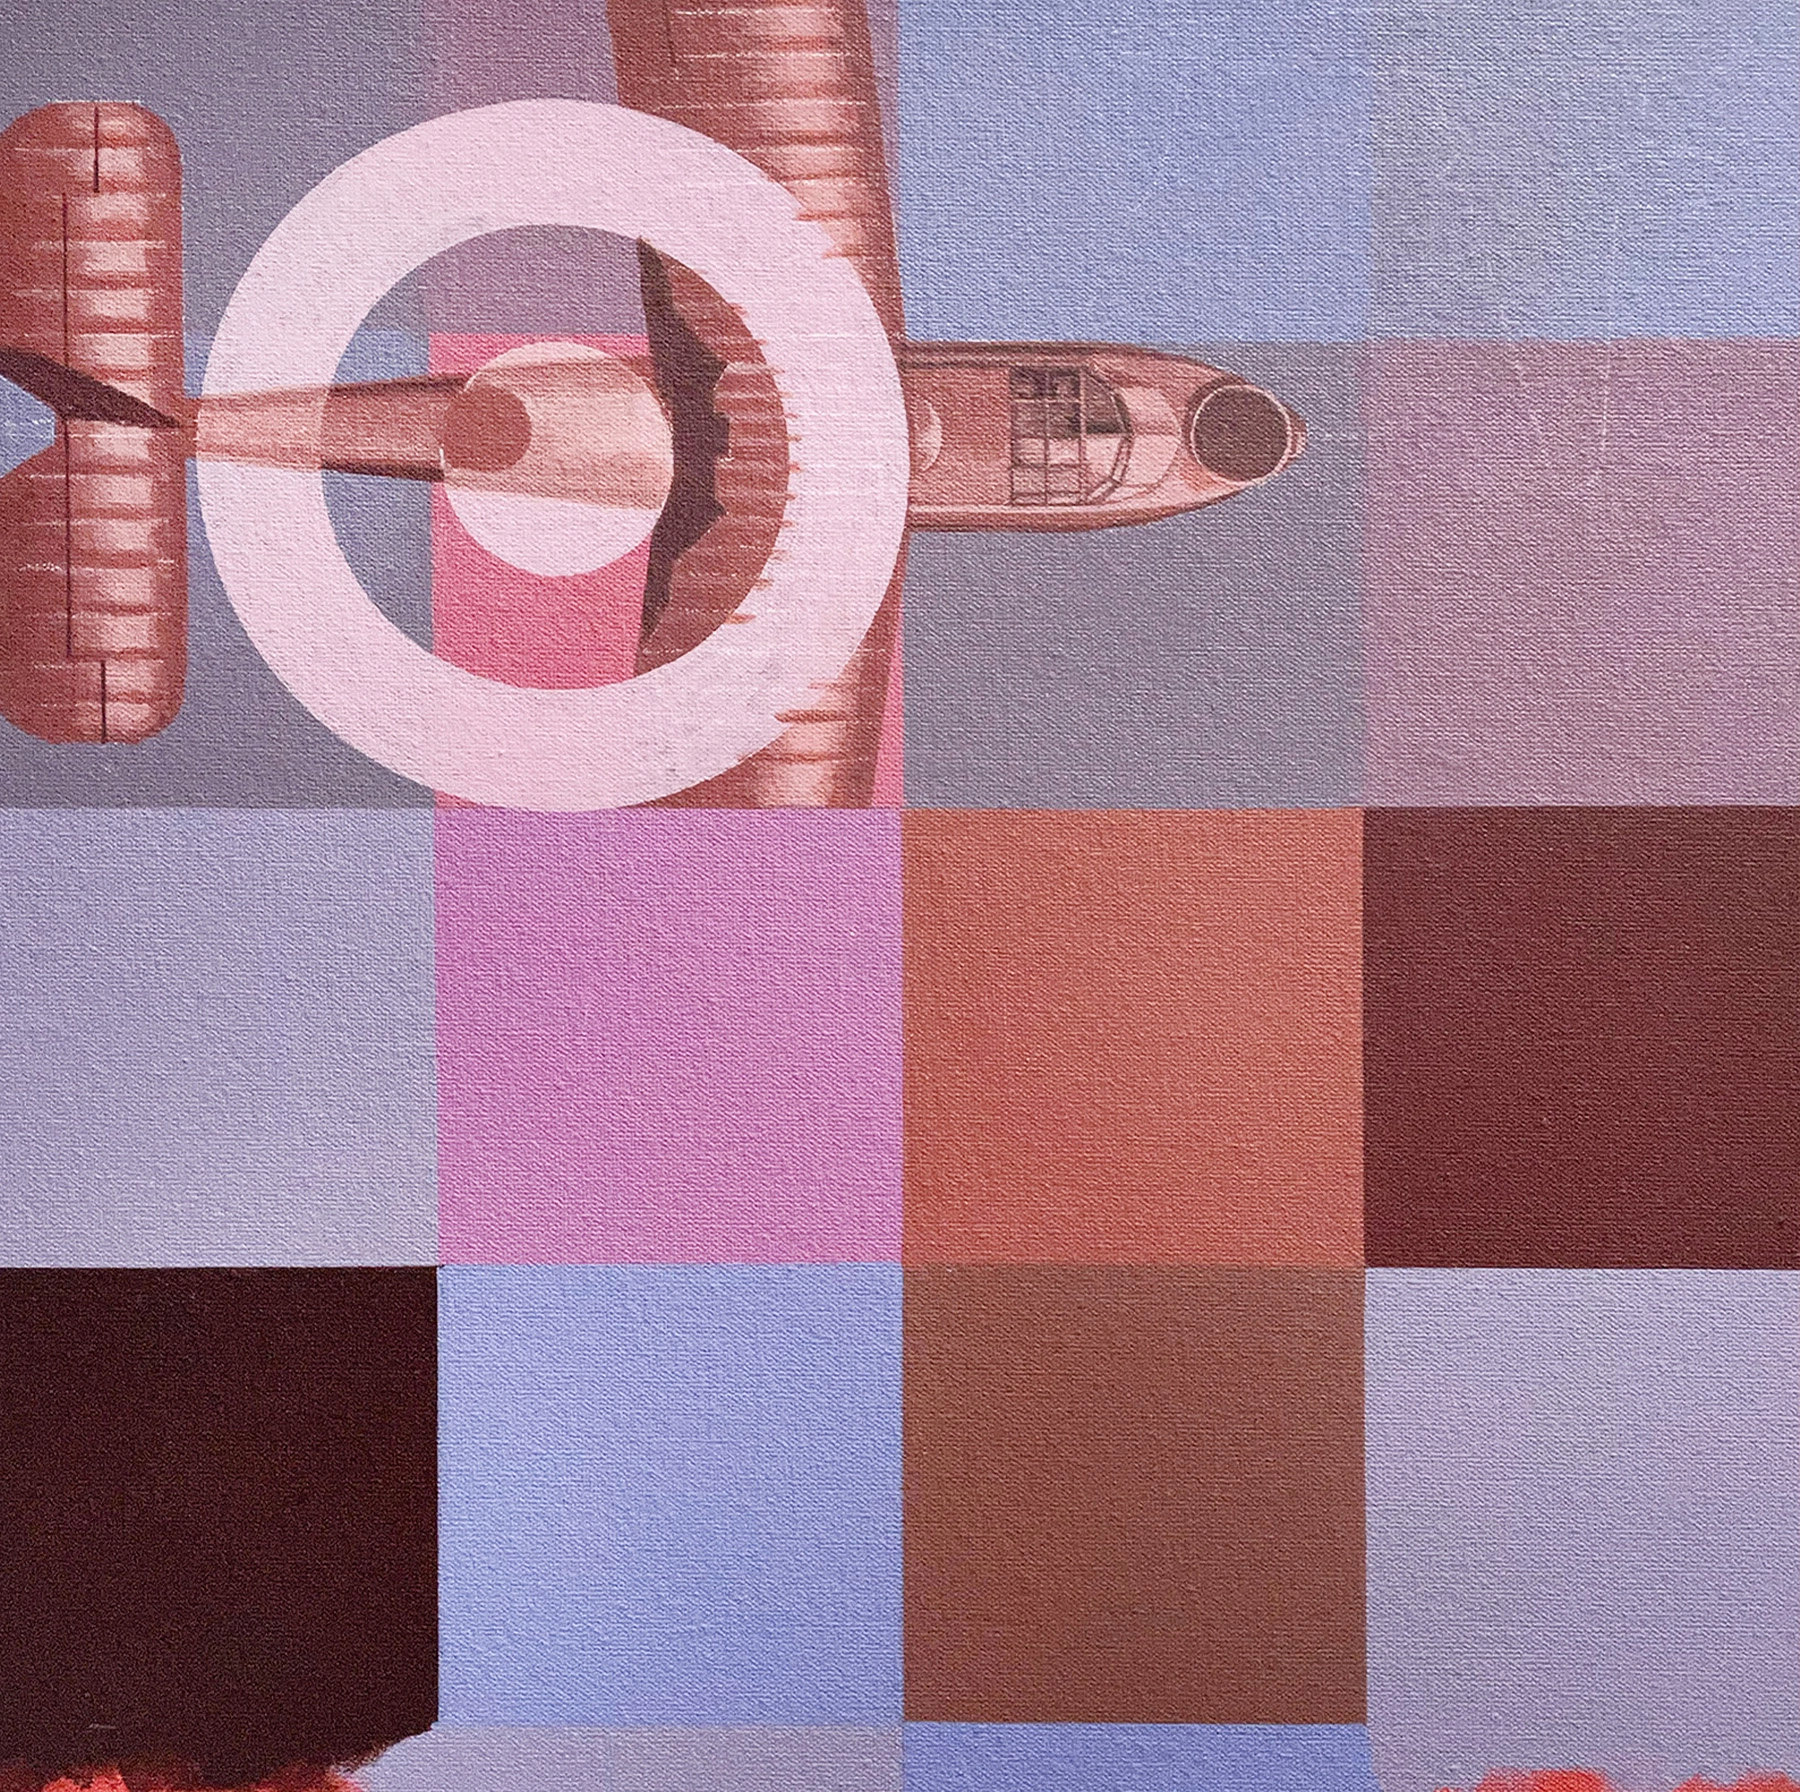
The left panel was approached with a certain amount of trepidation. Not only had I been painting solidly for a fortnight this canvas involved a switch in colour palette and more aircraft than the other two panels. Of those aircraft most were either camouflaged (which take longer to paint), or biplanes, that take even longer to paint. Put simply more work, less time, higher fatigue and reduced motivation!! One bonus was less layering of aircraft compared to panel three. This time my start point was blocking in a lot more squares at the beginning, although I worked in the Beaufighter wing fairly early as it is a continuation from the middle panel. For what ever reason the Lancaster proved to be harder than expected partly because of the camouflage running across multiple squares and fading in and out across cloudscapes. I personally prefer the Halifax bomber to Lancaster. Controversial! If the Lancaster was omitted I may have been shot! Either way both were flown by hundreds of Australian crews over Northern Europe during WWII.
The same pattern of blocking in aircraft took up the first few days of my schedule. These choices were tough to make. I am particularly drawn to WWII era aircraft and many had to make way for others. Yes, it would have been great to have an A-20 Boston of 22 Sqn RAAF, Vultee Vengeance from the other Citizen Squadrons 21, 23, 24, 25 or a Wirraway from 4 Sqn RAAF and Beaufort from numerous other units including 100 Sqn RAAF, etc, etc, etc. However, these are not overly well known types and there is greater affinity for aircraft such as the Catalina or Mosquito. In the case of the Boomerang it was Australia’s only indigenously designed fighter aircraft which did have a production link to the Wirraway and both flew operations with 4 and 5 Squadrons RAAF. Similarly the Beaufort and Beaufighter share a similar heritage. As expected the camouflaged aircraft were time consuming to complete involving a bit more research for markings and units. Fortunately, most of the remaining aircraft in the bottom left were silver and could be painted using the same colour mixes.
At top left is an ungainly Walrus spotter plane that was used extensively in the early prewar and wartime period. This is overlaid with an early British roundel. Annoyingly at this stage I made a mistake on the exact type of roundel and it is something that had to be altered later. Even so the history of the roundel was an important story to tell within the centenary. Initially the RAAF adopted the same British type of the early 1920s and this evolved through several iterations until we arrived at the kangaroo. From my understanding this was originally painted on the side of a Mosquito nightfighter aircraft of 456 Sqn RAAF during WWII only later to be adopted officially into the service. Anyway, this progression of design is another story within the artwork composition.
Part 11
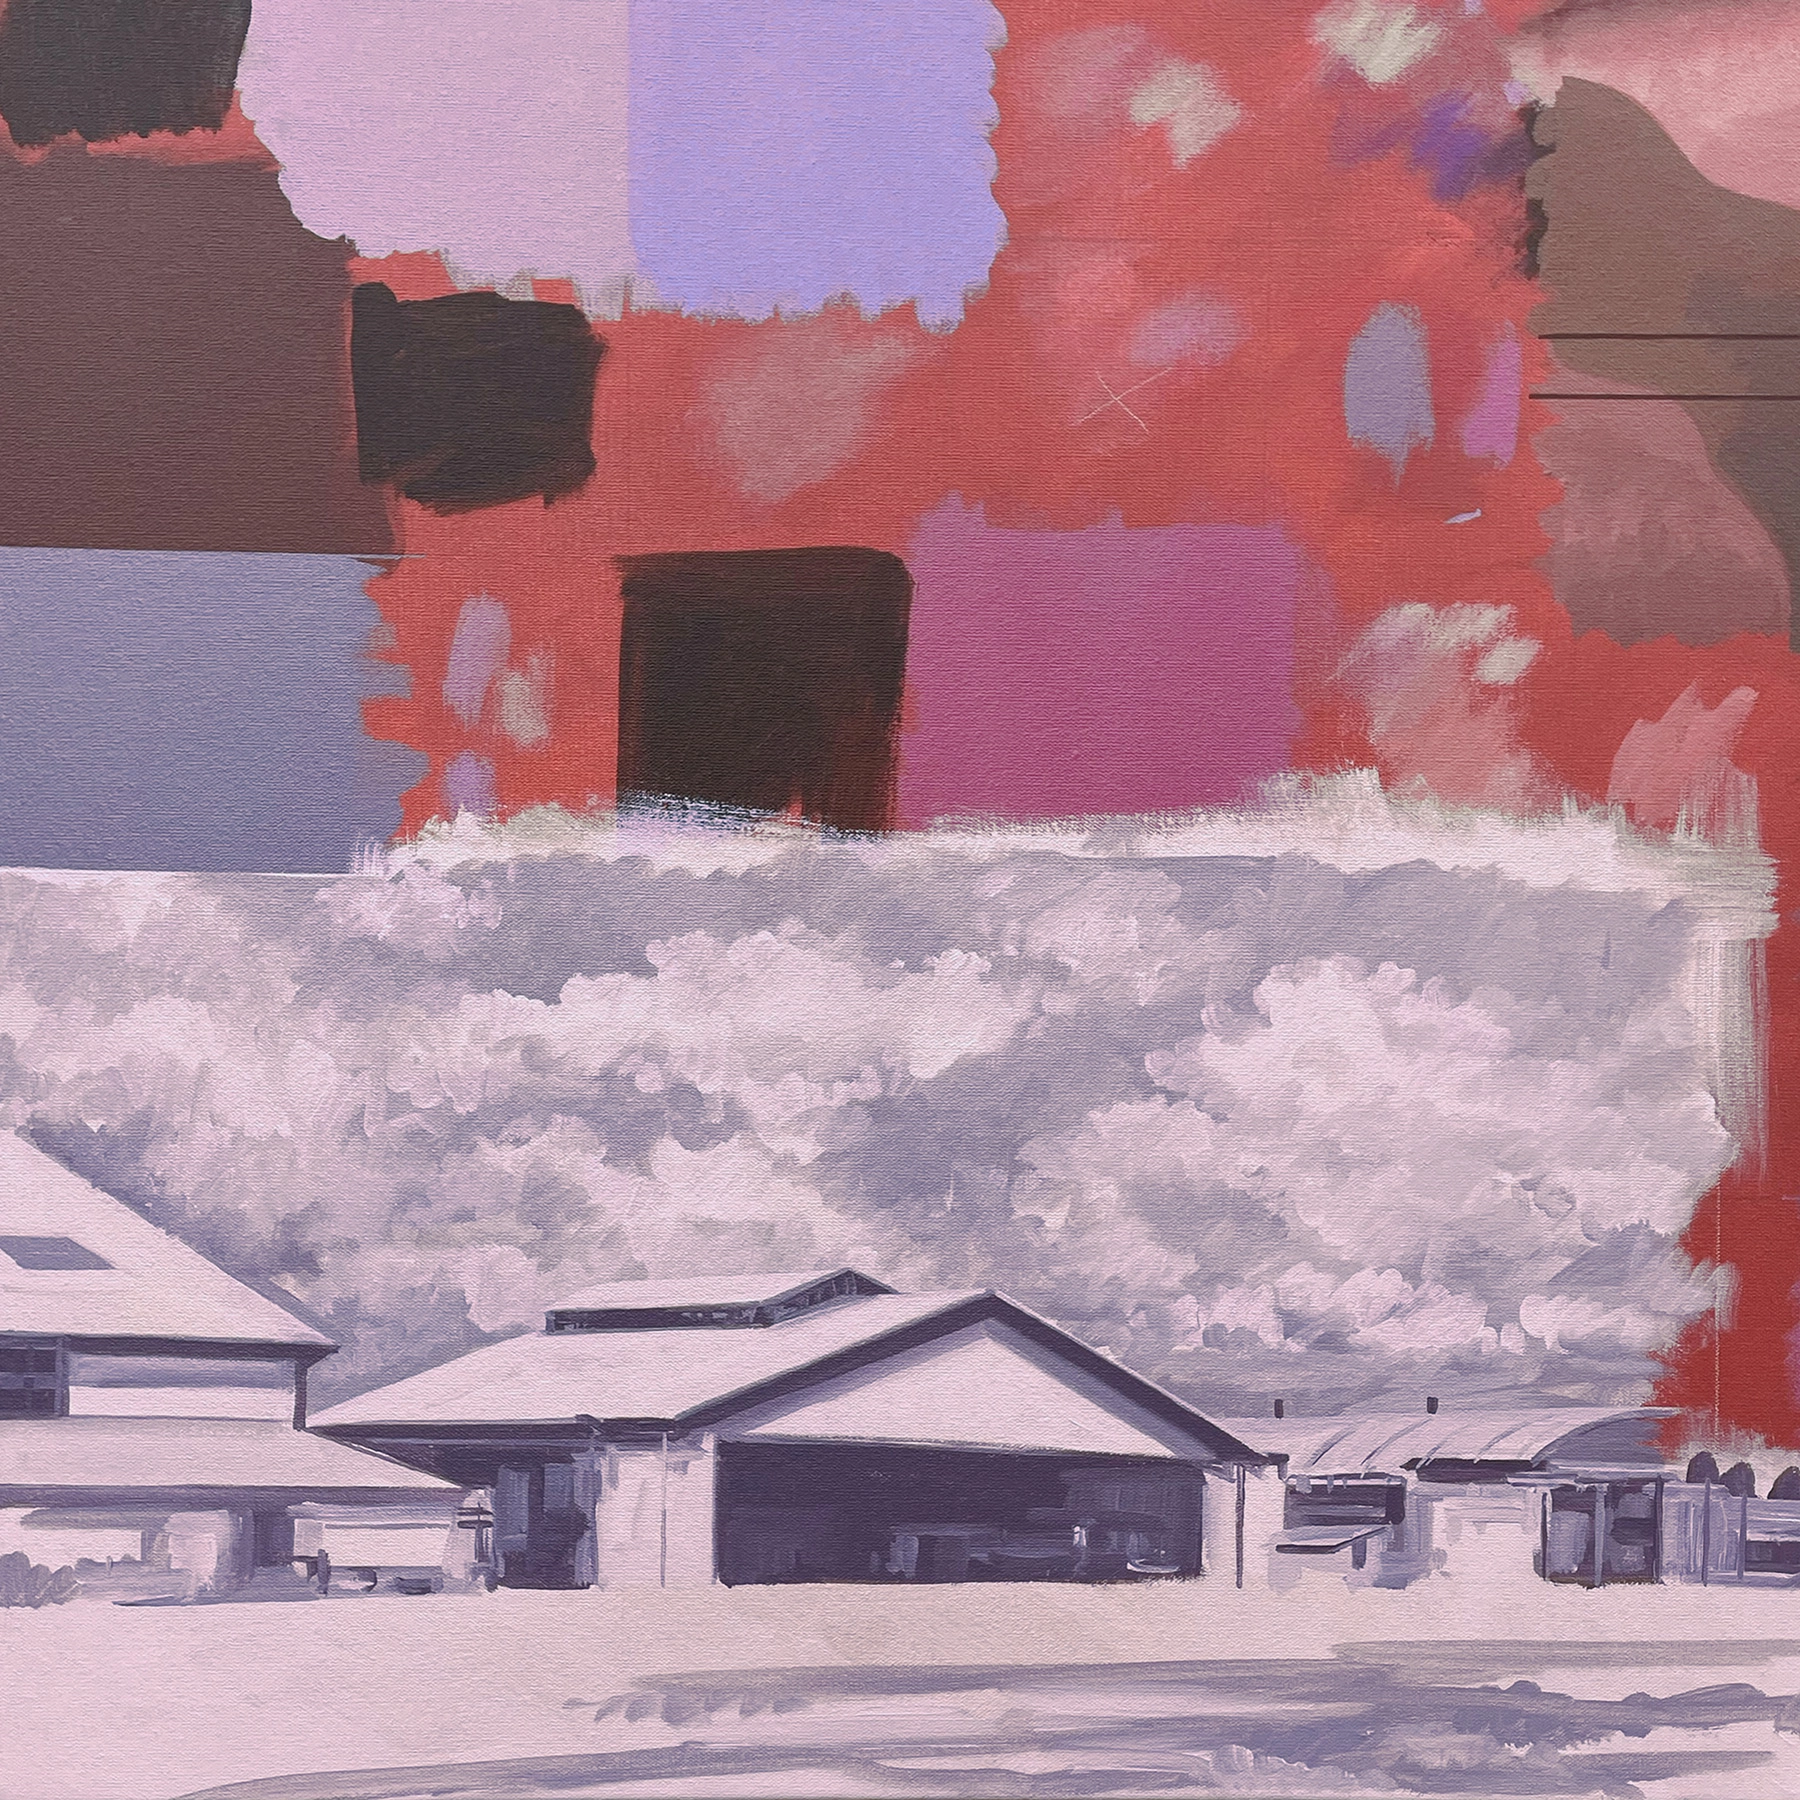
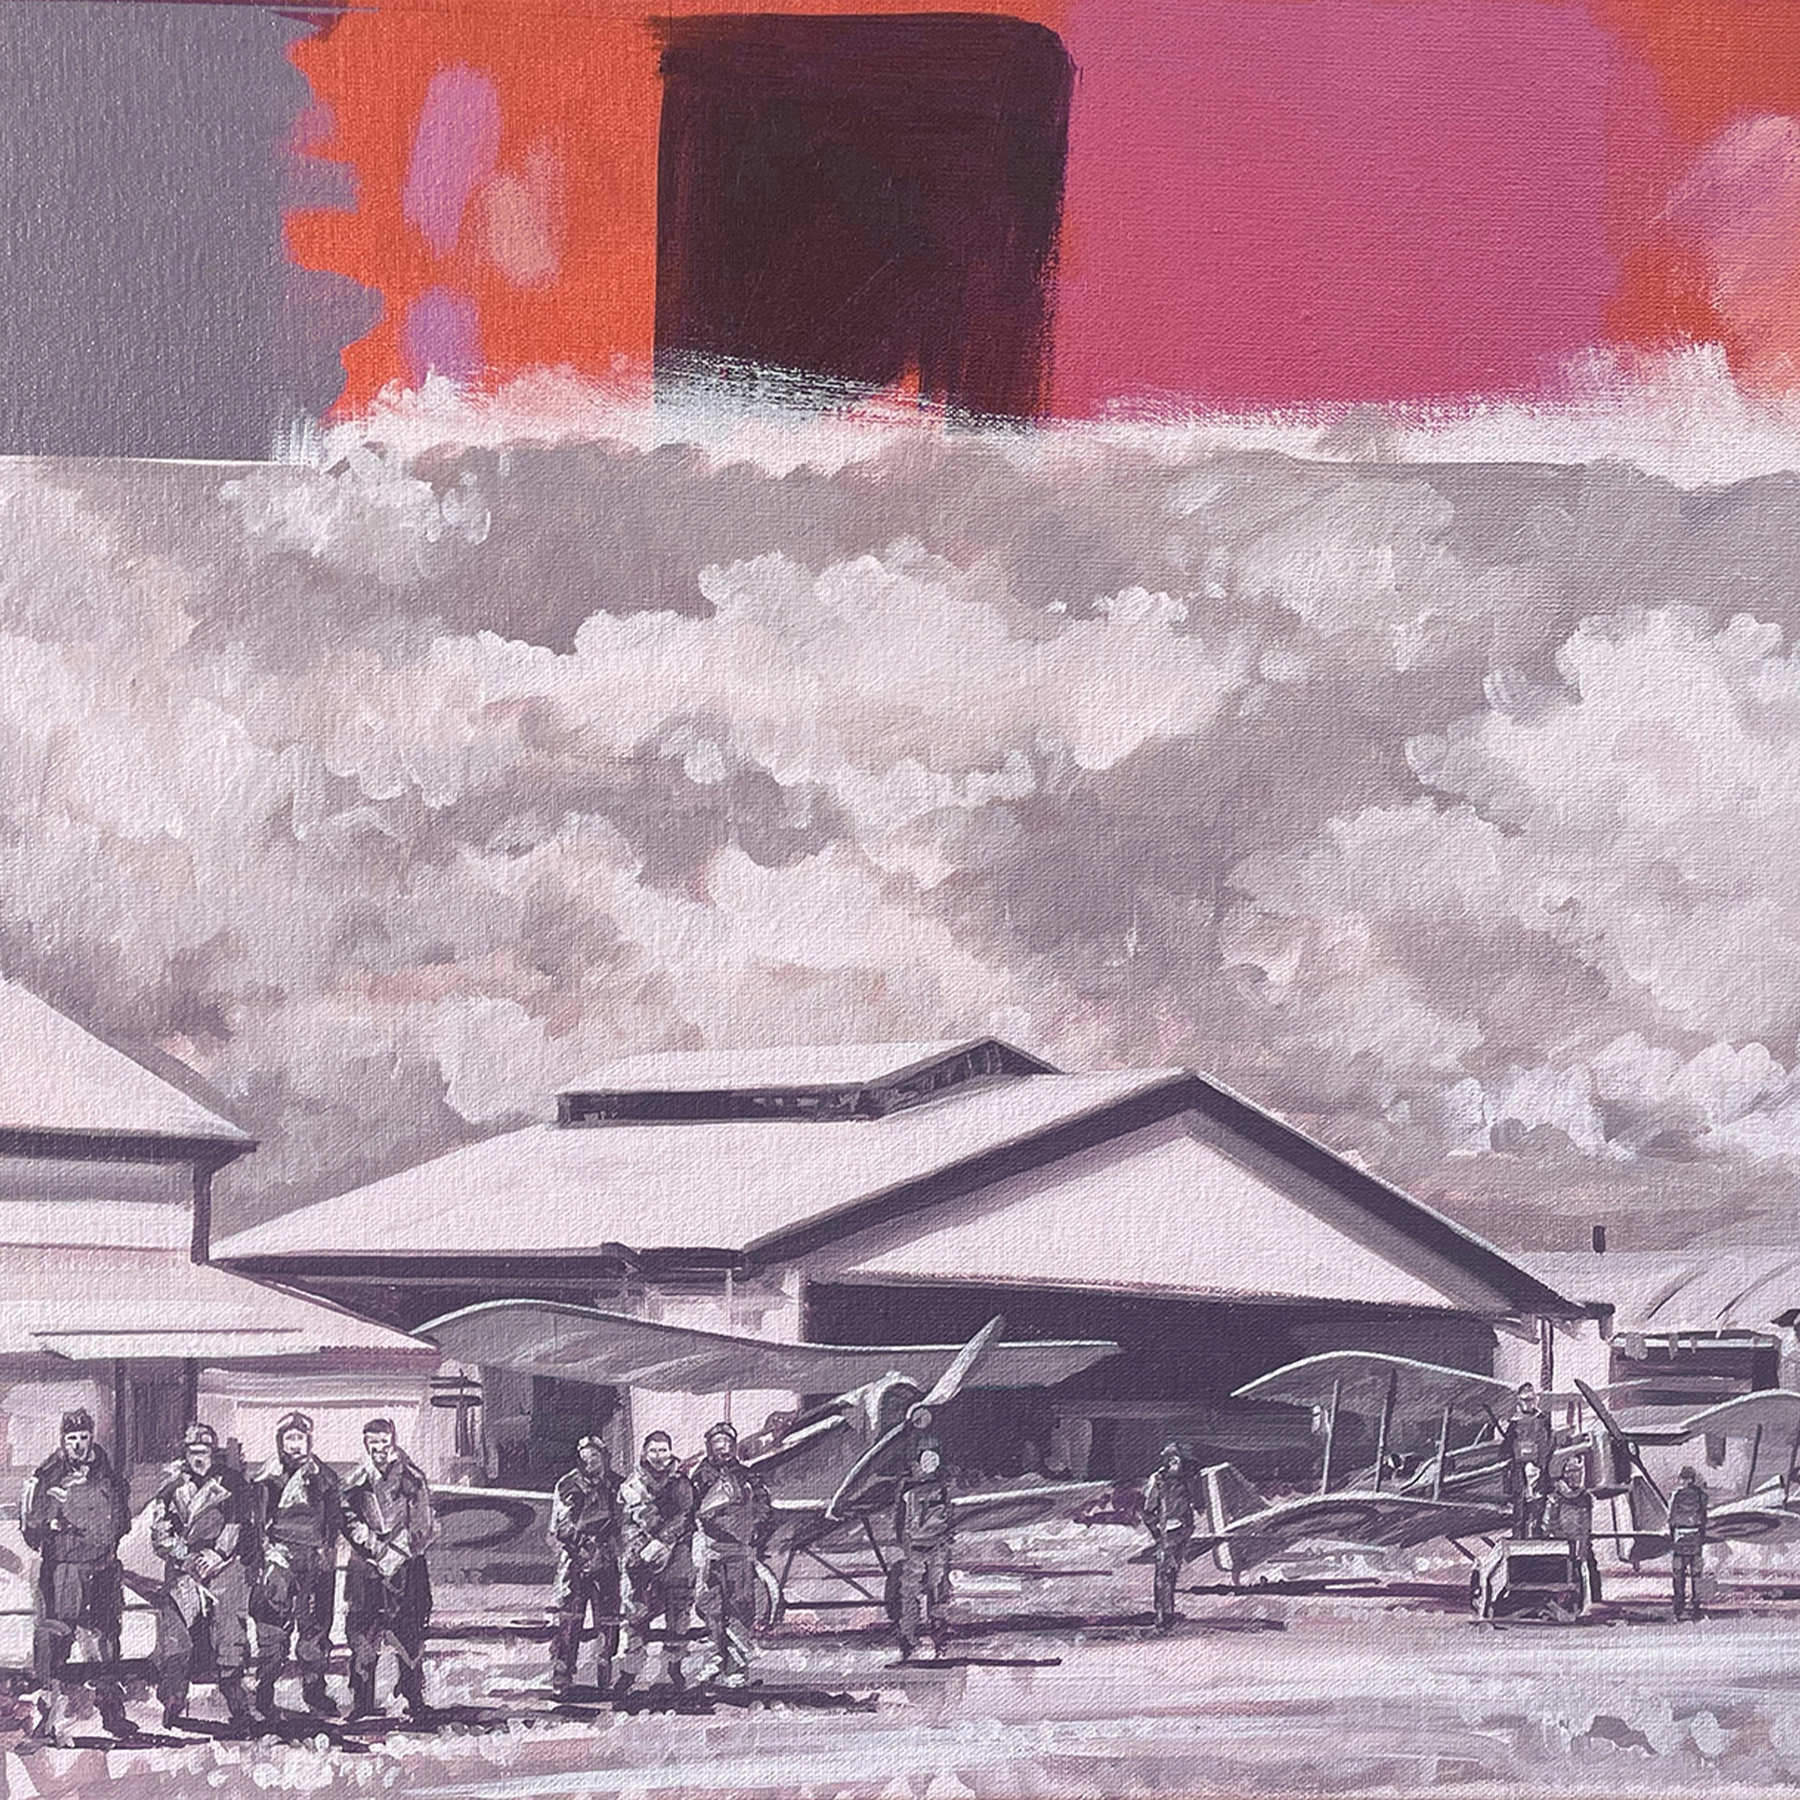
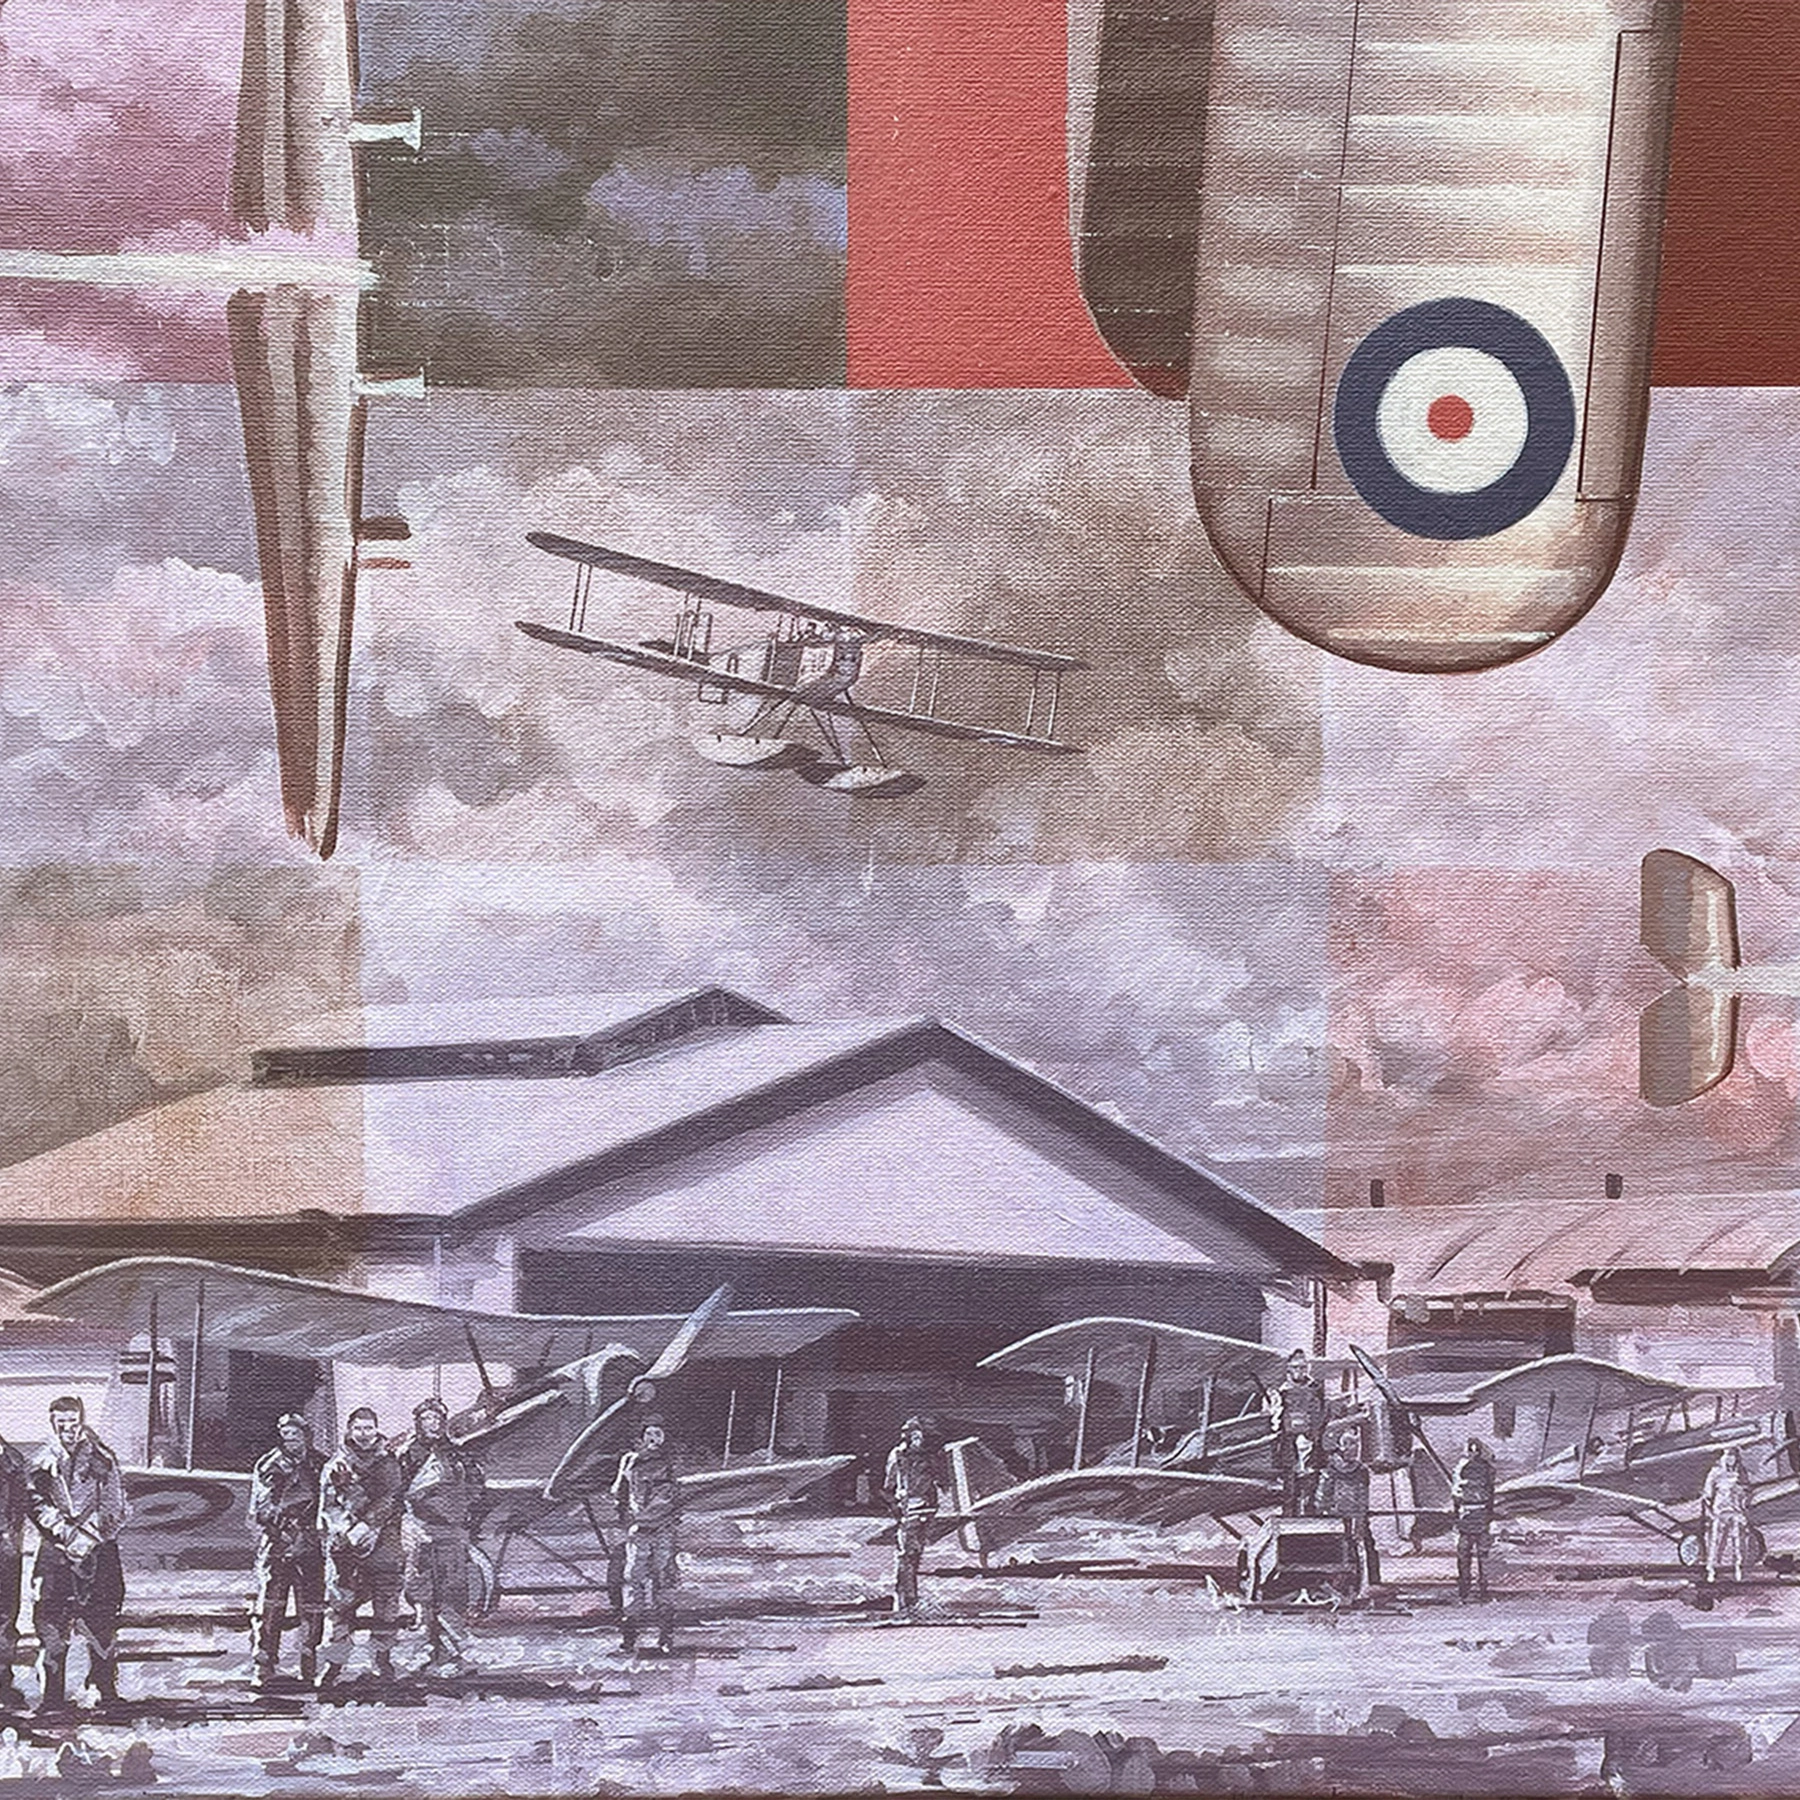
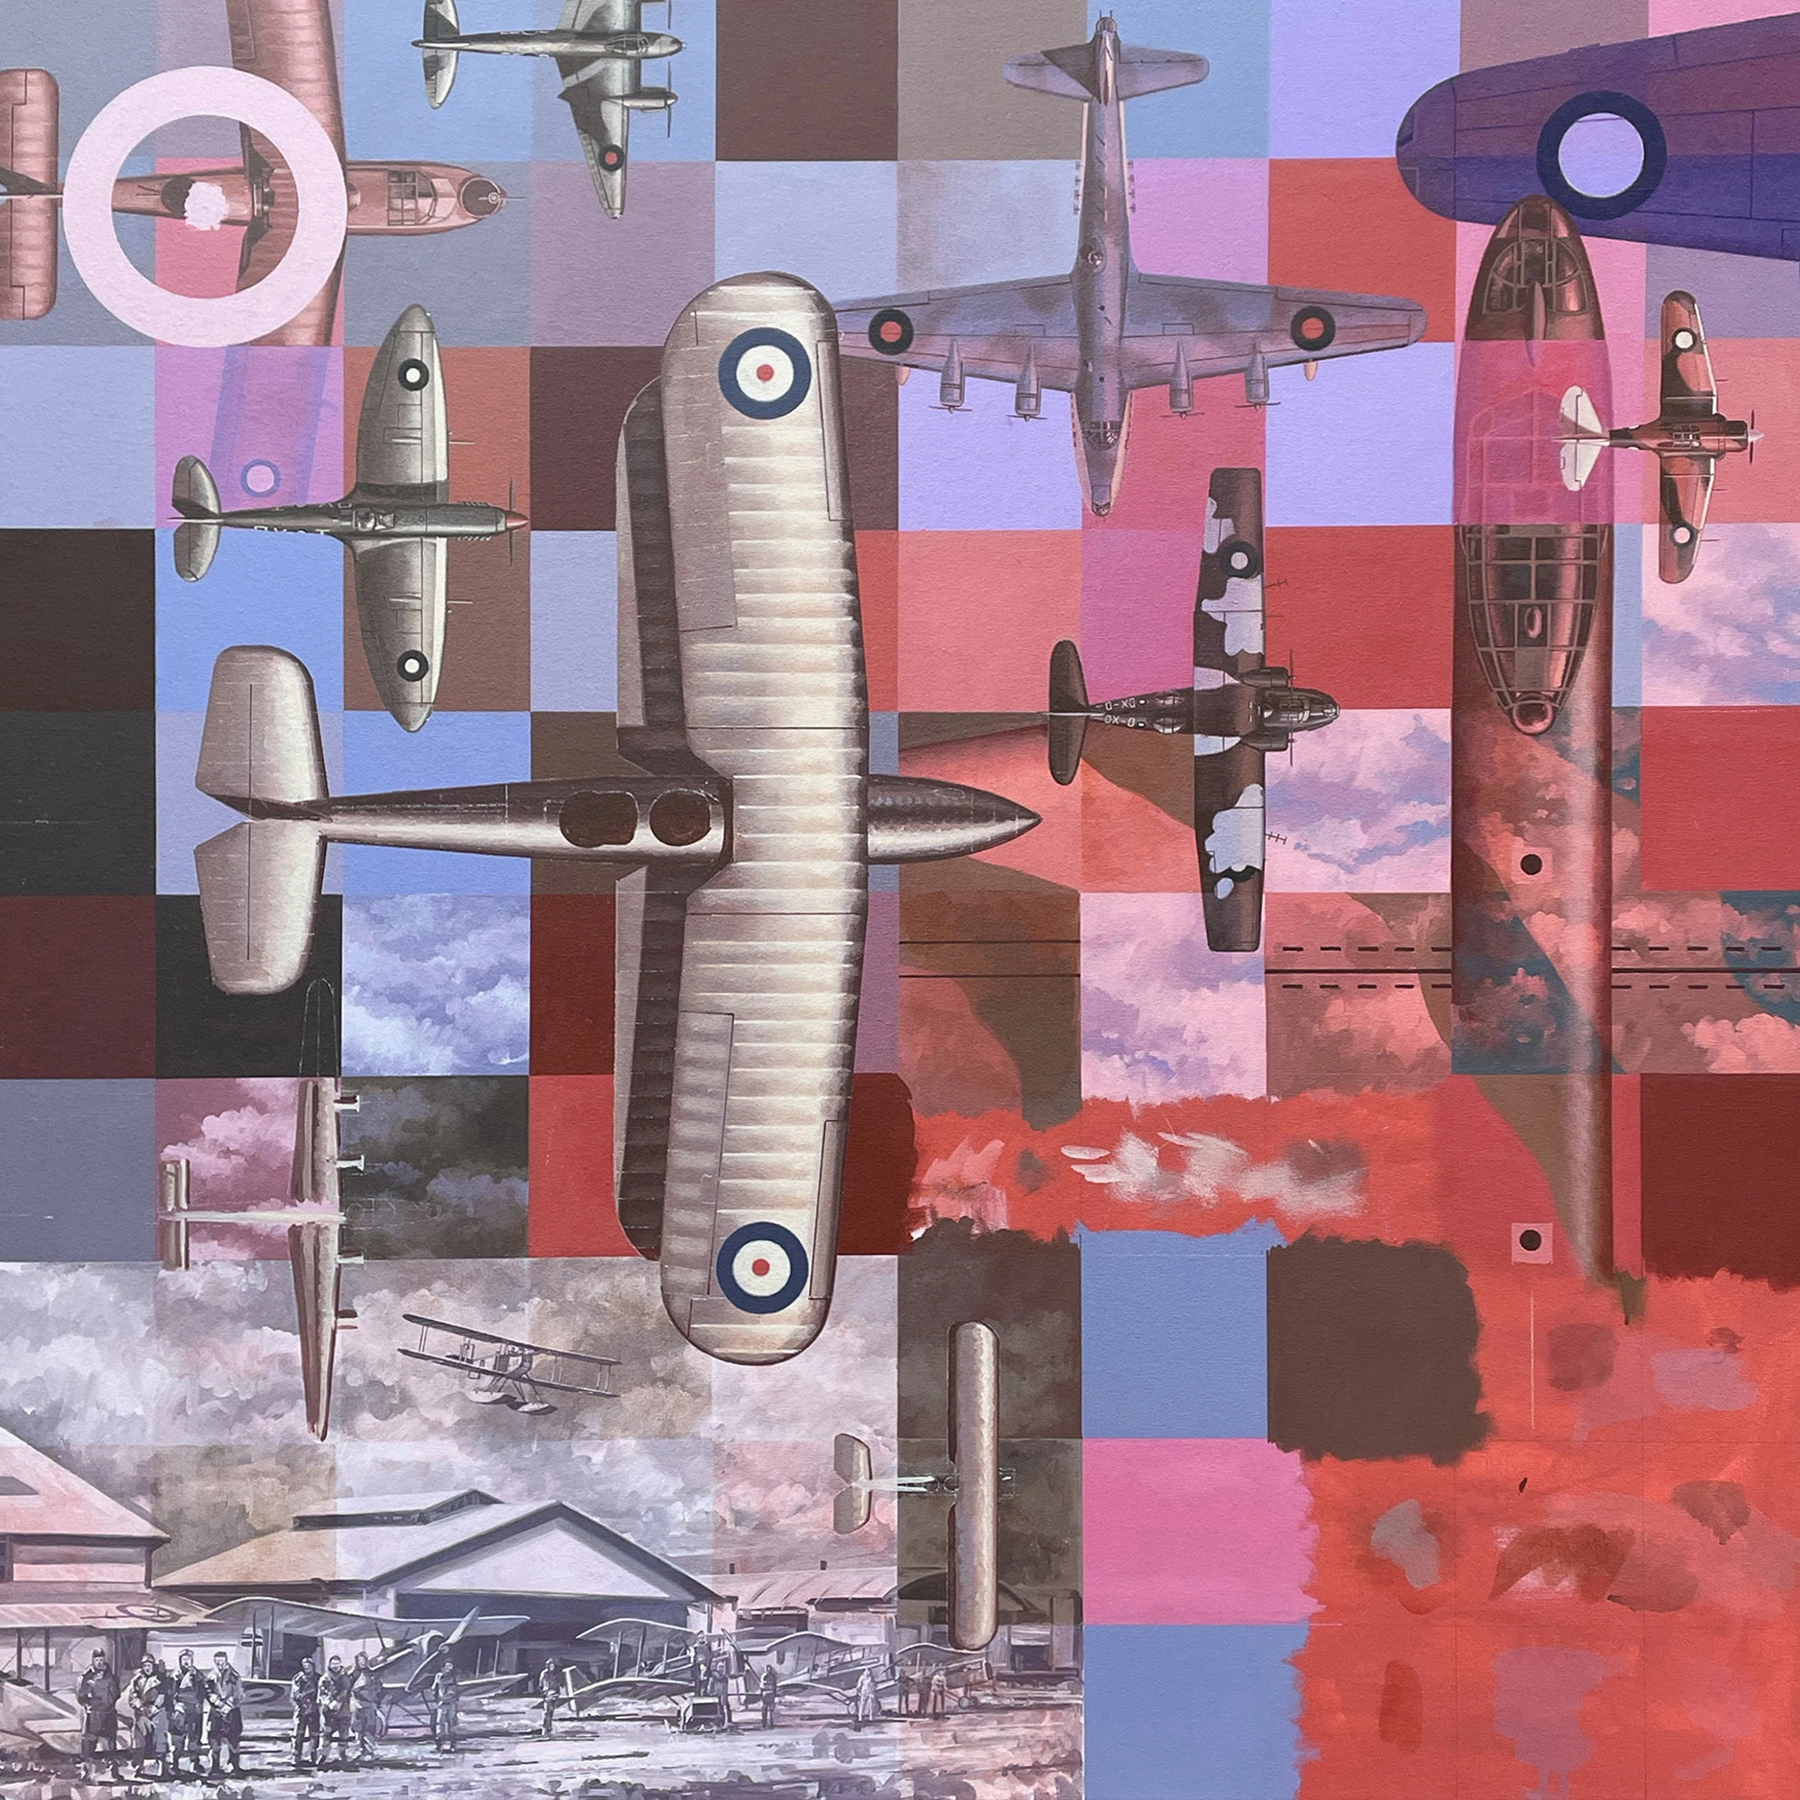
As with the other panels I had reached a stalemate after a few days of painting many aircraft and needed to switch it up a little. This led to the Point Cook scene at bottom left. In many ways it is a whole new painting within another painting! Quite a complex undertaking and really one of only two scenes in the entire work that is more closely aligned with traditional aviation art. Even so it is a single piece of a giant puzzle and did not require a heavy amount of detail. Additionally it is painted much like a sepia photograph in monotone. Stylistically it shares many similar traits to the pencil sketches I did for the Great War Diary series with the exception of using a paintbrush.
The entire scene was created in approximately a day using multiple references in an attempt to capture some of the atmosphere from those early days. The three aircraft - DH9, SE5a and Fairey IIID were important to the early days of the Royal Australian Air Force. Parts of the Point Cook scene have multi-coloured square overlays. While this could have been achieved by painting each square individually the colour shift was only gradual so I decided to use stencilling. With a stencil cut out of cardboard I used a mixture of a coloured wash/glaze to block in the appropriate squares. Sometimes a little scrubbing with a cloth was needed to soften the effect or some drybrush technique. It was enough to do the trick and help recess the larger view into the overall square grid.
The lower corner has many of the pre-war aircraft as feature, although a wartime B-24 Liberator bomber snuck into the formation. The period 1921 until 1939 saw massive developments in aircraft technology and so many manufacturers designed unusual aircraft that often had short lived service. Again, I picked out a few important types and was torn between the Hawker Demon or Bristol Bulldog as the main plan-view aircraft. Ultimately it was the wonderful wing shape of the Demon that won! I also managed to squeeze in a Tiger Moth purely because this was the first aircraft in which thousands of pilots received their training. It was around this time I was forced to pause from the painting and finish plotting the trajectory lines and other overlays. The main reason was to correct the alignment for the P-40 and even up other lines from the middle panel.
Part 12
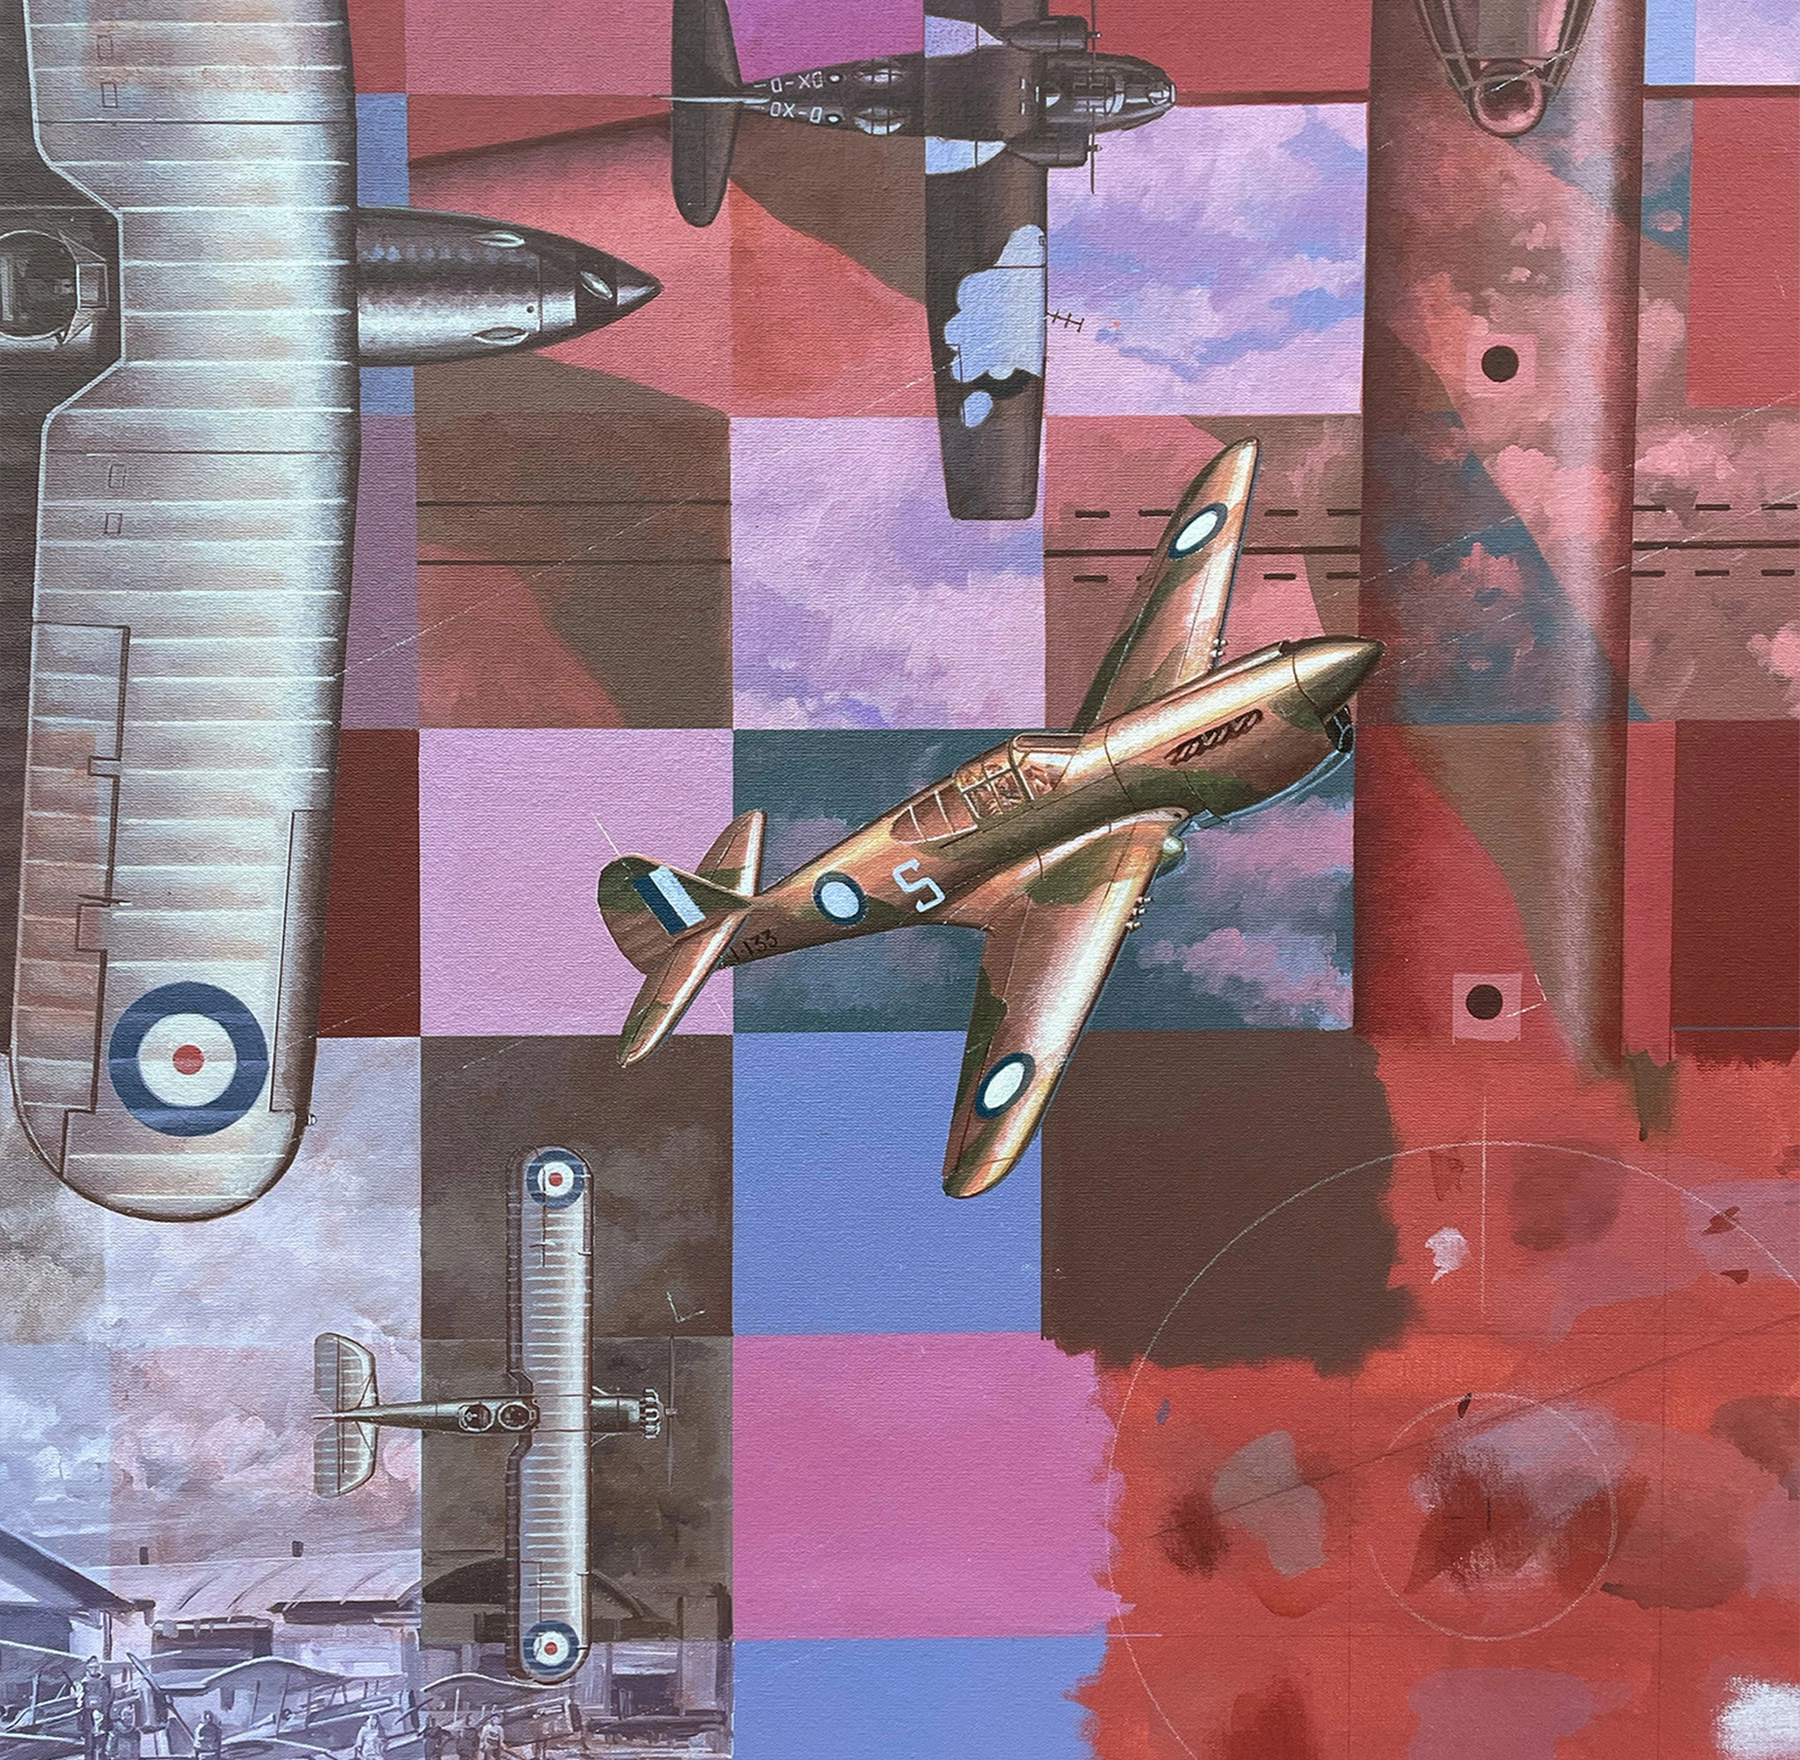
As often happens in a painting some elements shift and change or can appear very different to the original plan. I was beginning to rethink the 100 on top right of the middle panel and there were also discussions about the RAAF crest as a shoulder patch. Because we had now committed to adding a C-17 loading scene at bottom right of panel three some of the design balances had shifted. While working through a solution in Photoshop I was also continuing to reach a completion point on the left panel. Probably the most frustrating point was that no panels were 100% complete even after several weeks of solid work.
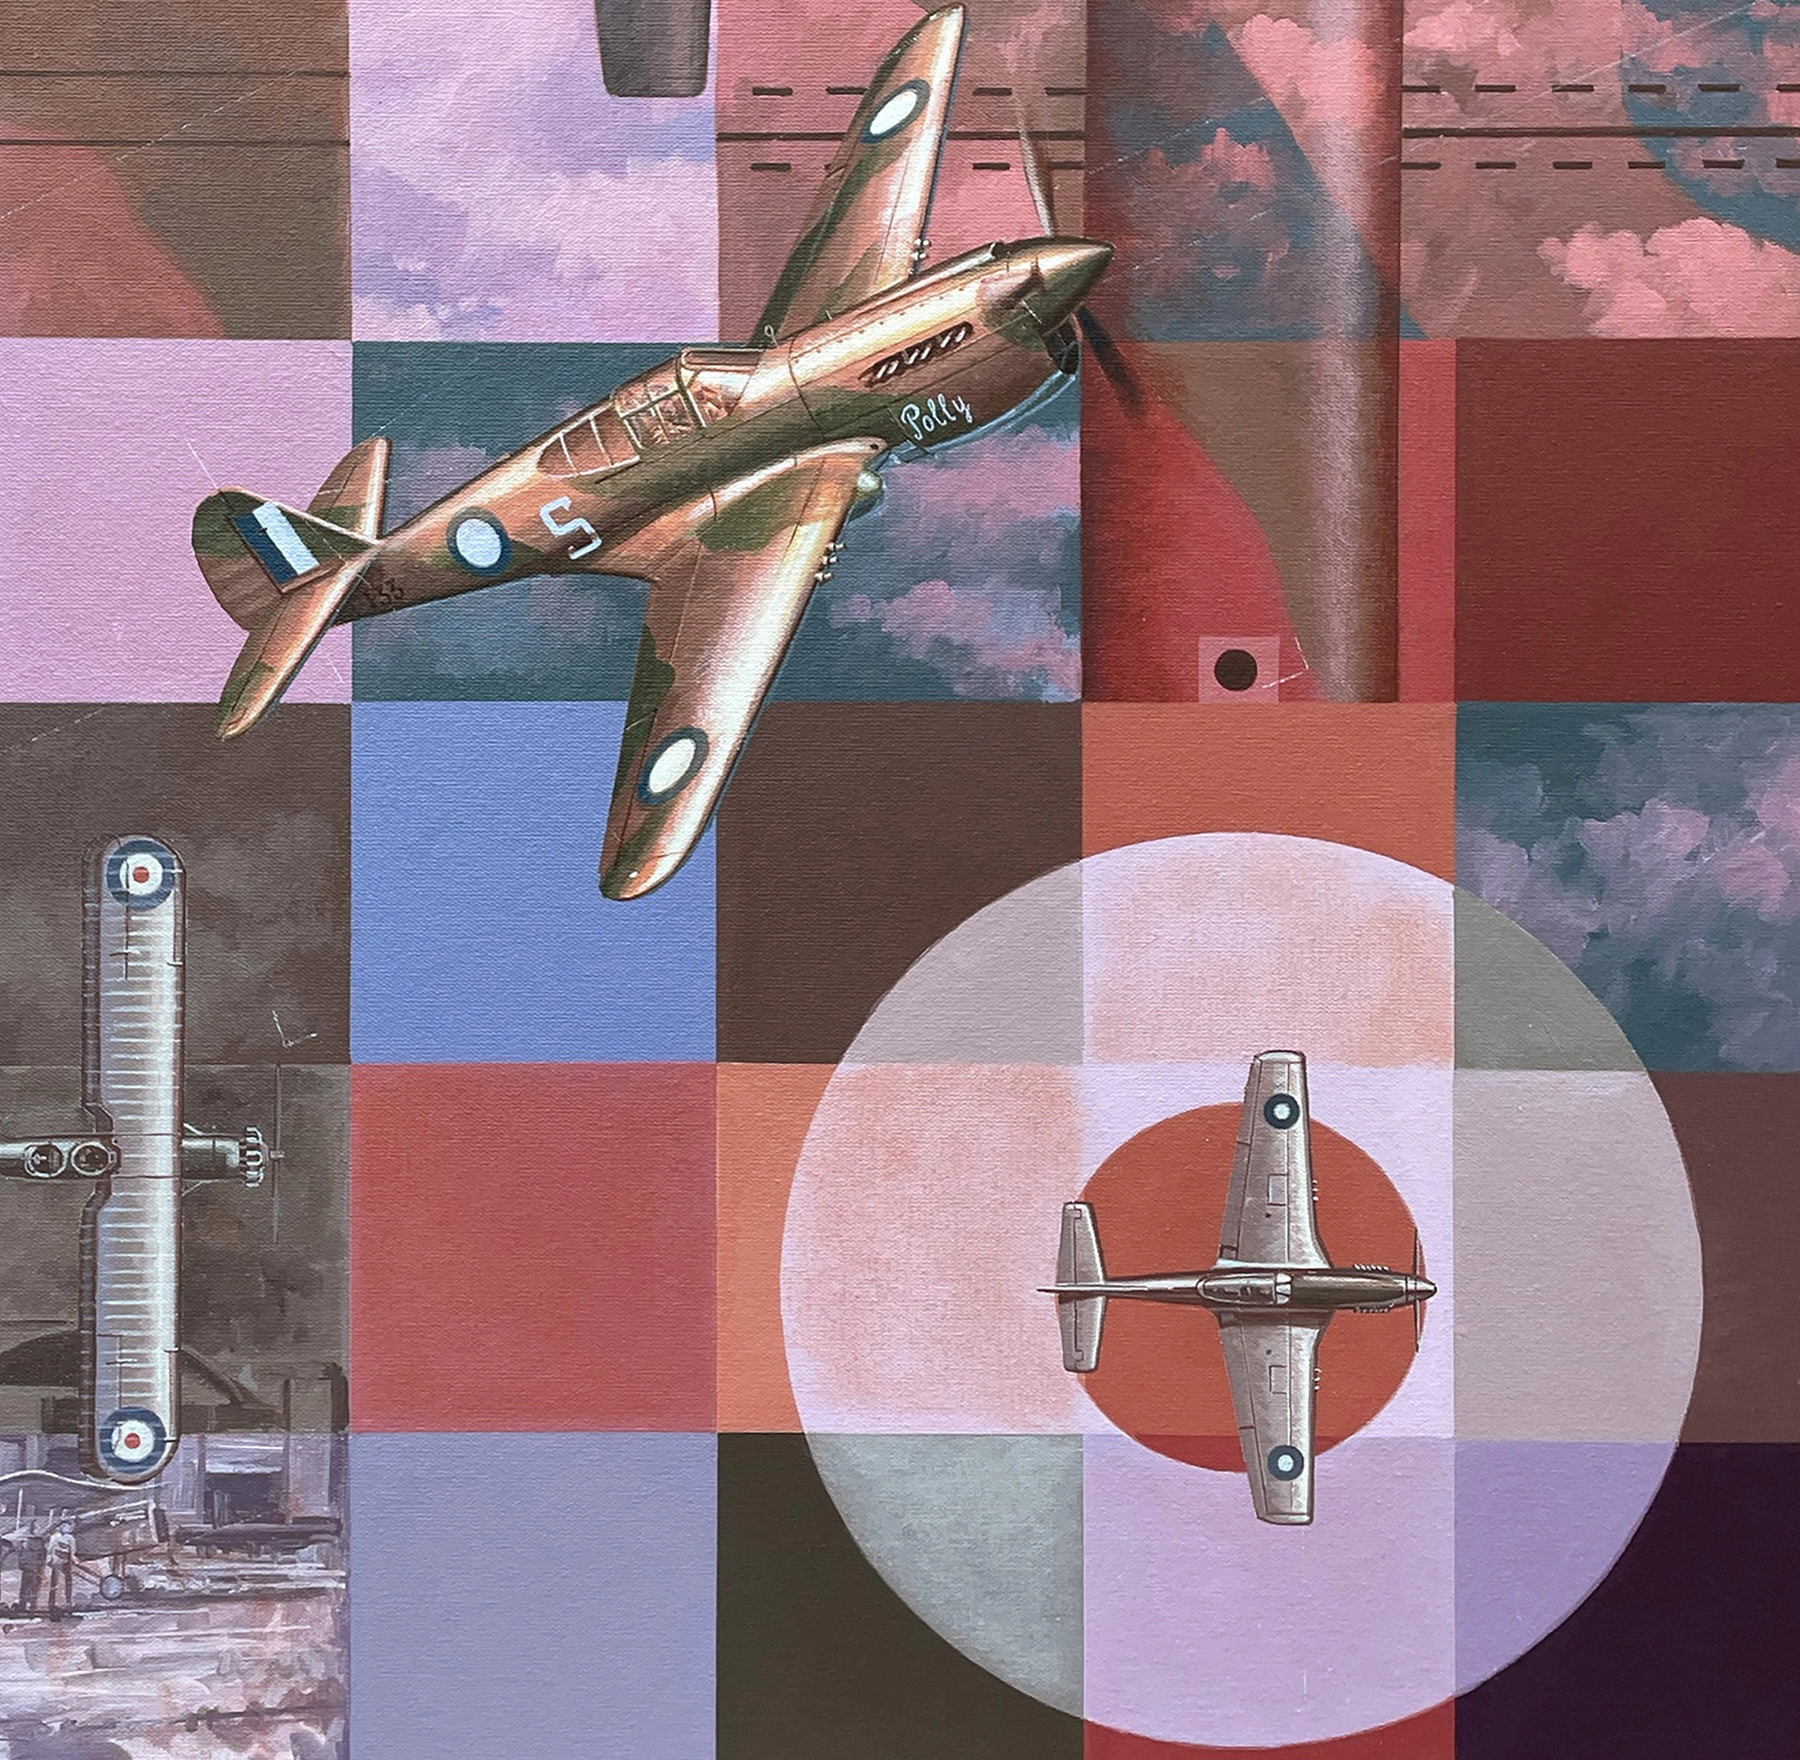
I pushed on and added the foreground P-40 that had switched places with the P-51. This was an important swap because the Kittyhawk flew in greater numbers and bore the brunt of the fighting during the early days of the Pacific War as well as with Australian units in the Middle East. Originally I was going to depict one of the 75 Sqn RAAF aircraft sent to Port Moresby, although settled on the AWM’s A29-133 ‘Polly’ around the time of Milne Bay in late 1942. Importantly 75 Sqn RAAF remains another existing frontline squadron in the modern day Air Force. The final roundel on panel one proved to be quite a challenge. Rather than using washes or drybrush technique across the flat colour I had to paint each segment individually. Essentially each colour inside the roundel is a lighter version of the surrounding squares. That’s right, nine individual colour mixes!
The very last hurdle on panel one was massive and quite possibly the most nerve racking! This canvas contains more overlay lines than both other panels and involved painting them on top of hundreds of hours of other work. While acrylics are easy to overpaint and correct I wanted to avoid doing that to lines that cross over multiple colours and areas of high detail. The lines are actually taken from an original map of Point Cook and involved lots of curves and straight lines. One concept to understand when dealing with colour is how it is affected when placed next to varying other colours. Put simply a single tone can appear lighter when placed next to a dark colour and darker when next to a light! Careful inspection will reveal there are lots of variations in the lines even though they appear to be a single tone when viewed from a distance. Phew! So that was it. Well, not quite….a few final touches.
Then. Now. Always. Artwork
Final Notes
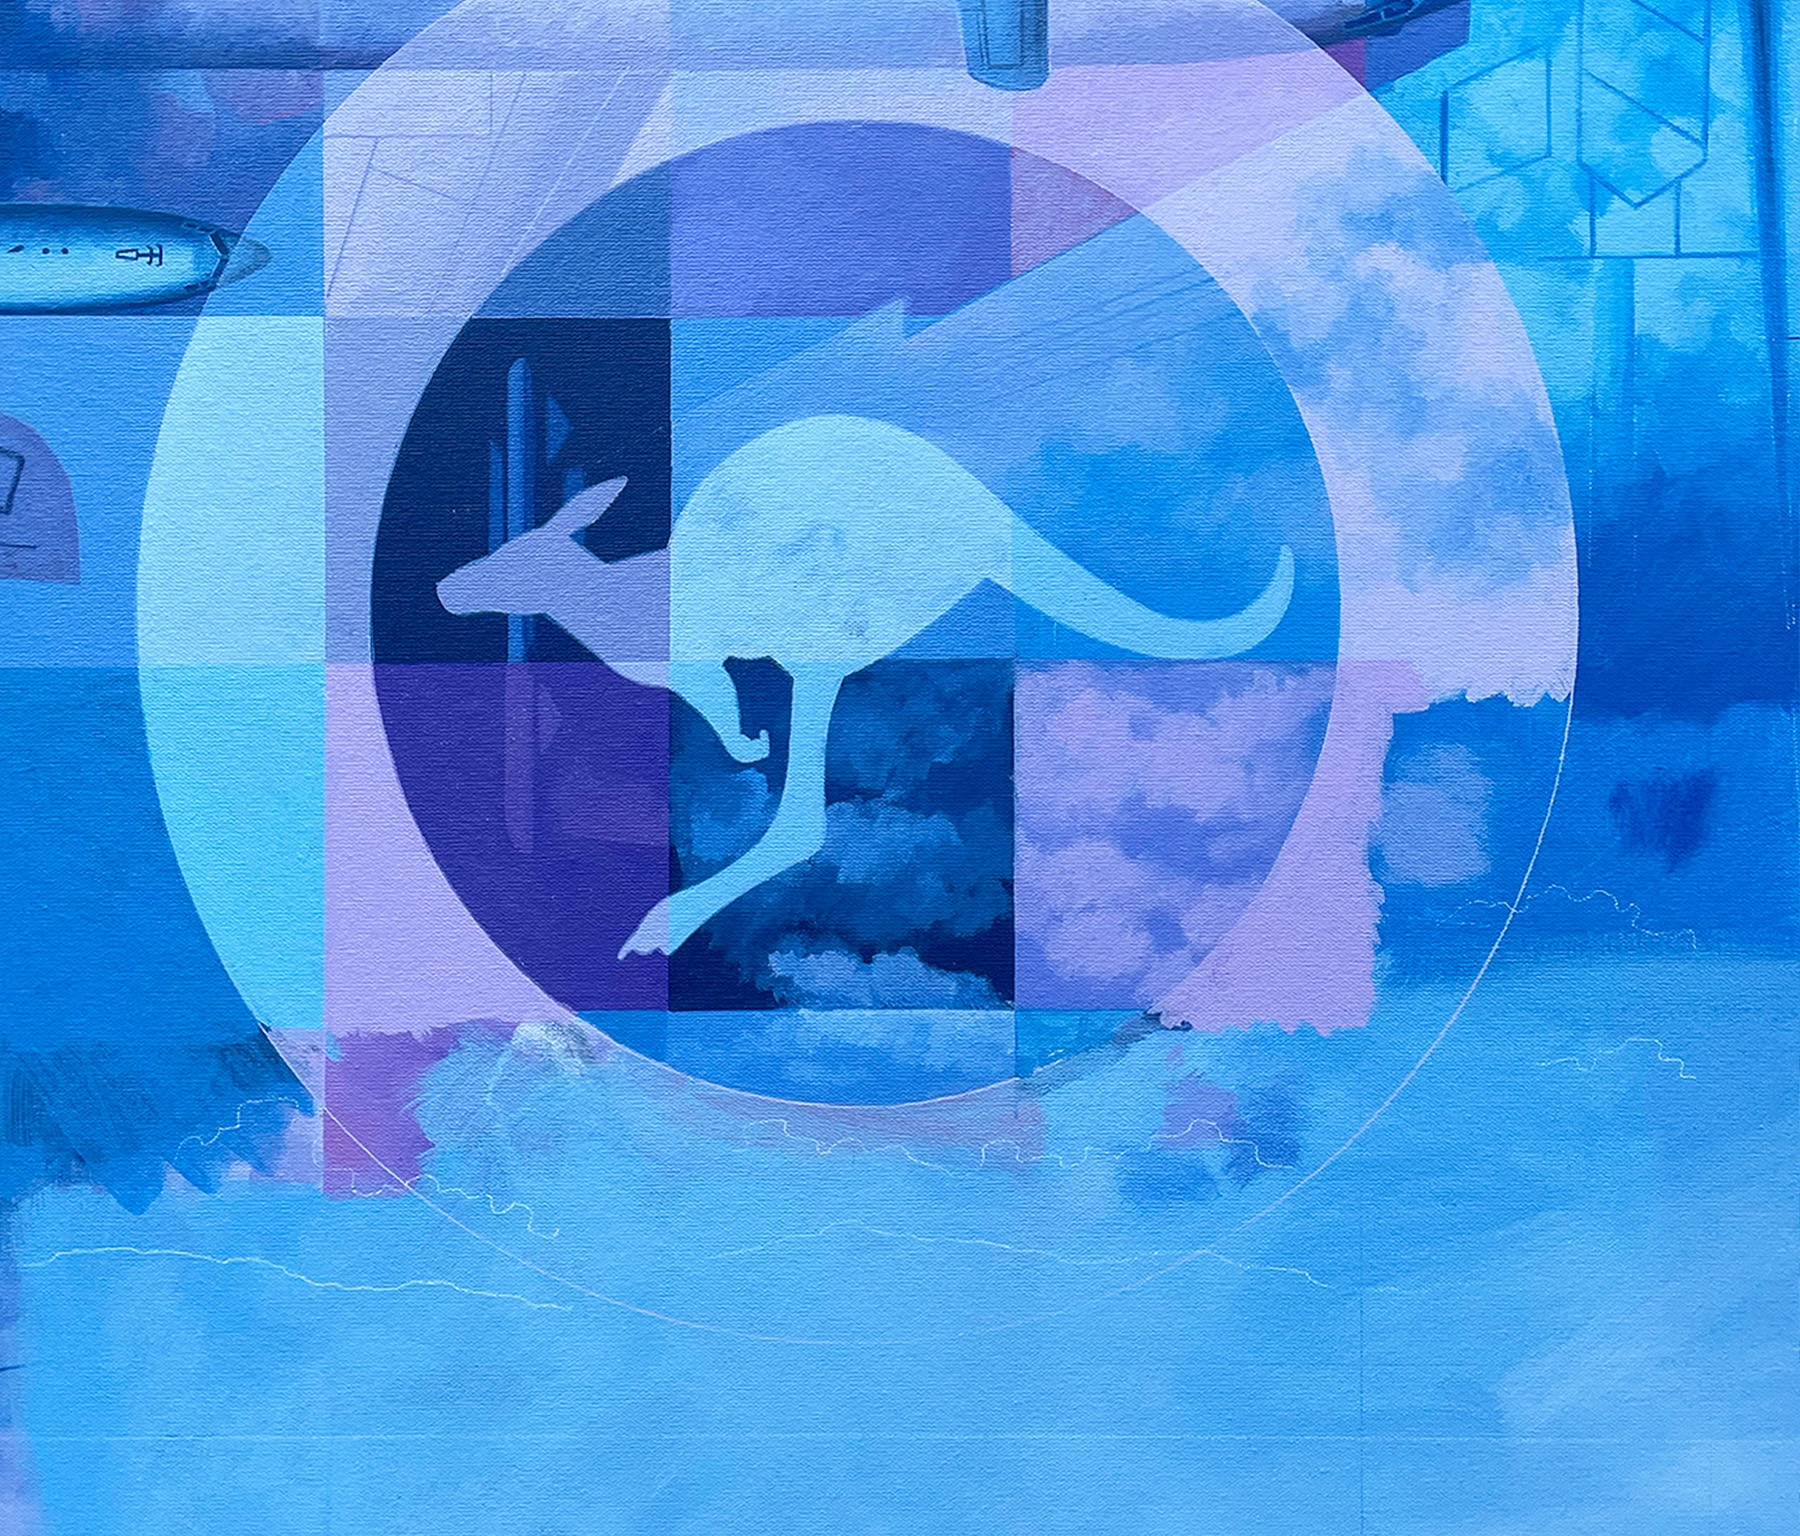
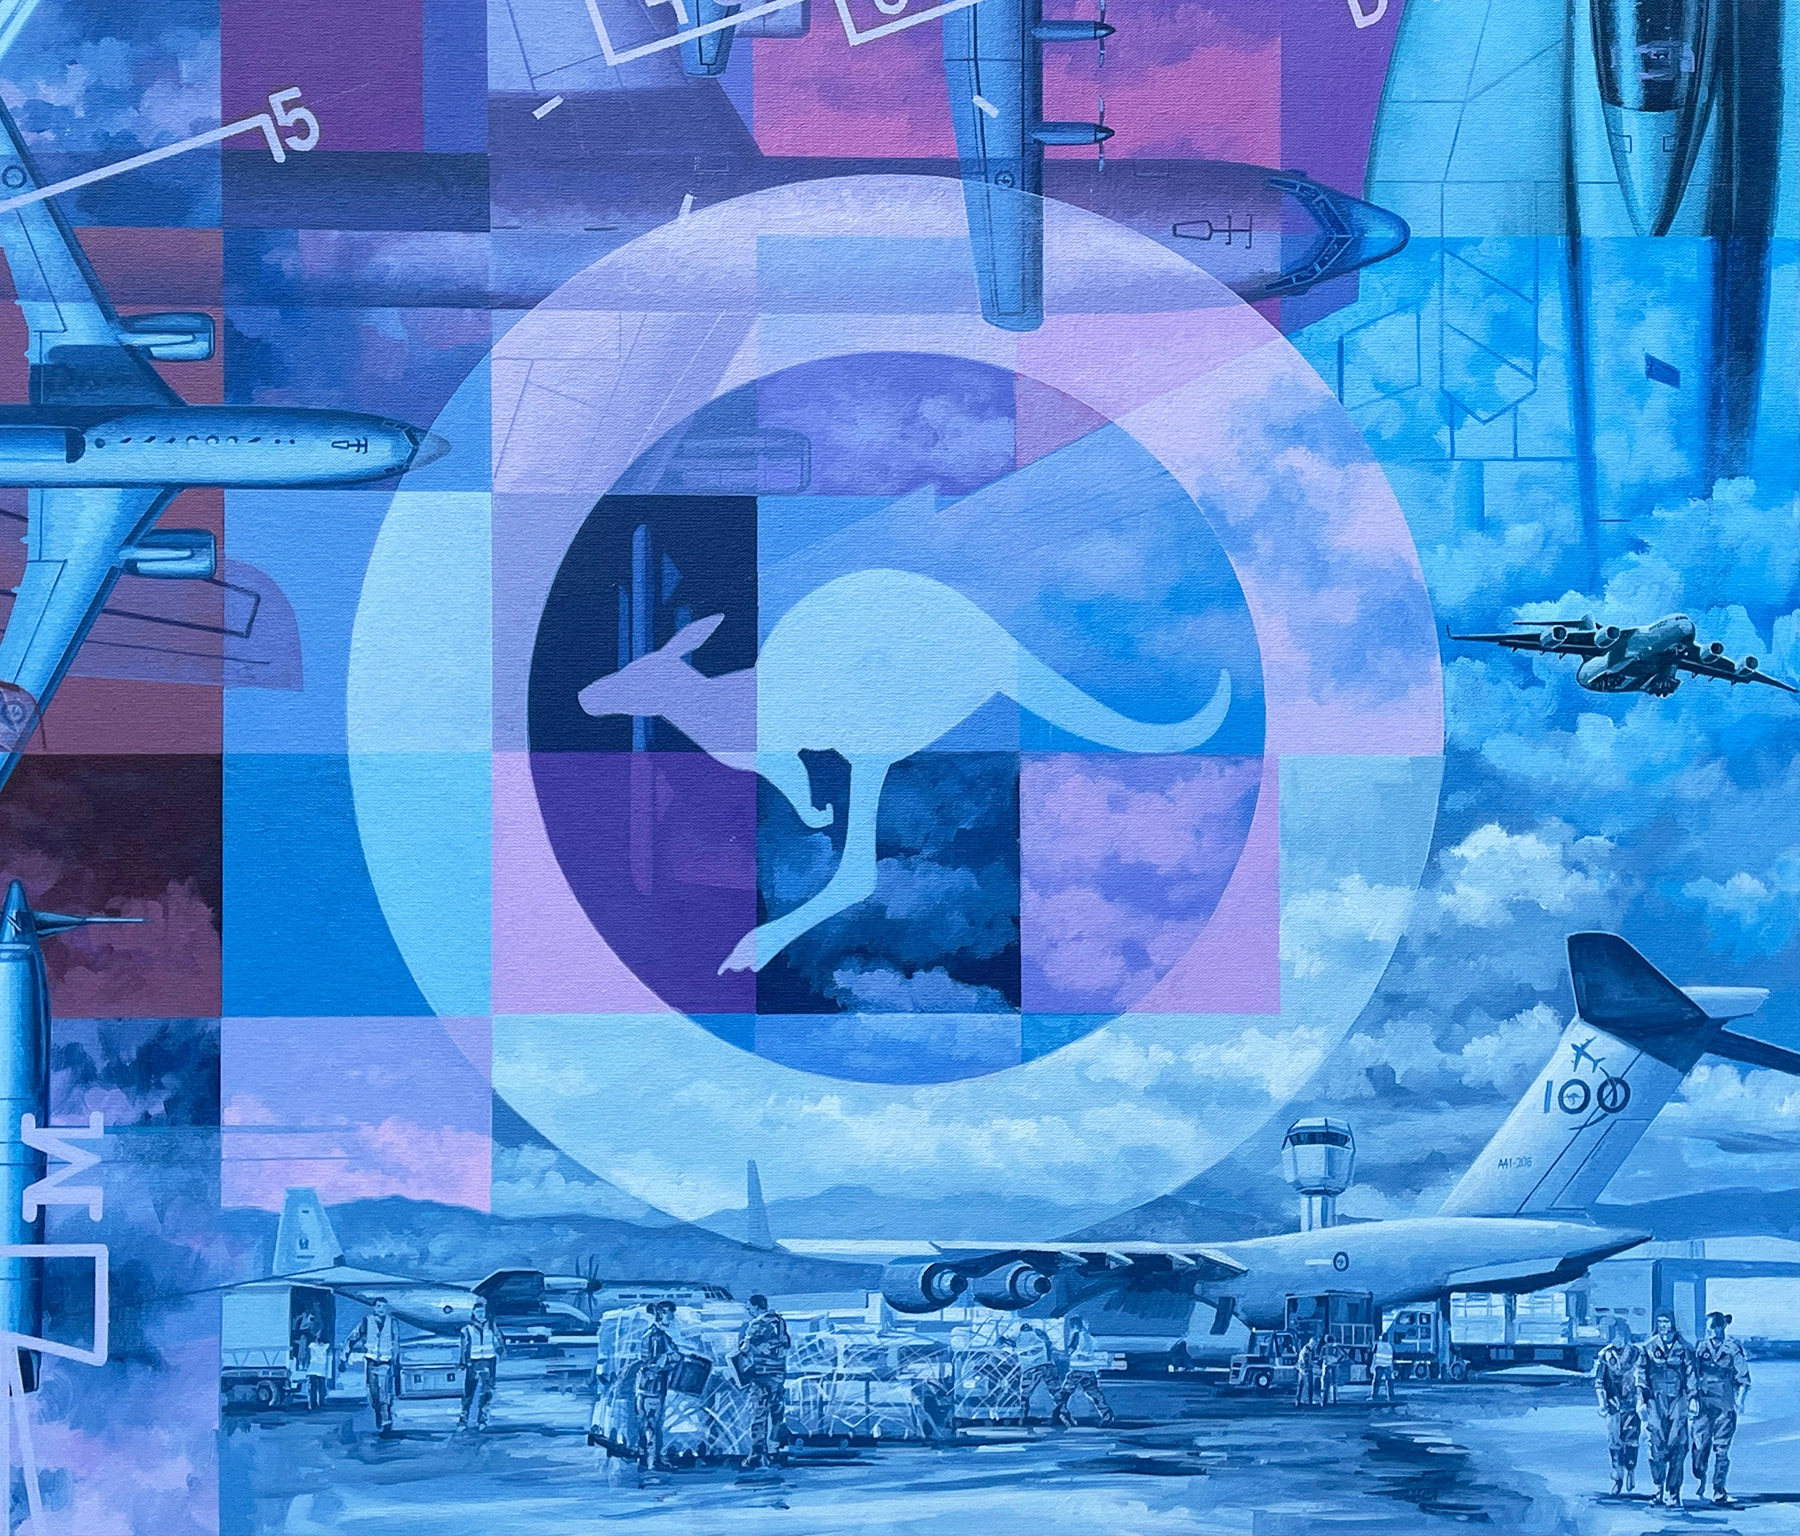
It is always good to have a few extra days up the sleeve. That wasn’t really the case here but I did factor an extra four days just in case. Up to this point I had worked twelve days a piece for each of the three panels. With the remaining time I had to clean up a few areas and finalise panel two (middle) and three (right). First task was to revisit the bottom right corner of panel three. Here the roundel was my first point of call and I was able to adopt a similar technique to that used on the roundel in panel one. That was painting a lighter version of surrounding colours to give the illusion of transparency. Similarly, the C-17 and Hercules loading scene could be approached in much the same way as the Point Cook vignette. An important correlation is the connection between these two scenes. They have an almost identical perspective plane, albeit in reverse, and the figures are similar proportions. It’s nice to think there is also a certain level of interaction between the personnel even though separated by 100 years! Most importantly today’s modern organisation is clearly far more diverse than the world of 1921. Displayed prominently on the C-17 tail is the Centenary of Air Force logo. The end of the first 100 years!
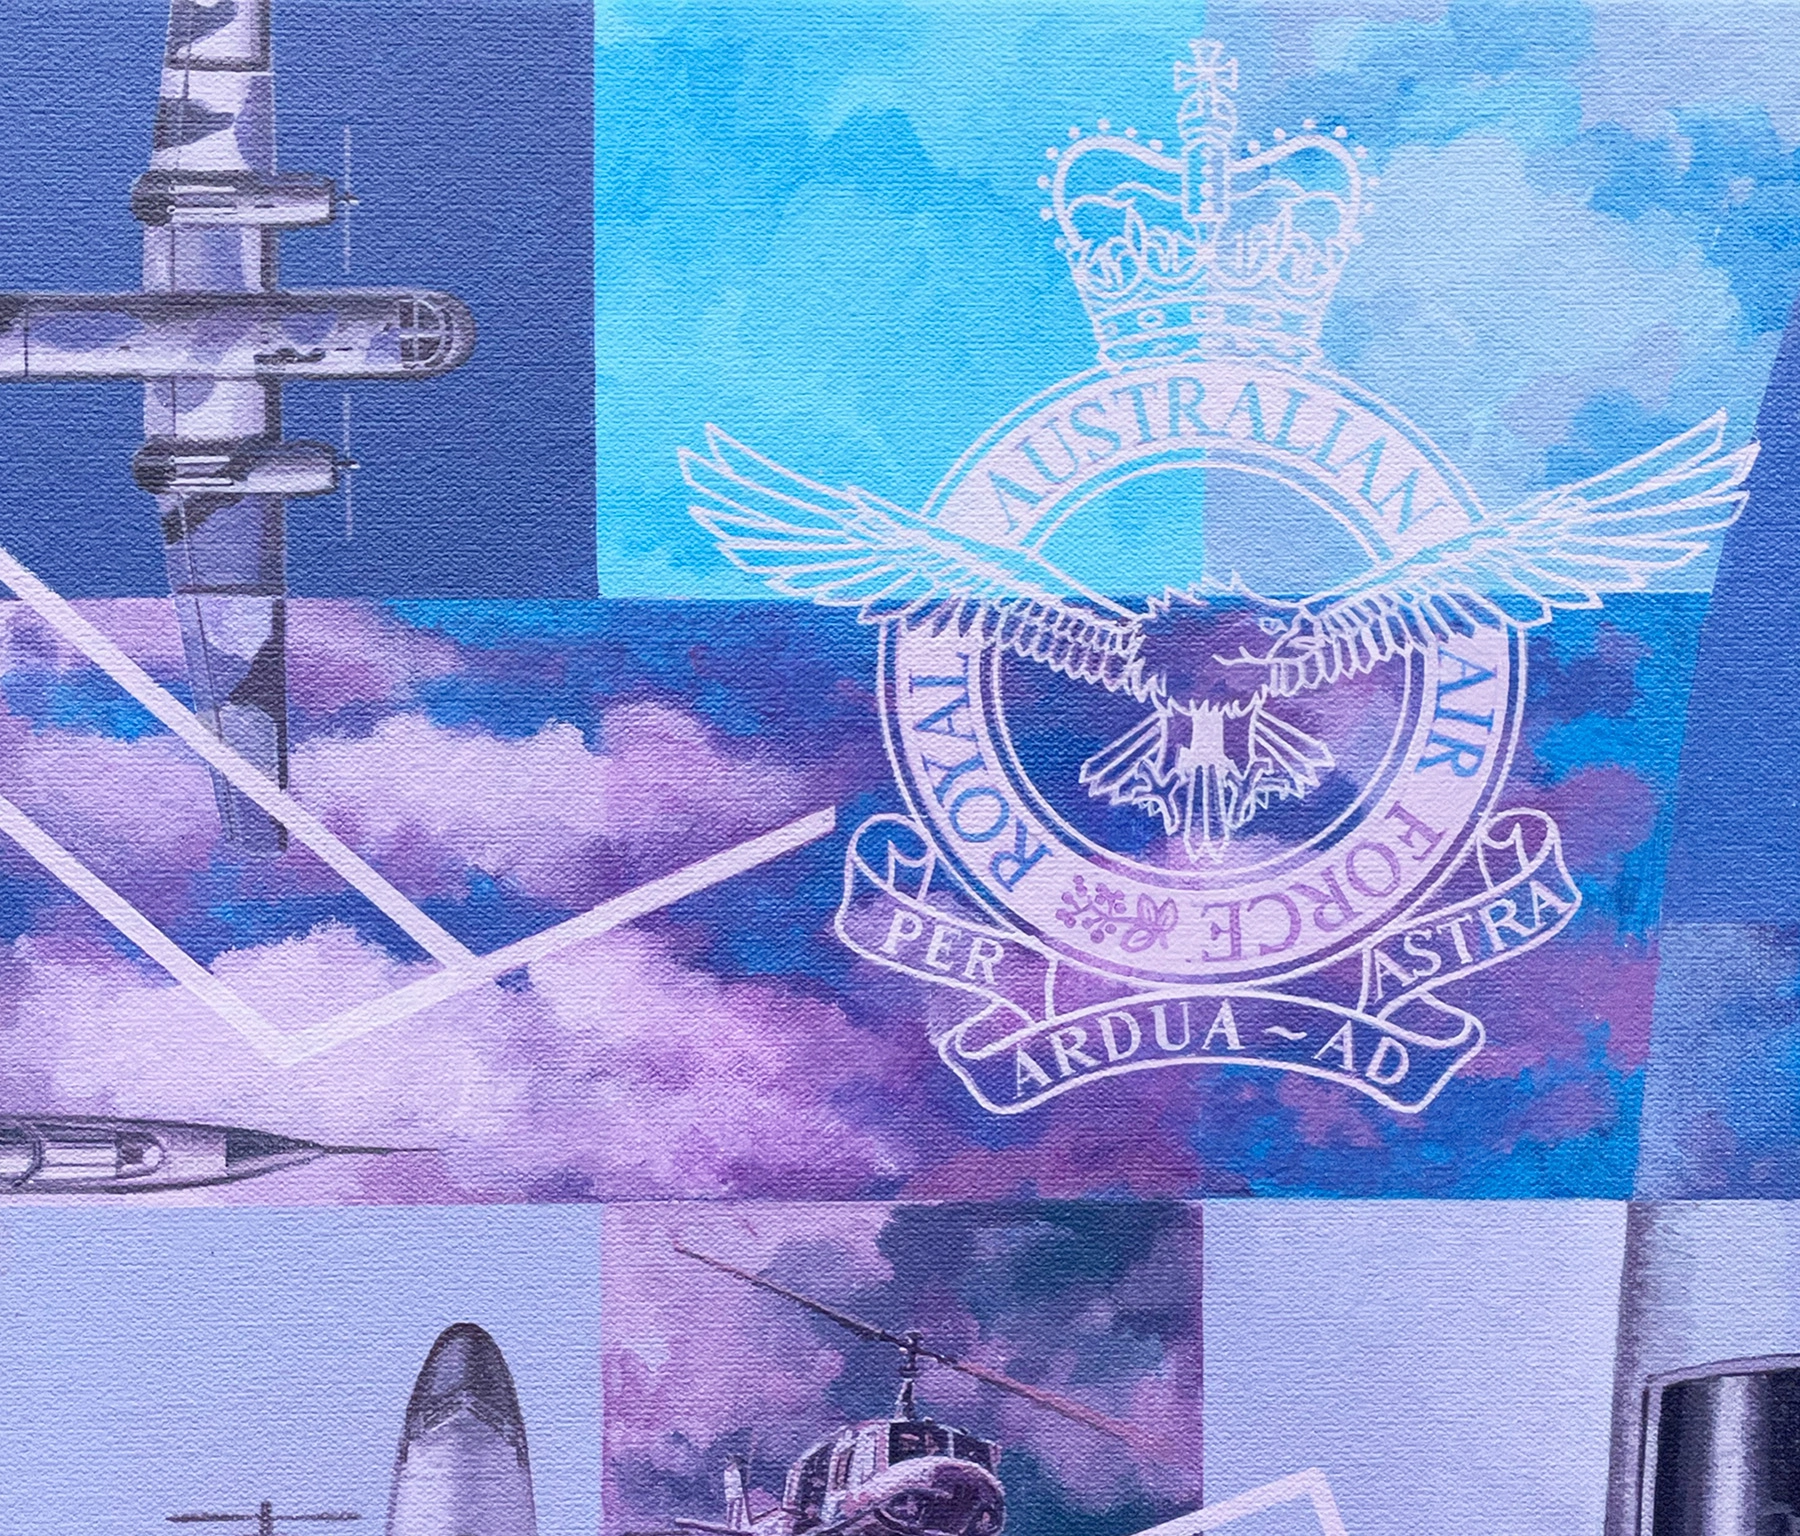
As mentioned previously there was some discussion about accuracy of using the RAAF crest as a shoulder badge on the pilot. At one point we were going to include the centenary logo instead, however, this was now positioned on the C-17 tail in panel three. As a consequence the level of repetition was not really required. Therefore, the shoulder patch went, and the 100 at top right middle was replaced by the RAAF crest. In many ways the symmetry is greatly improved as the crest now reads as a visual development of the roundel narrative. A bit more balancing was required by adding some lines to the composition. Ultimately, I am really pleased with the crest, although it was a hugely complex and time consuming graphic comprising multiple circles and typography! Last step was another few days of varnishing and then my job was done. Big shout out to ProLab Imaging for scanning the original in such short time before delivery to Canberra.
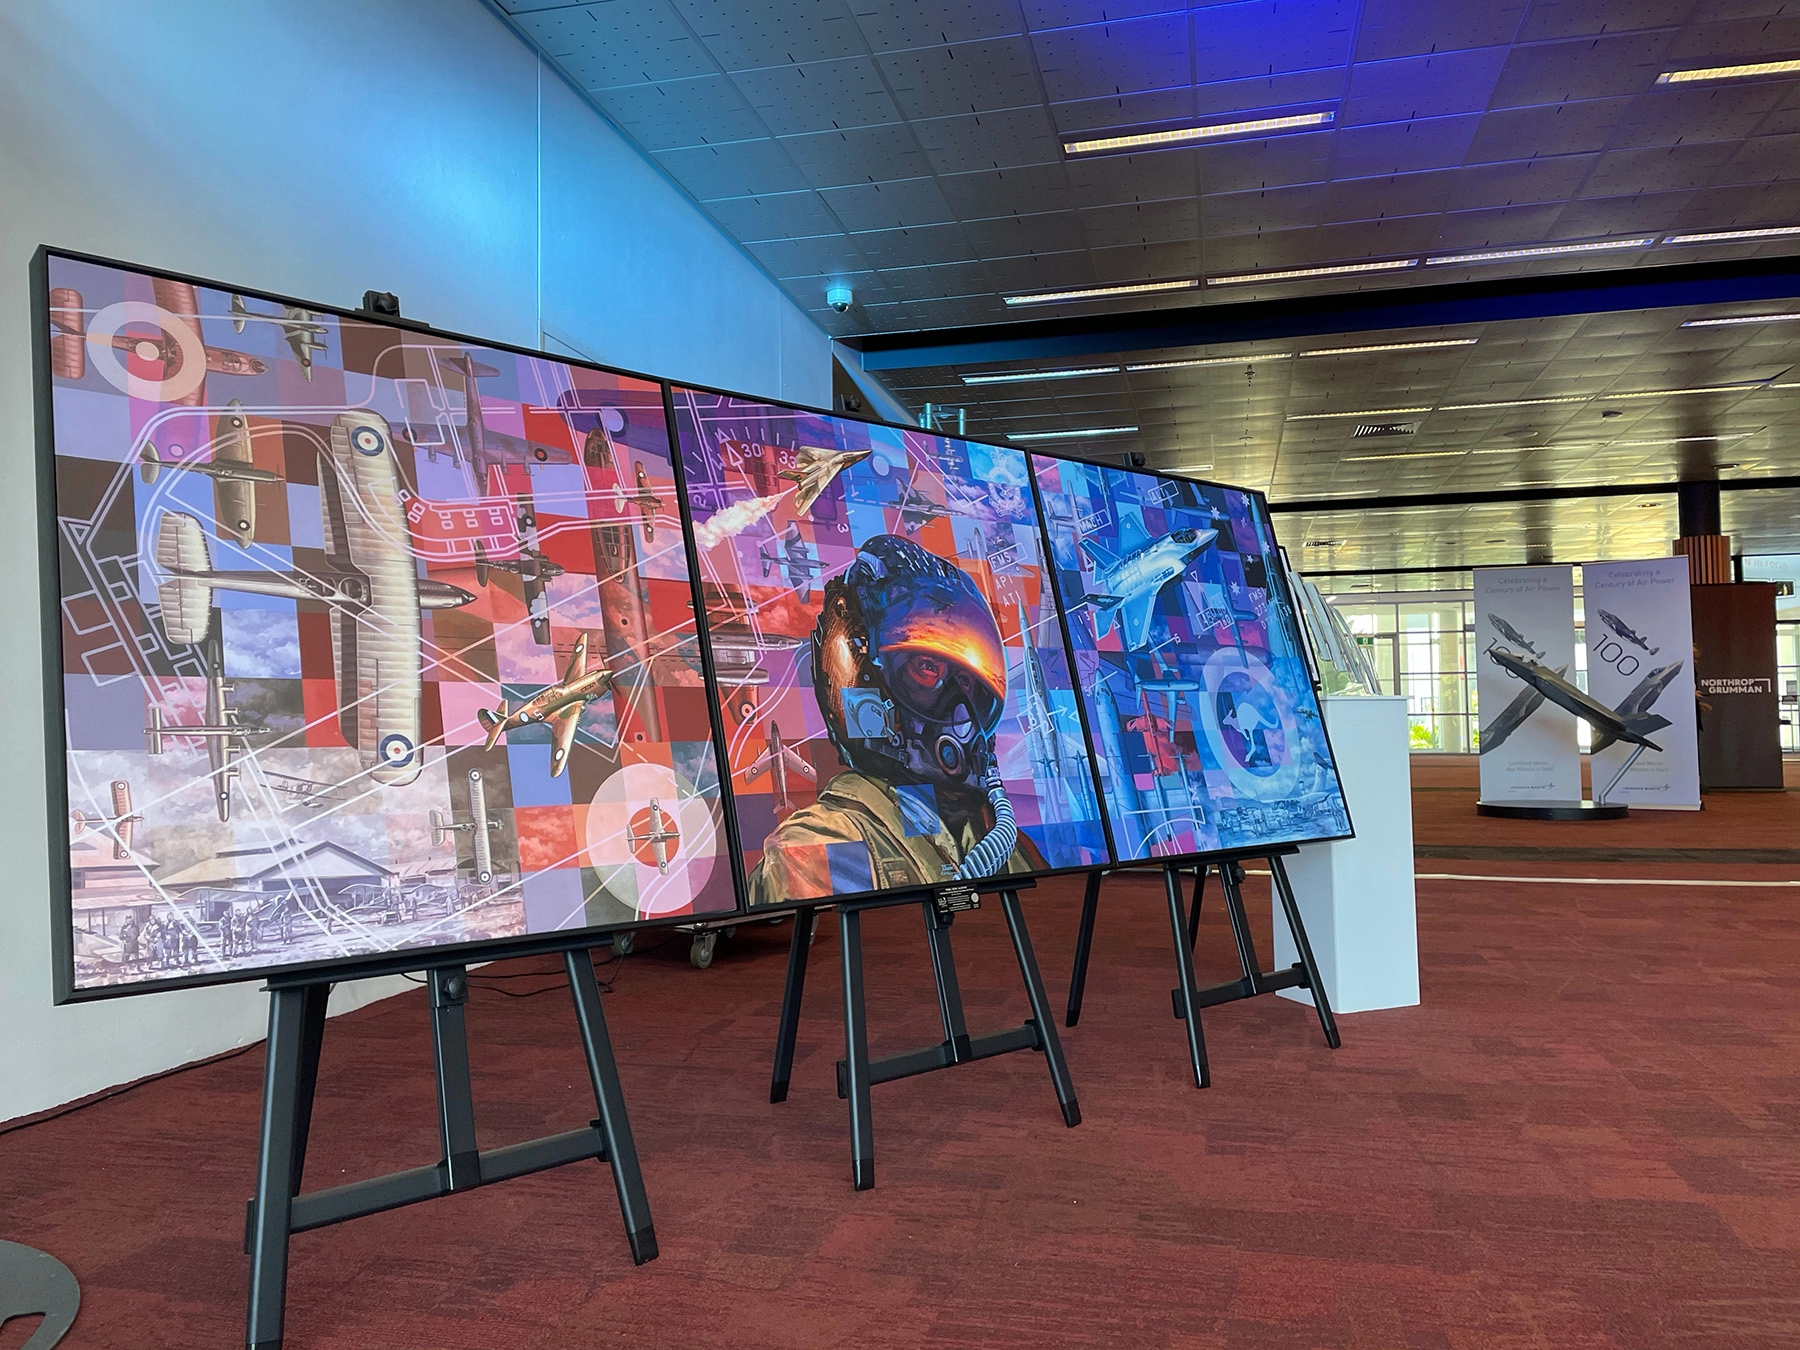
The response has been overwhelming and it has been hugely enjoyable watching people explore the painting and looking for all those little details. I guess one of the most endearing outcomes has been the engagement generated with people of all ages and not just aviation enthusiasts. With a fantastic selection of high quality print sizes available it is humbling to know many others can spend some time reflecting on the service and sacrifice of the Royal Australian Air Force. THEN. NOW. ALWAYS. Last but not least has been meeting with the Chief of Air Force, Air Marshal Mel Hupfield, AO, DSC during the presentation of Print number 003 by Stephen Davie of Brandnet. This will be given coverage in the latest issue of Air Force News along with a superb reproduction of THEN, NOW, ALWAYS centenary artwork as a lift-out poster.
Drew Harrison
Drew Harrison is a practicing artist based in Adelaide, South Australia. His formal illustrative training has provided a solid background for his evolution into contemporary artist. Acrylic paint is Drew's medium of choice and a material that he has adeptly mastered for creating a wide range of works.
Early projects in the field of illustration included several publications such as the children's book A Horse and More. An interest in flight led to a successful period of detailed aviation painting and regular prizes in the Royal Australian Air Force Heritage Awards. These works have since become part of the Service's permanent collection. With an eye for the vast Australian sky, his observational landscapes of the Adelaide Hills are a continued exploration of light, shade and vivid hues. Similarly, these traits are noticeable in Drew's wildlife paintings whereby the very essence of a subject is often manipulated and twisted to a new level. He has found success in all of these fields as either a prize winner or finalist in national competitions. Public acclaim has also been achieved with people's choice awards and highly commended paintings.
Colour, shape, form and texture remain strong hallmarks of his work, however these elements have recently been coupled with a unique and often satirical conceptualisation of 21st century living. In narrative based, expansive series such as Project Icarus, Chasing American Dreams, and the forthcoming Chaos Theories, darker themes have been explored using contemplative and realist subject matter and drawing on influence from pop art. Central to each work is an examination of humanity although this is often represented subliminally via mechanical and inanimate objects.
The current foray into military art represents a culmination of Drew's varied experience across multiple artistic techniques. On return to the field of fine art he has been able to draw influence from a pedigree of artists within this specialised area. However, there remains a characteristically fresh and unique atmosphere within each painting as well as his meticulous eye for historical detail and accuracy.
Drew has exhibited in several group exhibitions and his paintings are represented in private collections. He is also an experienced art tutor who has gained a reputation for effectively communicating and demonstrating practical art knowledge for many years.