

The Battle
of The Nek
Discover the people, events and research behind each commissioned work.
View the original commissioned artwork and, where available, enquire about acquisition.
Discover and purchase rare #1–#10 Archive Editions and historically significant retained pieces.
Explore related Limited Edition lapel pins, medallions and art.
A narrow ridge at the centre of the August Offensive
The Nek was a narrow bridge of land at the northern end of the Anzac position, connecting Russell's Top with Baby 700 across the head of Monash Valley. Ottoman trenches on and beyond Baby 700 dominated the approaches. The ground between the opposing positions was desperately short — roughly 27 metres in the plan preserved in BrandNet's historical notes — but it was exposed to rifles and machine guns.
The assault formed part of the August Offensive, the Allied attempt to break the Gallipoli stalemate by seizing the heights of the Sari Bair range. The 3rd Light Horse Brigade was to attack across The Nek towards Baby 700 in concert with New Zealand troops expected to descend after taking Chunuk Bair. That supporting movement did not arrive as planned, while Ottoman positions remained ready to meet the Australian attack.
At 4.30 am on 7 August 1915, the first line of the Victorian 8th Light Horse Regiment went forward. The second followed two minutes later. Both were devastated. The Western Australian 10th Light Horse then formed the third wave, despite attempts by its commander, Lieutenant Colonel Noel Brazier, to stop the attack. Confusion also sent part of the fourth line forward. Within about fifteen minutes the assault was effectively over.
Read the battle in more detail
The plan called for four waves of about 150 men, with the 8th Light Horse providing the first two and the 10th Light Horse the next two; the 9th Light Horse provided supporting fire. The men attacked dismounted, with fixed bayonets. The first line was struck almost immediately by intense Ottoman rifle and machine-gun fire.
The broader plan had already begun to unravel. New Zealand troops had not captured Chunuk Bair in time to create the intended pressure from the rear, and a separate attack intended to neutralise German Officers Trench had failed. The machine guns covering the ground at The Nek therefore remained a major threat.
The first and second waves were cut down with extraordinary speed. Brazier tried to stop the third wave, describing the continuation as needless slaughter, but the order stood. Part of the fourth wave also advanced amid confusion. Australian War Memorial accounts record 372 casualties in the 8th and 10th Light Horse Regiments — 234 in the 8th and 138 in the 10th — including 234 dead in those two regiments.
The familiar story that a mistimed bombardment alone caused the disaster is contested by later research. BrandNet's historical brief argues that the decisive problem was that the bombardment failed to neutralise the forward Ottoman trenches and the machine guns covering the approach. Australian War Memorial material also notes that much of the bombardment fell beyond its target. The result was that the defenders were capable of firing as soon as the light horsemen appeared.
A different view of a familiar tragedy
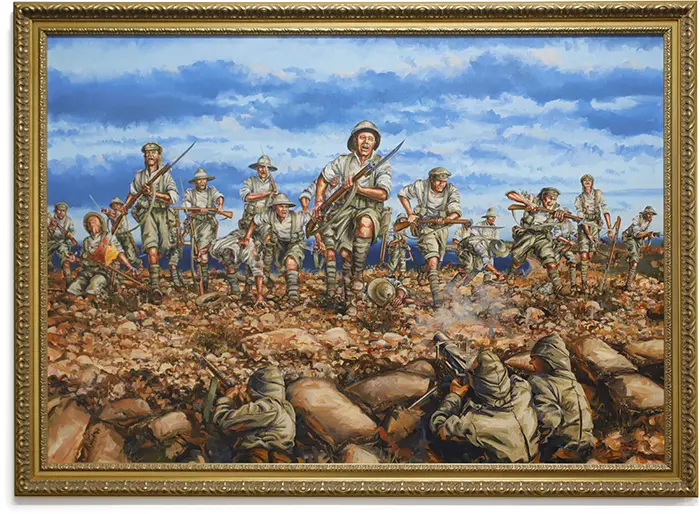
BrandNet again paired Drew Harrison with historian and retired Army Warrant Officer Graham Wilson. Their starting point was deliberately different from George Lambert's famous interpretation: instead of looking uphill with the Australians, Harrison would place the viewer close to the Ottoman forward position, looking back into the charge.
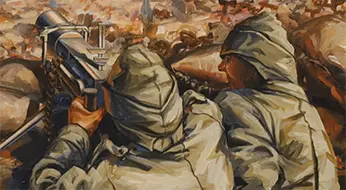
The machine gun position
Harrison chose the instant before an Ottoman machine gunner resets his sights. The weapon and crew sit in the viewer's foreground, making the lethal imbalance of the charge immediately understandable.
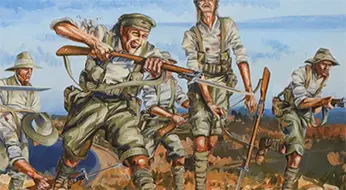
Seconds from the trench
The Australians are shown face-on, compressed by foreshortening into a narrow field. Harrison's notes emphasise individual fear, adrenaline and determination rather than presenting the men as an anonymous mass.
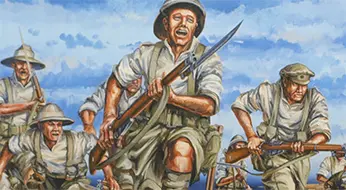
A front-on perspective
The unusual viewpoint creates a direct encounter between viewer and attackers. Early-morning light separates foreground, middle distance and background, drawing attention away from the larger Ottoman figures and onto the Australians.
The Battle of The Nek
Harrison's painting freezes the charge in the brief interval before another burst of Ottoman fire. The choice avoids a field of bodies while making the outcome unmistakable: the defenders occupy the near ground, the Australians are fully exposed, and the distance between them has almost disappeared.

Not Lambert's viewpoint
Harrison and Graham Wilson consciously sought a composition distinct from George Lambert's iconic work. Looking from the Ottoman side places the viewer almost inside the defending position.
The marker flag
Harrison's notes identify a fallen flag bearer close to the objective. The red-and-yellow marker was intended to signal that the enemy trench had been reached — a small detail that becomes a symbol of how close some men came.
Light, depth and emotion
Low morning light, cast shadows and foreshortening solve a difficult compositional problem: keeping depth in a front-facing scene while making the charging men, rather than the defenders, the emotional centre.
Acquire the original commissioned artwork
The source painting behind BrandNet's Battle of The Nek collection has remained within the BrandNet collection. It is one of the major original works now being presented through The BrandNet Archives.
Specialist delivery, insurance and installation requirements can be arranged directly with the purchaser.
Acquire the Original Enquire About the ArtworkThe first ten numbered editions, preserved since release
BrandNet retained certificate numbers #1–#10 of the 2005 Sands of Gallipoli Battle of The Nek medallion. These are the original low-number pieces from the edition — not newly numbered products — and all ten are recorded in good condition with their certificates.
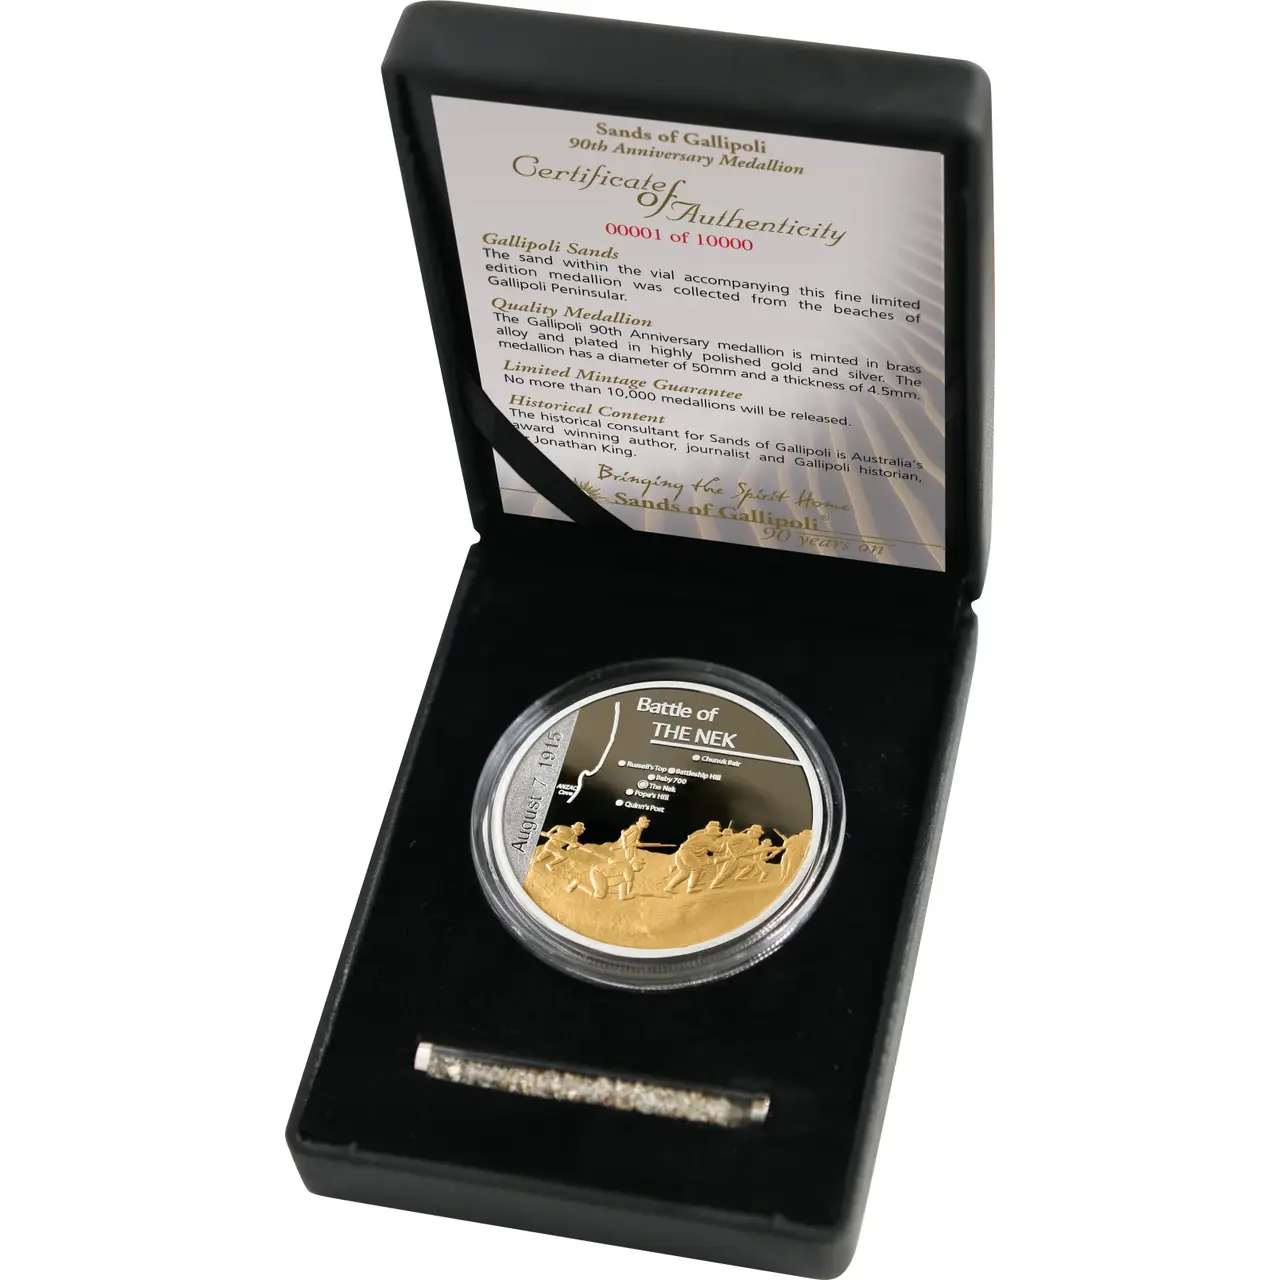
The Battle of The Nek Medallion — Archive Editions #1–#10
A 50 mm brass-alloy Sands of Gallipoli medallion commemorating the charge at The Nek, presented with Gallipoli sand and its original numbered certificate of authenticity. BrandNet's retained examples carry certificate numbers #1 through #10.
Own a part of the story
The commissioned artwork became the foundation for a tightly limited family of art and collectables. Each piece carries Harrison's interpretation of the charge into a different format.
 Click to enlarge
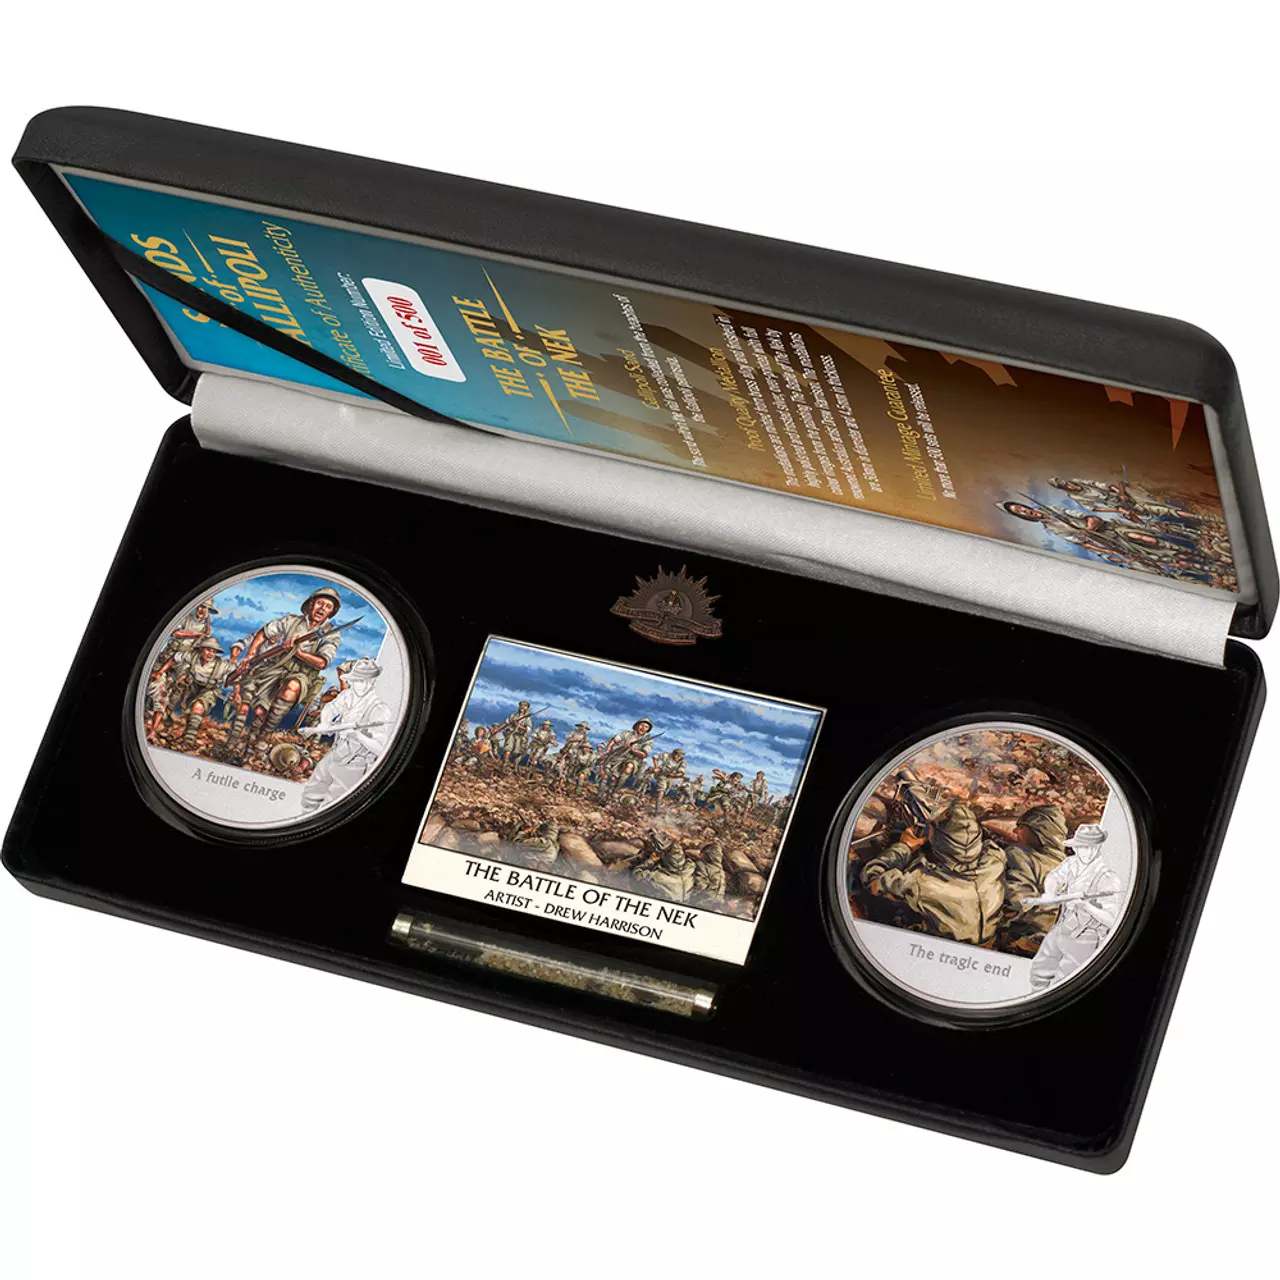
Battle of The Nek Medallion Set
A compact commemorative set built around details from Harrison's painting. The two proof-quality medallions are presented with a miniature artwork plate, authentic Gallipoli sand and a numbered certificate of authenticity.
View the set →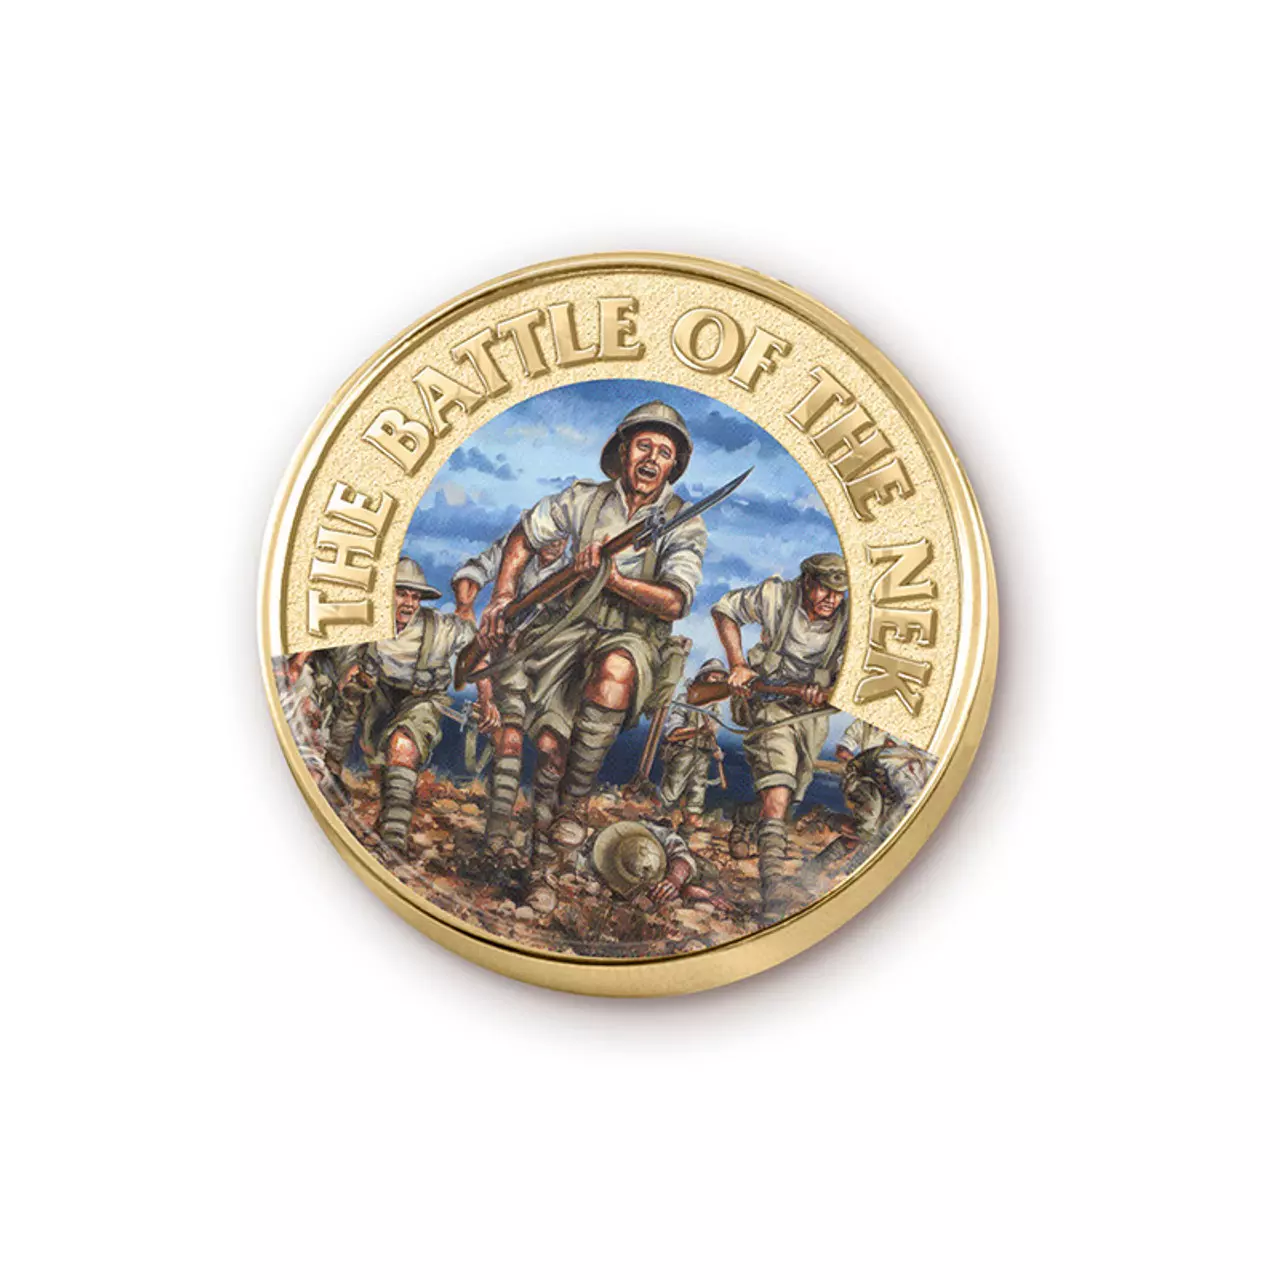 Click to enlarge
The Nek Limited Edition Lapel Pin
A small, highly collectable connection to the painting. The pin captures Harrison's charging light horsemen in miniature and is individually numbered as part of the strictly limited Battles of Gallipoli pin series.
View the pin →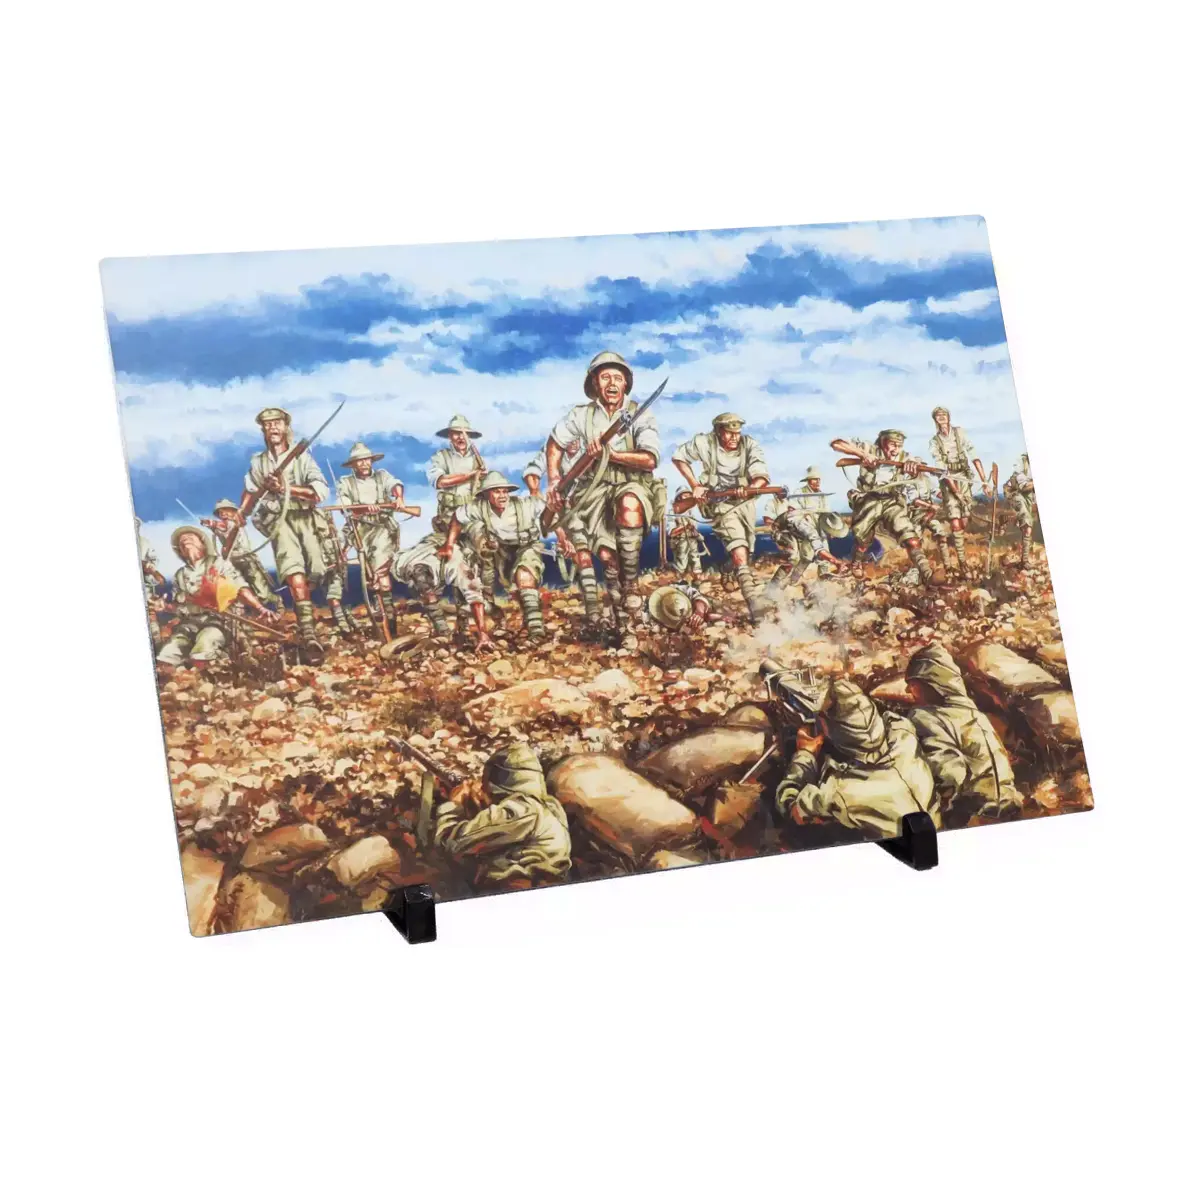 Click to enlarge
Aluminium Print
A crisp contemporary presentation of the artwork on solid aluminium. The compact format preserves the dramatic frontal composition and is supplied in a velvet presentation pouch with its Limited Edition certificate.
View the artwork →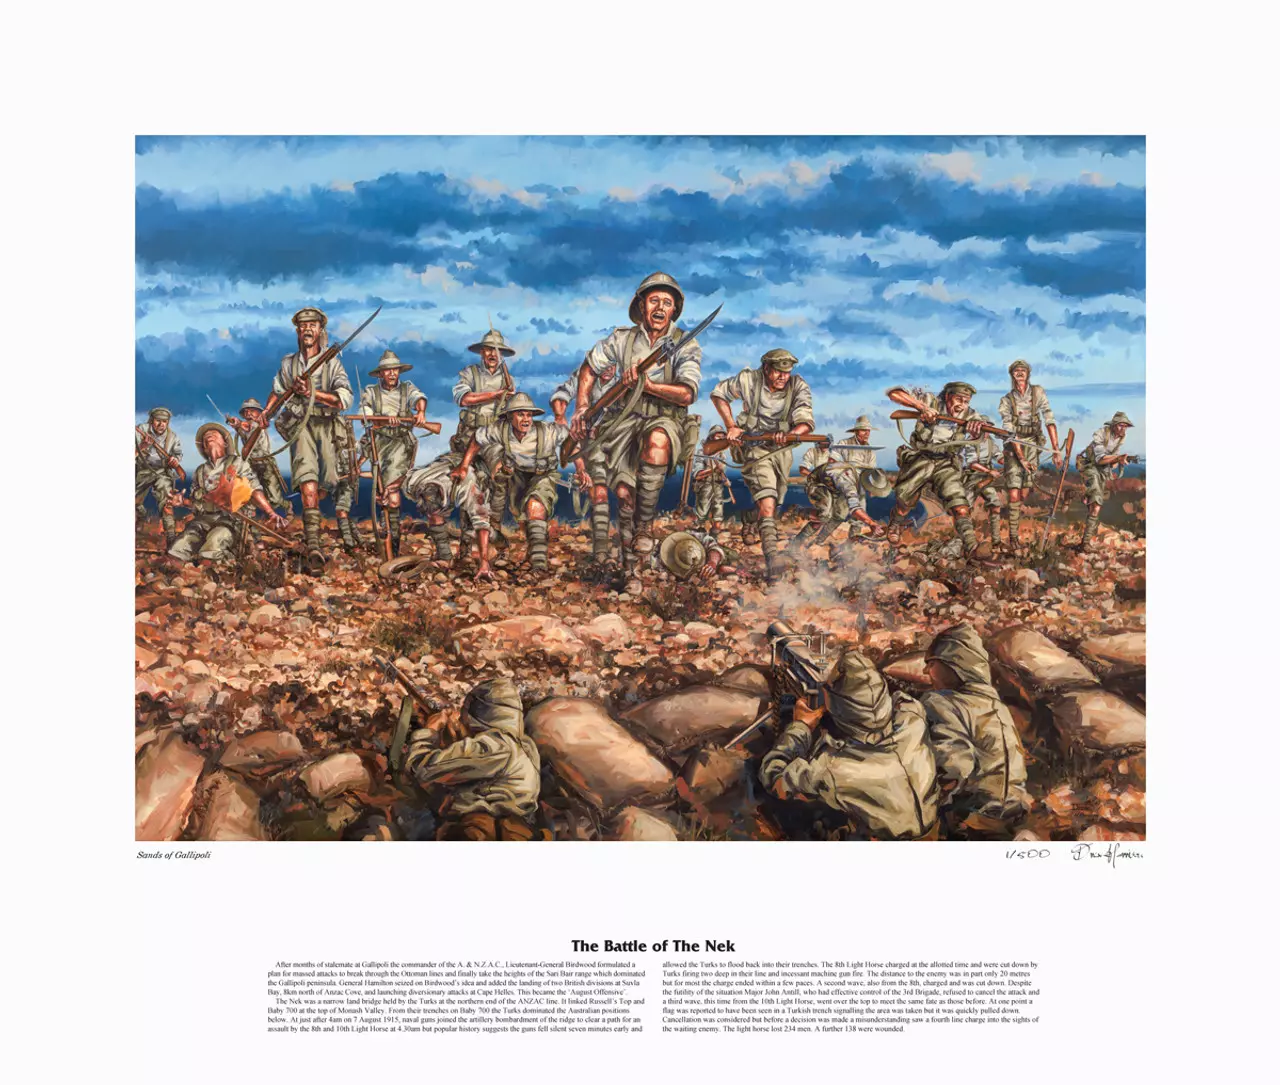 Click to enlarge
Unframed Giclée Print
A hand-signed and individually numbered fine-art print for collectors who prefer to select their own framing. The larger paper format gives room to study Harrison's figures, foreground defenders and compressed battlefield.
View the print →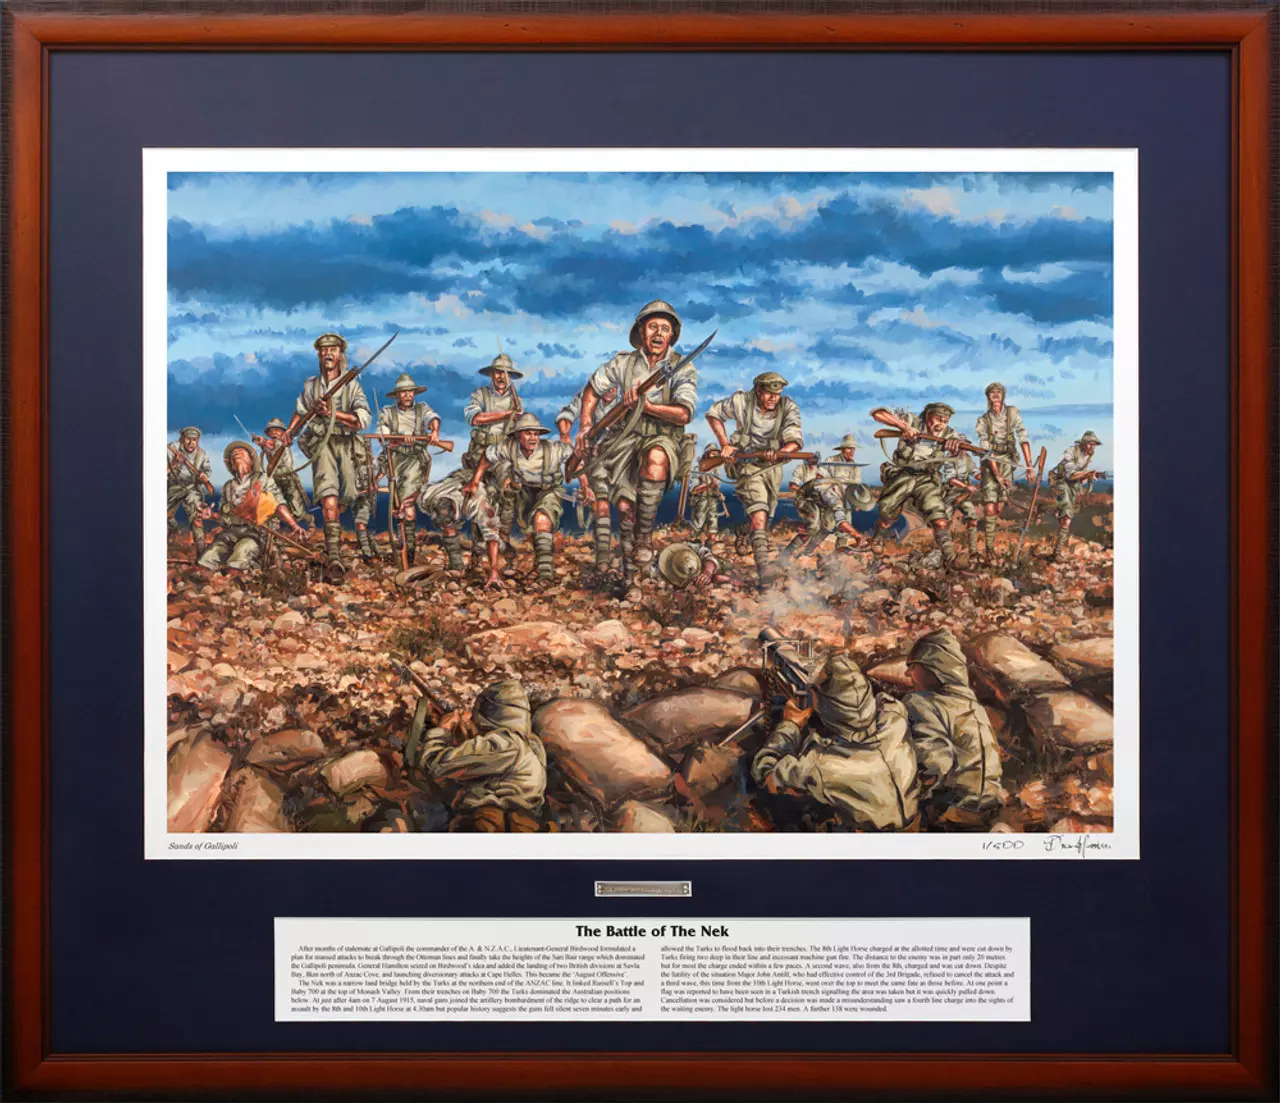 Click to enlarge
Framed Giclée Print
A premium framed edition of Harrison's work, hand signed and individually numbered. It preserves the confronting Turkish-trench viewpoint in a presentation intended for long-term display.
View the print →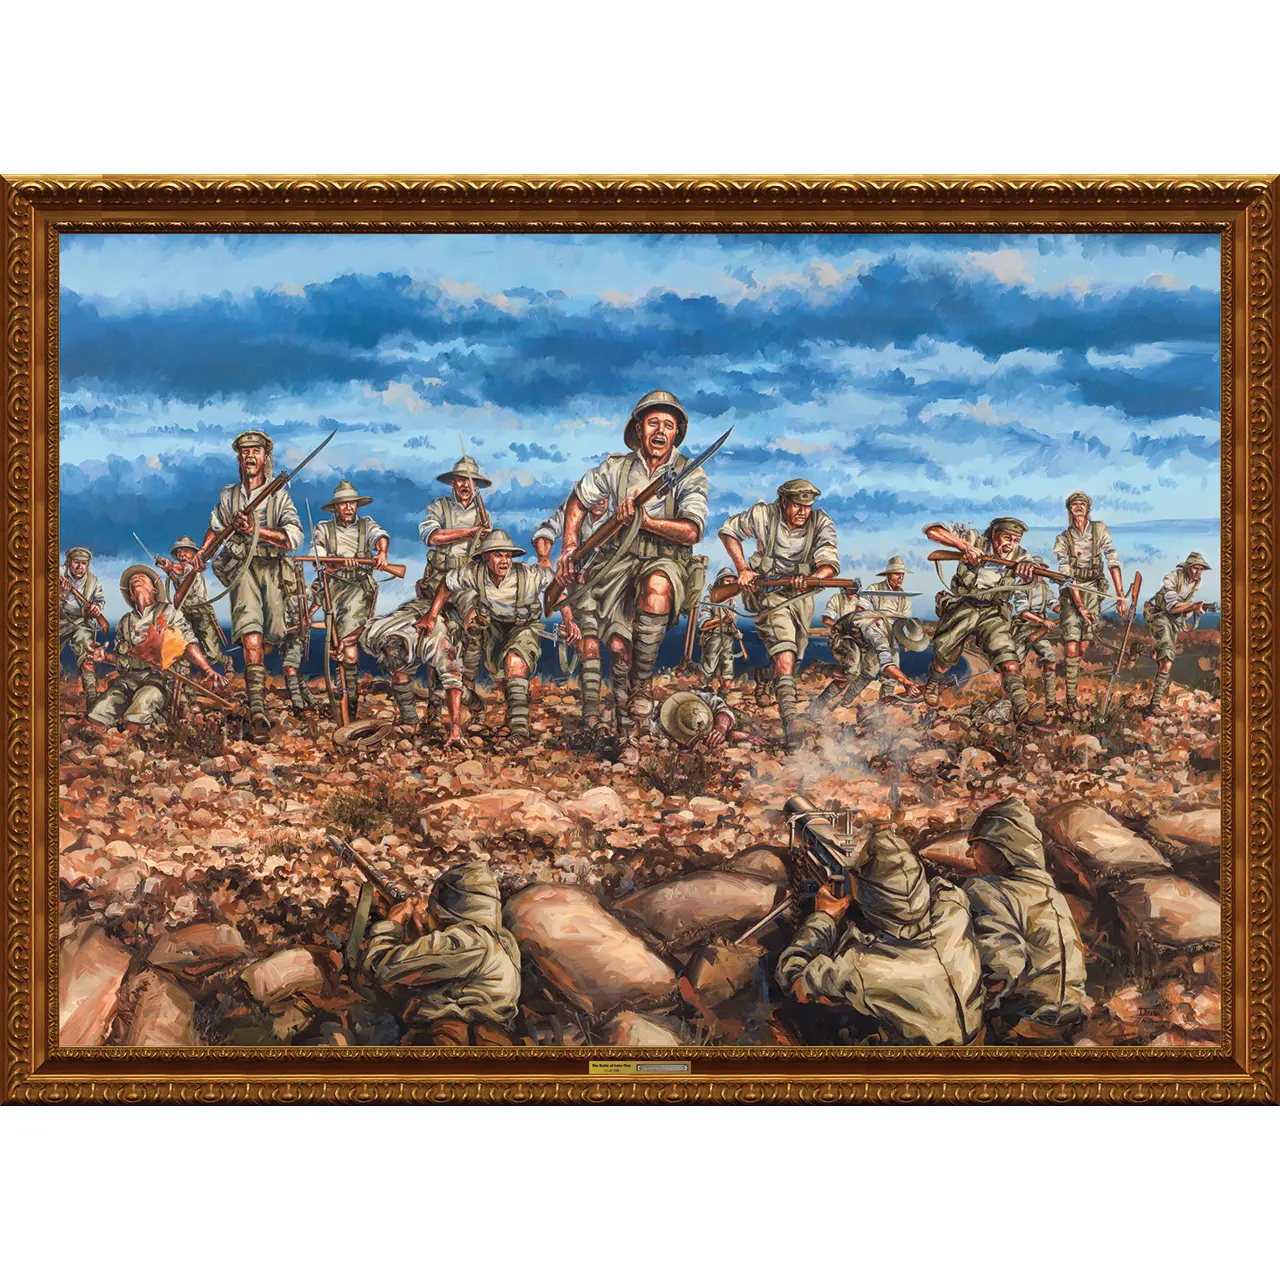 Click to enlarge
Full Size Canvas Edition
The closest way to experience Harrison's composition at the scale of the original. The full-size canvas includes a numbered metal plate holding Gallipoli sand and a certificate of authenticity.
View the canvas →History, artwork and collecting
Explore the military history behind the charge, the choices Drew Harrison and Graham Wilson made in reconstructing the scene, and the Archive and Limited Edition pieces created from the commission.
The Battle
What was The Nek?
The Nek was a narrow ridge linking Russell's Top and Baby 700 at the northern end of the Anzac position. Its confined geography made it strategically important and exceptionally dangerous to assault.
Read more
The position overlooked Monash Valley and formed part of the route towards Baby 700 and the Sari Bair heights. Ottoman trenches were well placed to cover the exposed ground. The attack of 7 August was therefore not an isolated action: it belonged to the much larger August Offensive intended to break the stalemate on Gallipoli.
Why did the Australians charge?
The assault was intended to support the wider drive towards the Sari Bair heights and Baby 700. The 3rd Light Horse Brigade was to attack while New Zealand forces approached from the rear.
Read more
The coordinated plan depended on other objectives being achieved. Chunuk Bair had not been captured in time, and a separate attack intended to suppress German Officers Trench had failed. Those changes removed important elements of the original plan, yet the attack across The Nek still proceeded.
How many men became casualties?
The Australian War Memorial records 372 casualties in the 8th and 10th Light Horse Regiments: 234 in the 8th and 138 in the 10th.
Read more
The 8th Light Horse formed the first two waves and suffered 154 fatal casualties; the 10th suffered 80 fatal casualties in the AWM's summary of the charge. Other official summaries use slightly different totals depending on whether later deaths from wounds and the 9th Light Horse are included, which is why historical casualty figures can vary.
Did the bombardment stop too early?
Contemporary and later accounts differ on how decisive the timing was. AWM material records the bombardment ending early, while BrandNet's historical research notes argue that the more fundamental failure was that the forward Ottoman positions were not effectively neutralised.
Read more
This distinction matters. Even if there was a pause, the defenders were not simply able to return to destroyed trenches: many of the forward positions and supporting machine guns had survived. Harrison's artwork therefore concentrates on the prepared defenders and the exposed Australians rather than trying to illustrate a clock-timing explanation.
The Commission
How was the painting researched?
Drew Harrison worked with historian and retired Army Warrant Officer Graham Wilson, analysing the battle before deciding how to represent it.
Read more
With no known photograph of the charge itself, the reconstruction relied on the documented geography, trench positions, attack formation, weapons, uniforms and sequence of events. The research also informed less obvious choices: the Australians advance in approximate waves rather than as rows stretching deep into the distance, and the Ottoman defenders occupy the dominant ground.
Why is the scene shown from the Ottoman side?
The reverse viewpoint was chosen to create a fresh interpretation and place the viewer close to the defending trench.
Read more
Harrison and Wilson wanted to avoid simply echoing George Lambert's famous painting. The Ottoman viewpoint also changes the emotional logic of the work: viewers face the Australians directly and can see how little ground separates them from the objective, while the machine-gun crew in the foreground makes the danger immediate.
What moment does the painting depict?
Harrison imagined the instant before an Ottoman machine gunner shifts his fire onto the men directly ahead.
Read more
That choice allowed him to convey the inevitable human cost without filling the canvas with casualties. The men are still moving, individual faces and gestures remain visible, and the viewer is asked to confront the seconds before the outcome rather than only its aftermath.
How did Harrison create depth in a front-on scene?
He used foreshortening, early-morning light and tonal separation to keep the charging Australians as the visual focus.
Read more
Harrison's notes cite the immersive battle paintings of Elizabeth Thompson, Lady Butler, particularly The 28th Regiment at Quatre Bras, as an influence. Low sunlight illuminates the Australians while the larger foreground defenders and the sea beyond are handled to preserve depth rather than flatten the scene.
Archive Editions
What makes the #1–#10 medallions Archive Editions?
They are the original first ten numbered certificates retained by BrandNet from the 2005 release. They were not renumbered later.
Read more
BrandNet's register records BN6043 certificate numbers #1 through #10, all with certificates and in good condition. The standard medallion was issued in a much larger edition of 10,000; the Archive significance lies in these exceptionally early numbers and their continuous BrandNet provenance.
Can I choose the exact number?
Yes. Each available number from #1–#10 is treated as its own one-off Archive option. Once an exact number is sold, that number is no longer available.
The Collection
Which Limited Editions were created from the artwork?
The current collection includes a 500-set medallion release, a 1,000-piece lapel pin, a 250-piece aluminium artwork, 500-piece signed paper editions and a 100-piece full-size canvas edition.
Read more
The formats range from an accessible individually numbered lapel pin to the full-scale 1545 × 1130 mm canvas. The medallion set incorporates Gallipoli sand, while the full-size canvas includes a numbered metal plate containing Gallipoli sand and a certificate of authenticity.
The Battles of Gallipoli
Explore more Australian military stories, art and collectables
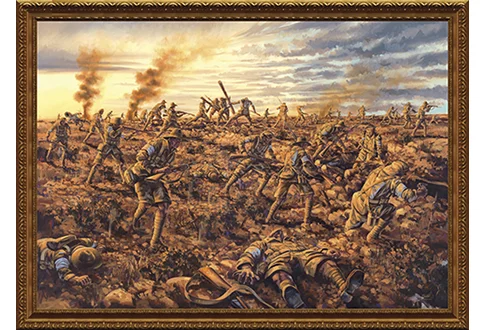
The Battle of The Nek is one story within a much larger archive of commissioned military artworks, historically significant pieces, low-number Archive Editions and Limited Edition collections.
Explore The BrandNet Archives